Fuji Cameras

TOO BOLDLY GO... NOT A REVIEW OF THE FUJI 16MM LENS

Best Western Space Age Lodge in Gila Bend, Arizona. Fujifilm X-Pro2, 16mm 1.4. 1/70 @ f2.0, ISO 200.

Two photos, two locations, one theme, and one lens. I had originally thought this post was going to be a review of the Fujinon XF 16mm f1.4 lens, but I'm not quite ready to write that yet.

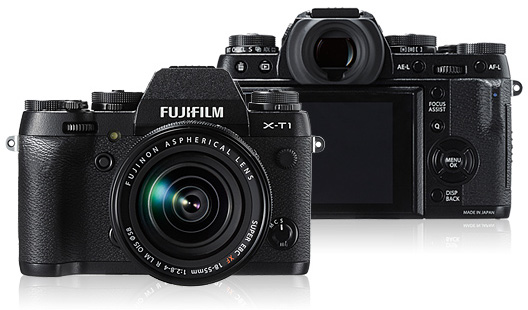
It's not that I'm disappointed with this lens. In fact, it is tack-sharp, solidly built and deserves its place in the Fuji premiere lens lineup, but I just haven't used it enough to really write a proper review. Perhaps I will never use it enough to write that review. And that's the issue.

Typically, before making a lens or camera purchase, I borrow the piece of equipment and try it out. If I had done that before aquiring this lens, I would have realized that the Fujinon XF 23mm 1.4 would have been a better choice for me. 

Too big. That was my first impression when attaching the 16mm lens to my X-Pro2. I'm so used to carrying this camera around all the time while not drawing attention to myself, that this lens with its 67mm front element and even larger lens hood made the camera front heavy and made me feel very conspicuous.

Too wide. Is that really possible? I had become so accustomed to shooting with the Fuji X100S and its fixed 23mm (35mm equivalent) and the Fujinon XF 35mm F2 (53mm equivalent) on my X-Pro2 that I found myself lost in the frame.

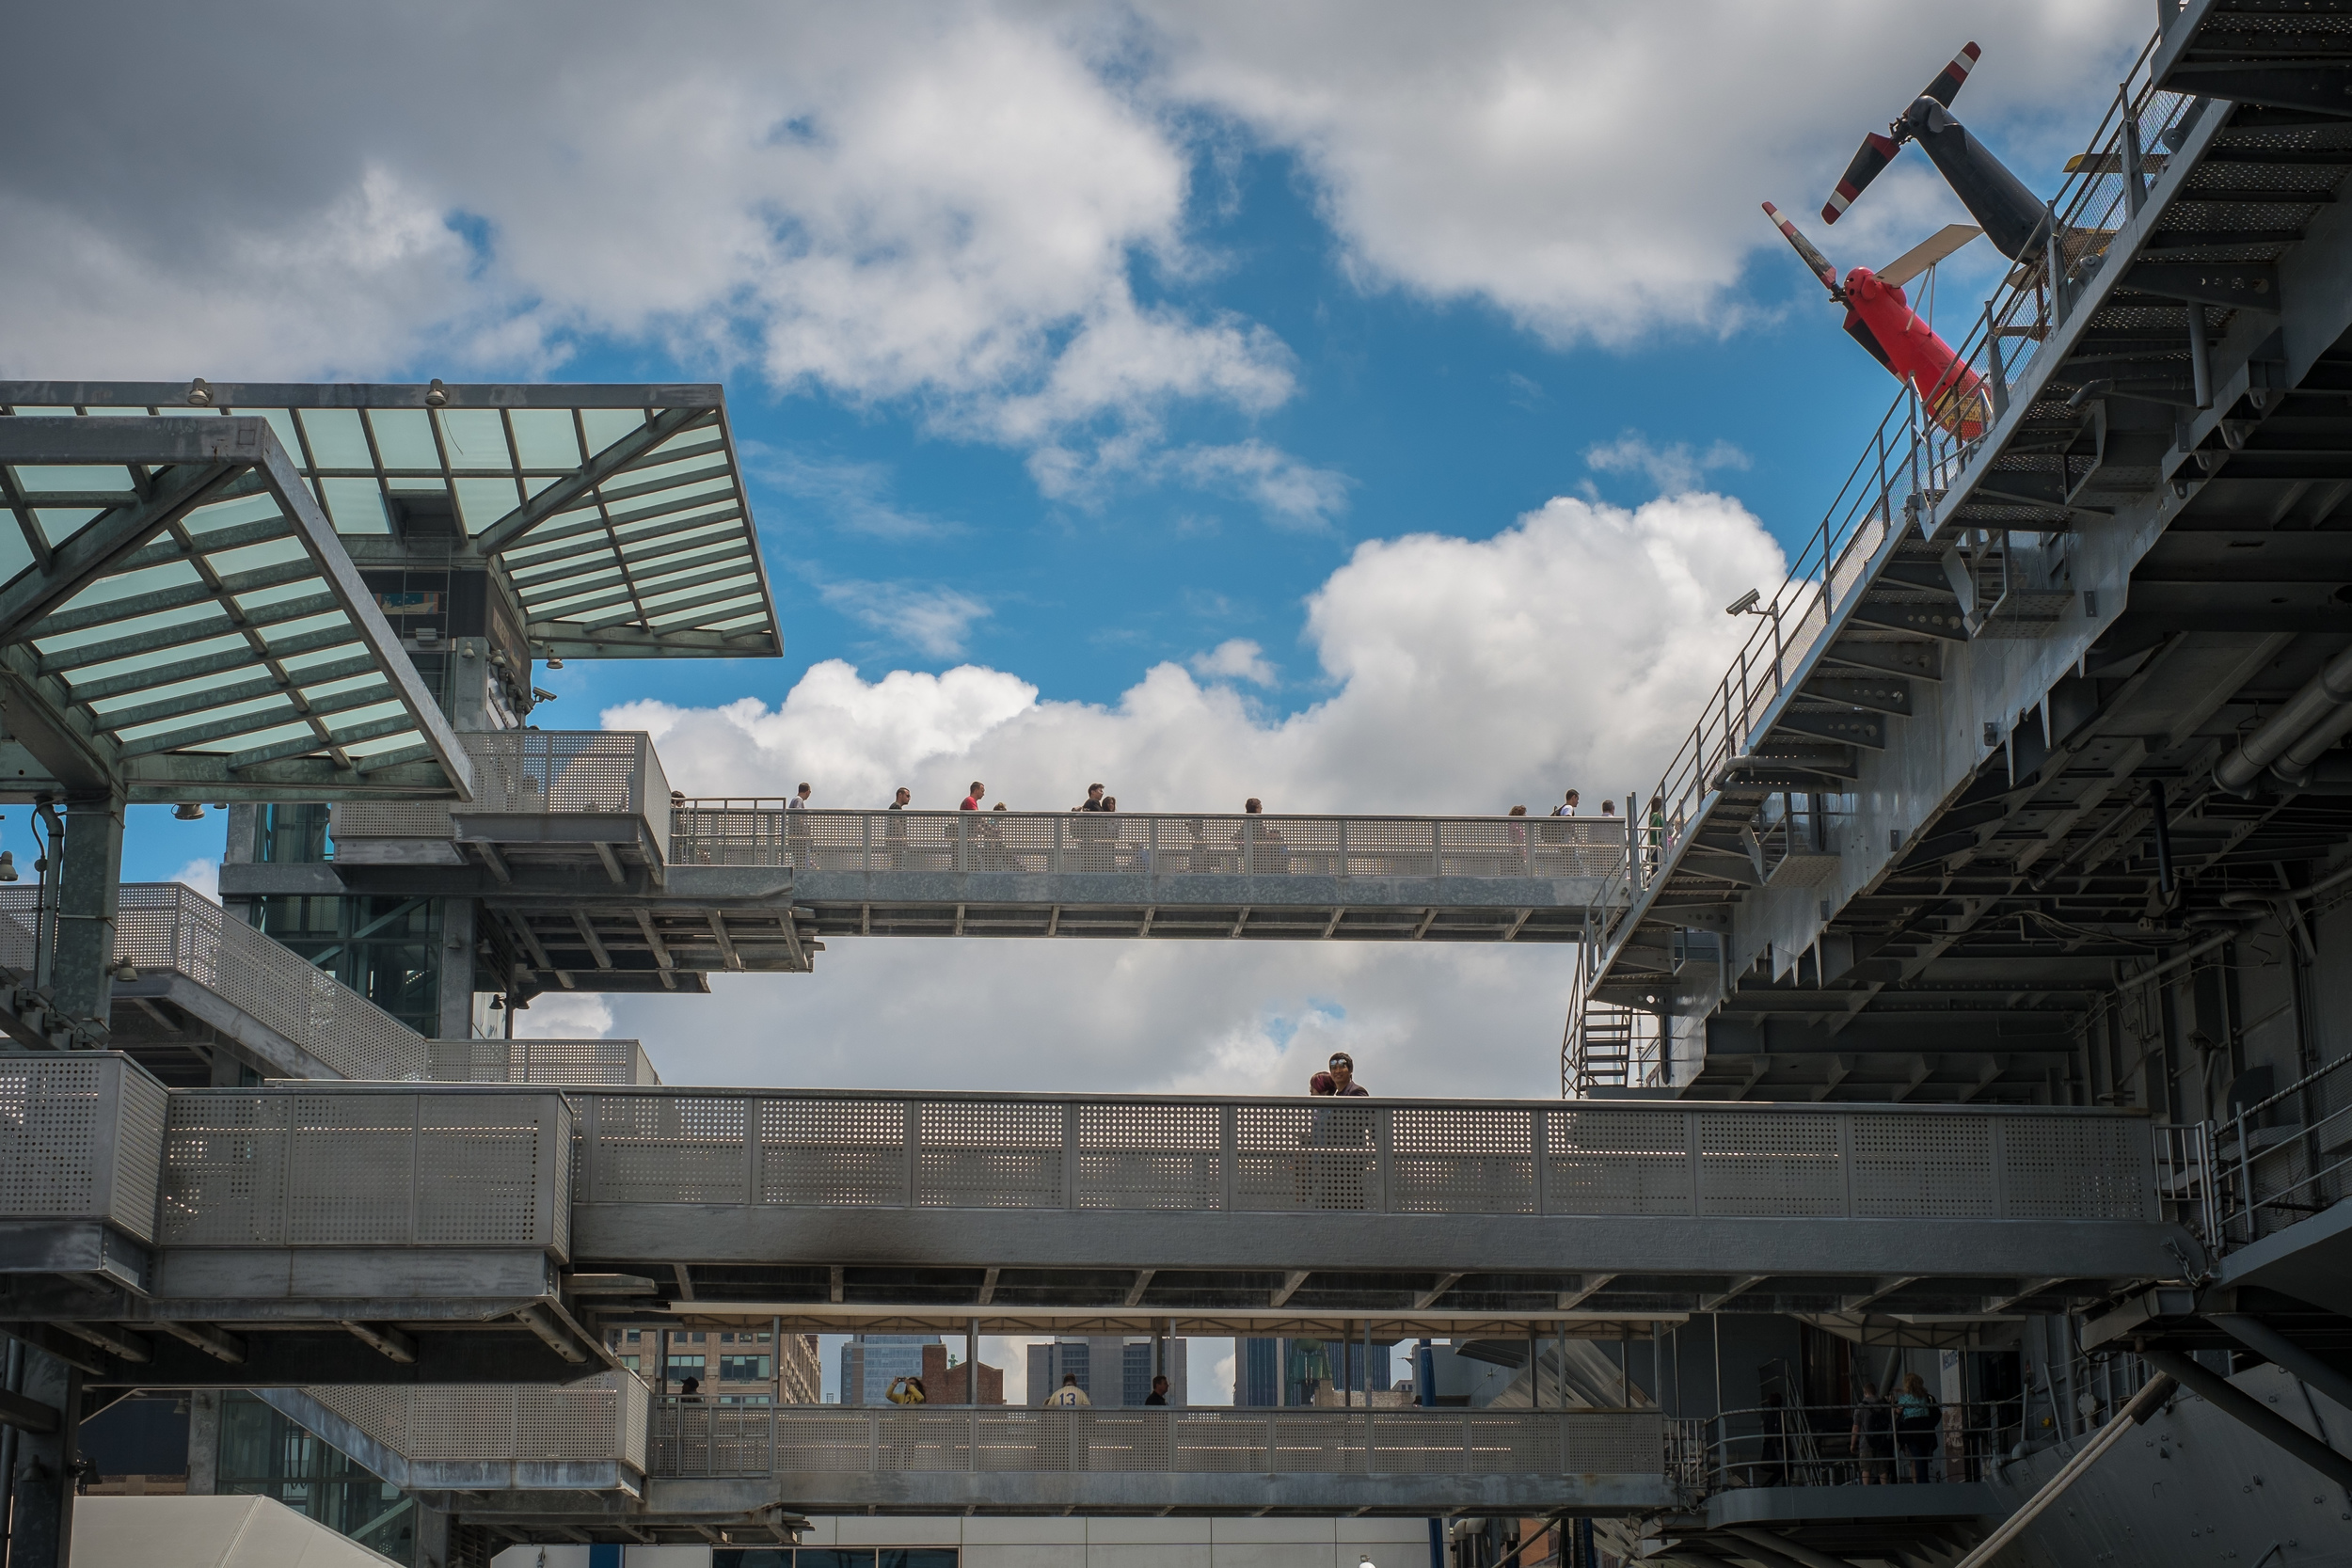
Restored USS Enterprise model on display at the Smithsonian Sea Air and Space Museum in Washington, D.C. Fujifilm X-Pro2, 16mm 1.4. 1/60 @ f2.0, ISO 1000.

Too much. Not cost, in fact, I was able to purchase the lens for $699 during a promotion. Perhaps the real issue I need to work through is how many lenses do I really need? The joy of shooting with Fuji for me has been the simplicity, one camera, one lens, in a form factor that does not draw attention and allowed me to be very creative.

For me, the reality is that the 16mm (24mm equivalent) borders on a specialty lens, whereas the Fuji 23mm (35mm equivalent) or the 35mm (53mm equivalent), can be a one-lens solution. Or, maybe having to change lenses just feels like I'm at work shooting with DLSRs.

Perhaps this has turned out to be somewhat of a mini review after all.

HAWAII WITH THE FUJIFILM X-PRO2

On the first day as I wandered around Waikiki Beach trying to overcome some jet lag, I came across these kids being kids. I watched for a little bit before taking any photos and while they were aware I was there, they soon just went back to timing t…

On the first day as I wandered around Waikiki Beach trying to overcome some jet lag, I came across these kids being kids. I watched for a little bit before taking any photos and while they were aware I was there, they soon just went back to timing the surf and leaping from the pier. I liked this photo best because while most of these kids jumped feet first, this girl just went for it.  1/680 @ f5.6, ISO 200.

During a recent trip to Honolulu, Hawaii, I had my first chance to spend some time walking around with my new Fujifilm X-Pro2. In the previous post, I explained my initial camera setup and my thoughts behind those choices. In this post, I'll discuss whether I stuck with those choices and share a few things I learned.

The camera handled great, felt good to carry and performed up to my expectations. That really isn't a surprise, however, I was surprised by how much I liked it more than the X-Pro1. Granted, I only spent a week with the X-Pro1, but Fuji really did take the time to improve this camera versus the original. Little things, but well thought out.

As the sun dipped below the horizon, it didn't take long for it to get dark. I was photographing surfers and paddle boarders coming ashore when I noticed a hotel's flood light illuminating a patch of sand, so I positioned myself hoping that some act…

As the sun dipped below the horizon, it didn't take long for it to get dark. I was photographing surfers and paddle boarders coming ashore when I noticed a hotel's flood light illuminating a patch of sand, so I positioned myself hoping that some action would take place in or near the light. I like the warm yellow light contrasting with the blue ocean and sky and that last hint of pink. I think that just enough light reaches the subjects and ensures that they weren't in silhouette. 1/35 @ f2.0, ISO 3200. 

I stuck to shooting Auto ISO with my max ISO set to 3200. I was happy with the results, but I may up that to 6400. During this trip, I was working during the day (video project) so most of my personal shooting with the Fuji was during the evening hours where 3200 was fine, however on one occasion, I was shooting after the sun had set and in that case I could have used the faster shutter speed provided by setting the upper limit to 6400. 

I was around the fifth person to reach the top of Diamond Head just as the sun was coming up. In this photo, several visitors defied the off-limits signs and ventured about 50 yards to another peak. I didn't pay much attention until this gentle…

I was around the fifth person to reach the top of Diamond Head just as the sun was coming up. In this photo, several visitors defied the off-limits signs and ventured about 50 yards to another peak. I didn't pay much attention until this gentleman climbed atop the metal frame. I like the contrast between the grass, concrete and the performance of this man balancing atop some old metal. With Honolulu in the background, he's on top of the world. 1/75 @ f6.4, ISO 200.

I'm really glad I choose the 35mm f2.0 R WR lens. Unlike the 35mm f1.4, which I previously used with the X-Pro1, It is smaller, quieter and weather resistant, all things that came into play during this trip. Another thing that I appreciated about this lens is the focal length. At a 50mm equivalent, it has a nice reach, yet still works in close situations. I will probably still purchase something wider, but I'm not in any hurry.

Something else I realized was that within a half hour of me reaching the summit of Diamond Head, I was joined by the entire country of Japan. Seriously, it did get really crowded and most of the visitors continued to take photos of the rising sun, p…

Something else I realized was that within a half hour of me reaching the summit of Diamond Head, I was joined by the entire country of Japan. Seriously, it did get really crowded and most of the visitors continued to take photos of the rising sun, probably long after it made sense. But as I made my way back down, I wanted to take a photo that would give a sense of the crowd, when I spotted this woman taking a picture of the sunrise. I turned, made three frames and keep moving. 1/120 @ f6.4, ISO 200.

The autofocus was really quick and the added ability to move the focus area around quickly using the joystick was a welcome addition. In a few instances when shooting on the street, I reacted quickly and the focus was locked on without me having to think about it. Like all the previous mirrorless cameras I've used, you do have to make sure the camera "awake" or you could experience an initial delay.

On Oahu's North Shore, there are hundreds of spots to pull over and explore the coast with your camera. The weather was not great and most of the morning I was dealing with volcanic fog, or VOG, as the locals call it. Eventually, as I continued to d…

On Oahu's North Shore, there are hundreds of spots to pull over and explore the coast with your camera. The weather was not great and most of the morning I was dealing with volcanic fog, or VOG, as the locals call it. Eventually, as I continued to drive along the coast, this tidal pool caught my attention and I focused on the lone snorkeler and the range of subtle color changes throughout the scene. 1/680 @ f5.6, ISO 200.

I loaded the dual card slots with San Disk 32mb SDHC cards, capturing monochrome jpegs to one and raw files to the other. Not sold on this. I still really like seeing the results in monochrome as I shoot, but I also utilized the built-in WiFi a lot with this camera. It's how I transferred my photos to my phone and iPad then shared on social media during the trip. However, since I was caputing in monochrome, if I wanted to use a color version, I had to first do an in-camera raw conversion. Again, this is something I'm going to have to work on.

On my last night in Hawaii, I was walking back from dinner along Waikiki Beach watching all the tourists line up to photograph the sunset. It was a nice sunset, however with nothing spectacular to put in the foreground, I was drawn to the color refl…

On my last night in Hawaii, I was walking back from dinner along Waikiki Beach watching all the tourists line up to photograph the sunset. It was a nice sunset, however with nothing spectacular to put in the foreground, I was drawn to the color reflected in the receding waves. A different view of the setting sun. 1/40 @ f3.2, ISO 200.

There is no doubt the X-Pro2 is now my everyday carry-around camera. It handled well in all the shooting situations I found myself in and the 24 megapixels images are just beautiful. Off to Portland, Oregon, next week, so more to follow.


FUJIFILM X-PRO2 INITIAL SETTINGS

Fuji Xpro2 with XF 35 f2.0 lens, two SD cards, extra batteries and a soft shutter release button. Details and links appear at the end of this post*.

Fuji Xpro2 with XF 35 f2.0 lens, two SD cards, extra batteries and a soft shutter release button. Details and links appear at the end of this post*.

I finally got my hands on the new Fujifilm X-Pro2. And like with every new or loaner camera I receive, I downloaded the manual and read it (I highly recommend this). In this case, I read it several times even before the camera arrived.

Then once the camera was in front of me I went through all the menus and adjusted the settings in a way that makes sense to me and will best compliment my shooting style.

Below are the changes to the factory settings I made:

IMAGE QUALITYFINE+RAW: I prefer to shoot with this set up so that I can take advantage of Fuji's film simulation options with the jpegs while always having the raw file to process anyway I want. Taking advantage of the X-Pro2s two SD card slots means I have the jpegs on one and raw on the other. 

FILM SIMULATIONACROS-Ye FILTER: ACROS is a new monochrome film simulation option on the X-Pro2, so I'm giving it a try. Additionally, I've added the yellow filter (you can also add a red or green filter) which slightly enhances contrast and darkens the sky.

LONG EXPOSURE NROFF: Will activate if needed, but see no reason to leave on until then.

AF ILLUMINATOROFF: One of the advantages of mirrorless cameras is the ability to blend in, so the last thing I want when shooting at night or in dark situations is to draw attention myself with light.

AF+MFON: This setting allows me to manually adjust focus while the shutter button is pressed halfway. The camera must be in focus mode S for this work.

INSTANT AF SETTINGAF-C: This tells the camera what autofocus setting I want to use when I press the AF-L button while the camera is in manual focus mode.

CORRECTED AF FRAME ON: This adds a second focus frame to the display in the optical viewfinder for distances of about 1.6. Corrects for parallax inherent in rangefinders. 

SHUTTER TYPEES ELECTRONIC SHUTTER: Eliminates shutter noise and used for the same reason I turn off the AF illuminator and turn all other sounds off. The less attention I draw to myself when shooting, the better.

ISO AUTO SETTINGMAX SENSITIVITY 3200 and MIN. SHUTTER SPEED 1/30: I started using auto ISO on my X100S about a year ago and really like not having to worry about making changes when moving from inside to out or in and out of the shadows. Besides, if I change my mind it is easy and quick to change the ISO using the dial located on top of the camera.

SOUND SETTINGALL OFF: It should be obvious by now.

IMAGE DISPLAY1.5 SEC: One of the coolest things about this camera, like others in Fuji lineup is that a preview of the photo you just took appears in the viewfinder of the camera. It gives you instant feedback, especially when using the optical viewfinder.

FOCUS SCALE UNITSFEET: What, am I in Europe?

FOCUS LEVER SETTINGON: One of the new features on the Xpro2 is a joystick located on the back of the camera that enables you to move the focus-point around the viewfinder. This setting makes the joystick active.

EDIT FILE NAME - Changed the SRGB name to JFWP and the AdobeRGB name to JFW. No reason other than I can and after all, how boring is DCS.

CARD SLOT SETTING (STILL IMAGE)RAW/JPG: I really like having two card slots in this camera. The second card slot can be used as overflow or as backup, but as mentioned previously, since I'm shooting both raw and jpegs, this setting allows me to separate them on two different SD cards.

WIRELESS SETTINGS - GENERAL SETTINGS: Changed the wireless name to FUJIFILM-JFWPHOTO.

Once I've had a chance to spend some time shooting with this camera, I'll give you my thoughts and also update you on any changes I've made to the list above.

Fujifilm X-Pro2 Body (Black)

Fujinon Xf35mm F2 R WR - Black

Wasabi Power Batter (2-Pack) and Charger

SanDisk Extreme PRO 32GB SDHC memory card

Neewer 10mm Diameter Red Plan Metal Soft Shutter Release Button

SEVEN DAYS WITH THE FUJI X-T1

The first place I headed after landing in San Francisco was the Golden Gate Bridge. 1/200 @ f9, ISO 200.

The first place I headed after landing in San Francisco was the Golden Gate Bridge. 1/200 @ f9, ISO 200.

I recently spent seven days in and around San Francisco, California, with the Fujifilm X-T1. The X-T1 is the fourth of the Fuji X cameras that I've had the chance to use, starting with the X-10 in 2012 and most recently the X-Pro1 during seven days in New York . Of course, my everyday carry camera continues to be the X100S.

Fujifilm X-T1 mirrorless digital camera. Photo courtesy of Fujifilm.com

Fujifilm X-T1 mirrorless digital camera. Photo courtesy of Fujifilm.com

As with the X-Pro1 and my first experience with the X100S, I rented the X-T1 along with the 18-55mm kit lens and a spare battery from Borrowlenses.com. Before a review camera arrives, I download the manual, then read and watch other reviews or tutorials in order to familiarize myself with all the features. Then once the camera arrives I check to make sure the firmware has been updated and in this case while the camera was up-to-date, I did have to update the lens.

I never really felt as comfortable doing street photography with this camera as I have with previous Fuji X rangefinders such as the X-Pro1 and the X100S. 1/15 @ f6.4, ISO 200.

I never really felt as comfortable doing street photography with this camera as I have with previous Fuji X rangefinders such as the X-Pro1 and the X100S. 1/15 @ f6.4, ISO 200.

Right out of the box I liked Fuji's attention to detail and style. The camera felt nice in my hands and the shutter speed, exposure compensation, and ISO dials were solid and easily accessible on top of the camera. In fact, once I went through the electronic menus and set up my preferences, I did not have to return to them for most shooting situations. Fuji really has this down and with the Q menu feature, which is now standard, your most used menu items are only one-click away, and if not, then you can customize them.

I found the 18-55mm lens very sharp at all focal lengths and appreciated the zoom, especially during this review period where I was covering a variety of scenes. 1/13 @ f4.5, ISO 200.

I found the 18-55mm lens very sharp at all focal lengths and appreciated the zoom, especially during this review period where I was covering a variety of scenes. 1/13 @ f4.5, ISO 200.

Three things I noticed right away that made this camera different from previous Fuji cameras I've reviewed. It is not a rangefinder, the SD card slot is separate from the battery chamber and there is a tiltable LCD screen. Two of these I really liked.

The rangefinder is what first attracted me to the Fuji cameras and it remains what I like best about my X100S. In the X100S and the X-Pro1 you have a choice between an Optical Viewfinder (OVF) and an Electronic Viewfinder (EVF), but with the X-T1 you only have the EVF. And while the EVF is good, using it all the time felt like I was missing something. a connection with my subjects. This was especially true when I was shooting in continuous focus mode and it never seemed to lock focus. When I took the photo and the preview would appear, the photo was sharp, but while framing shots the focus just never seemed to lock in, even with camera on a tripod.

Having a tiltable LCD screen meant that it was extremely easy to take this shot with the camera pointing straight up.

Having a tiltable LCD screen meant that it was extremely easy to take this shot with the camera pointing straight up.

I never gave tiltable LCD screens a second thought. In fact, when reading rumors of an X-Pro2 it always mentioned a tiltable screen and I would roll my eyes. However after using the tiltable screen on the X-T1, I think I'm a convert and found myself using it often. It saved me from laying on my stomach when shooting macro or low angles and seemed to be a wonderful option when shooting straight up.

Lastly, having the card slot separate from the battery compartment seems insignificant, but there were definitely times when it comes in handy. Such as when the camera was mounted on a tripod (or has the tripod plate attached) it is nice to still be able to access the camera card. Maybe it is just me, but I always seem to release the battery when what I really want to do is eject the camera card, and this eliminates any chances of that. Although I think the real reason Fuji did this was to accommodate the vertical battery grip which I'm sure also adds balance to the camera, especially with longer lenses attached.

Fujifilm XF 18-55mm f 2.8-4 R LM OIS zoom lens. Photo courtesy of www.bhphotovideo.com

Fujifilm XF 18-55mm f 2.8-4 R LM OIS zoom lens. Photo courtesy of www.bhphotovideo.com

During the review, I used the Fujinon XF18-55mm f 2.8-4.0 zoom lens "kit lens." A "kit lens" normally denotes an inexpensive starter lens that comes with a camera, but I found that this lens performed very well. I noticed good contrast and sharpness throughout the zoom range and nothing felt "cheap" about it. One feature I did miss was having the f-stops printed on the lens barrel. I typically shoot in aperture priority mode, so knowing what f-stop I'm at is critical to controlling my exposure. When walking around with my camera, I'm always checking my camera settings so that as light or situations change, I can make adjustments before I'm ready to shoot. With this lens, I had to bring the camera up to my eye and look into the viewfinder. A new Fujinon XF 16-55mm f2.8 lens is now available and would have been my choice if street, or low light photography was my goal. 

This camera does not have a built in ND filter like the X100S, so the slowest shutter speed I could get was 1/18 in this situation when I would have preferred something slower. 1/18 @ f22, ISO 200.

This camera does not have a built in ND filter like the X100S, so the slowest shutter speed I could get was 1/18 in this situation when I would have preferred something slower. 1/18 @ f22, ISO 200.

The 18-55mm lens has Optical Image Stabilization, which I left it on during the entire review period, so I don't have any examples of it turned off for comparison, however, looking at my photos now, even shots taken hand-held at fairly slow shutter speeds, they are sharp. A small lens shade is included, although I experienced considerable lens flare, even with the sun at 90 degrees. This is something I did not notice when using the XF 35 f 1.4 lens during my review of the X-Pro1.

One thing about carrying a mirrorless camera, I am much more likely to notice shots like this during lunch in Sausalito. 1/140 @ f5, ISO 400.

One thing about carrying a mirrorless camera, I am much more likely to notice shots like this during lunch in Sausalito. 1/140 @ f5, ISO 400.

I spent the majority of the seven days shooting landscape or outdoor scenes with the camera on a tripod which is very different than my previous reviews of the X-Pro1 and the X100S. So while that let me learn a few things about this camera, it really made me feel like I was missing what I really like about Fuji X cameras - street photography. The X100S and the X-Pro1 are naturals for street photography, but I just never got the same feel with this camera. For some reason, I also seemed to draw more attention to myself with this camera. The lens does stick out from the body which might be more intimidating, or I maybe I just didn't appear comfortable or casual while carrying it.

There is built-in WiFi that when paired with an IOS or Android device, lets you browse and transfer images or control the camera remotely. After some initial difficulty getting the camera to pair with my phone*, I found that it worked well. And it was useful to browse photos and transfer some for sharing on social media which I previously did using an Eyefi Mobi card. What I really would have found useful in this App, is to have the film simulation modes so I could process the photos without having to do it in-camera first.   

Like with previous cameras, I set the X-T1 to shoot Raw + JPEG with the JPEG set to MONOCHROME + Ye filter. With the Firmware V3.00 update, you will be able to enable the classic chrome film simulation mode. 1/600 @ f7.1, ISO 400.

Like with previous cameras, I set the X-T1 to shoot Raw + JPEG with the JPEG set to MONOCHROME + Ye filter. With the Firmware V3.00 update, you will be able to enable the classic chrome film simulation mode. 1/600 @ f7.1, ISO 400.

Final thoughts. This is another nice camera from Fuji and I would have no problem recommending it to someone as their primary camera, even to someone considering going pro. If, however, you already own a DSLR and are looking for a second camera to carry around every day or when working the streets, then I would stick with the X100S or the new X100T.

But you know what I really want is an update to the X-Pro1. An updated rangefinder with interchangeable lenses. Now that's what will get me to spend my money.

*I originally downloaded the wrong App, which wasn't very clear in the Play Store. And based on the one-star reviews, I don't think I was the only person making this mistake.

SEVEN DAYS WITH THE FUJI X-PRO1

The Fuji XF35mm (53mm equivalent), F1.4 lens did a great job. 1/1000, f2.8 at ISO 200.

The Fuji XF35mm (53mm equivalent), F1.4 lens did a great job. 1/1000, f2.8 at ISO 200.

I was headed to New York City on a seven-day assignment to cover Fleet Week for the Navy and thought it would be the perfect time and location to test a Fujifilm X-Pro1 outfitted with an XF 35mm f1.4 lens I rented from  BorrowedLenses.com.

I have been a fan of the Fuji X cameras since I purchased an X-10 in 2012. Then after spending in 2013, I immediately ordered one for myself and I still carry and shoot with it almost daily. Would I love the X-Pro1 as much as these previous cameras?

The X-Pro1 is not a new camera, in fact, it has been around since March 2012 and there is no shortage of reviews and testimonials from photographers who really like this camera. So why am I just writing about it now? Well maybe it's because I was so wrapped up in my X100S that I never really considered another APS-C camera, or maybe it's because I started seeing rumors about an X-Pro2. Whatever the reason, I figured it was time – probably long overdue, that I gave this camera a try.

A little bit of rain didn't bother the X-Pro1, but did offer some nice scenes to photograph. When shooting on the streets in large cities, I find crosswalks and street corners offer plenty of opportunities. 1/125, f5.6 at ISO 640.

A little bit of rain didn't bother the X-Pro1, but did offer some nice scenes to photograph. When shooting on the streets in large cities, I find crosswalks and street corners offer plenty of opportunities. 1/125, f5.6 at ISO 640.

Since there has already been so much written about the X-Pro1, and it really is similar in functionality to the X100S, I decided to skip most of the technical details about this camera and concentrate more on how I set up and used this camera during a week of street photography in New York City. But don't worry, I will still point out the differences to the X100S as they come up.

Of course, there is one major difference between the X-Pro1 and the X100S, interchangeable X mount lenses. In 2012, Fuji originally offered three lenses; a 60mm (91mm) f2.4 macro, 18mm (27mm) f2 and the aforementioned 35mm. As of this posting, there are now at least nine additional lenses, including zooms and offerings from other manufacturers, including Carl Zeiss. It never bothered me that the X100S was a fixed 35mm equivalent, since you work with what you have, but perhaps on a few occasions it would have been nice to have options. That said, I only had the 53mm lens available to me during the trial period, so I made that work and admit I enjoyed the change.

In street photography, you have to always be ready to shoot. In this case I noticed the Fleet Week sign and the man loading kegs as I walked by. I quickly turned and got off about a dozen frames before I moved on. 1/125, f5.6 at ISO 500.

In street photography, you have to always be ready to shoot. In this case I noticed the Fleet Week sign and the man loading kegs as I walked by. I quickly turned and got off about a dozen frames before I moved on. 1/125, f5.6 at ISO 500.

FIRST IMPRESSIONS

The X-Pro1 has a great feel, classic look and you get the sense that it is just made for the streets. Physically, it is slightly larger and a bit heavier than the X100S, but continues to feel comfortable and natural in your hands. The XF35mm lens did protrude from the camera body more than I expected and took me a while to get used to. I've noticed many of the new lens offerings look huge and somewhat awkward on these APS-C cameras.

The Hybrid Viewfinder is similar the X100S, except it will update views based on lens choice. I still prefer the Optical viewfinder (OVF) over the Electronic viewfinder (EVF). I find the EVF darker than I would like and just a bit artificial. The OVF feels open and I like how I can see what is happening just outside the frame which is helpful, especially in street photography.

I was still able to get that wide angle feel I'm used to with the X100S even though the XF 35mm is a 53mm equivalent lens. 1/1200, f5.6 at ISO 200.

I was still able to get that wide angle feel I'm used to with the X100S even though the XF 35mm is a 53mm equivalent lens. 1/1200, f5.6 at ISO 200.

Again, the button layout and functionality is also similar to the X100S. I think the placement of the AE/AF-lock button is in a better location and therefore, I found myself using it more often. You can also choose a focus area quickly by pressing the AF Button and then using the selector to move your focus point within the frame. Pressing the MENU/OK Button will return the focus point to the center. It takes some practice, but getting used to the focus features on the X-Pro1, like the X100S, is key to getting the most out of your camera.

MY SETTINGS FOR SHOOTING ON THE STREETS

Set the AF Illuminator to OFF. The purpose of this light is to assist with autofocus in low light situations, but using the camera in lowlight situations is also the time you probably don't want to draw attention to yourself, or telegraph that you are about to take a photo. I didn't notice any focus issues, even in some fairly low light, with the AF Illuminator off.

Place gaffer's tape over the Indicator Lamp. For the same reason I set the AF Illuminator to OFF, I prefer to cover over the Indicator Lamp on the back of the camera. I'm not so worried I'll be discovered or afraid of the interaction, however, if I can get a few frames off without being noticed, I prefer that.

Set Operational Volume off. Are you seeing a trend here. Plus no shutter noise is a real advantage of mirrorless over DSLR. Even my Nikon's quiet mode can't compete with silence.

Using Auto ISO meant that I could shoot all day in and out of the shadows and then well into the night without thinking about it. 1/125, f1.4 at ISO 2500

Using Auto ISO meant that I could shoot all day in and out of the shadows and then well into the night without thinking about it. 1/125, f1.4 at ISO 2500

Use Auto ISO. I like the thought of moving in and out of various lighting situations and not having to change ISO each time. You can assign ISO to the Fn (function) Button which speeds up the process, but if you don't have to worry about it, why do so. Within auto ISO, there are a few considerations you need to take into account, though. For instance, I set the max ISO to 3200, but the lowest shutter speed to 1/125. Prior to making that choice, the camera would favor ISO and I found my shutter speed kept dropping too low which in some cases resulted in blurred photos.

New York City and Times Square is a busy and crowed place. The small form factor of the X-Pro1 is perfect in these situations and most people hardly notice you taking photos. A real advantage in street photography. 1/125, f2.0 at ISO 320.

New York City and Times Square is a busy and crowed place. The small form factor of the X-Pro1 is perfect in these situations and most people hardly notice you taking photos. A real advantage in street photography. 1/125, f2.0 at ISO 320.

Set Film Type to Monochrome.  Just like with the X100S, I set up the camera to shoot both raw and jpeg allowing me to shoot and preview my photos in black and white, but still have the color originals available during post production. I further set the film simulation mode to monochrome plus yellow filter which offers slightly increased contrast while toning down the brightness of the sky. I've always associated street photography with black and white which why I favor this setup.

I used continuous shooting (burst mode) set to six frames per second (max for this camera) to capture this photo in Coney Island. 1/300, f11 at ISO 200.

I used continuous shooting (burst mode) set to six frames per second (max for this camera) to capture this photo in Coney Island. 1/300, f11 at ISO 200.

Remaining settings. Aperture-priority AE (A) mode, turn off display back (Viewfinder Only), focus mode set to Single Focus. 

SOME FINAL THOUGHTS

The X-Pro1 did seem to focus quicker than the X100S, but there was still a bit of lag when coming out of standby mode. I missed a few shots because of this which was a reminder to always make sure the camera is awake and ready.

UPDATE:

Under Power Management turning the Quick Start Mode to ON is supposed to reduce camera start up time except I failed to test this and only noticed it in the instruction manual recently. And sure enough there is a similar feature available on the X100S, so I may have found a solution. More to come.

In street photography, scenes like this happen quickly and having the camera awake and ready to shoot is key. 1/125, f1.4 at ISO 2500.

In street photography, scenes like this happen quickly and having the camera awake and ready to shoot is key. 1/125, f1.4 at ISO 2500.

What appealed to me about the X100S was its simplicity. And I wondered if adding interchangeable lenses would detract from that? Hard to answer since as I mentioned previously I only had the XF 35mm available to me during the trial period, but even if I had other options available, I tend to pick a lens and stick with it. Although picking a Fujifilm XF 60mm f2.4 macro lens  one day and then a Zeiss 12mm f2.8 Touit series the next would be a fun option to have.

I know there are other new X offerings from Fuji like the XE-2 and the XT-1, but I really love the rangefinder styling of the X100S and X-Pro1. The XT-1 has been getting a lot of favorable reviews and I'm looking forward to testing it in the future.

However for now, I've gone back to shooting with my X100S and really am not looking to change anytime soon. That is unless the X-Pro2 rumors pan out.