New York City

BEHIND-THE-SCENES TOUR AND FUJINON 16-55MM FIRST LOOK

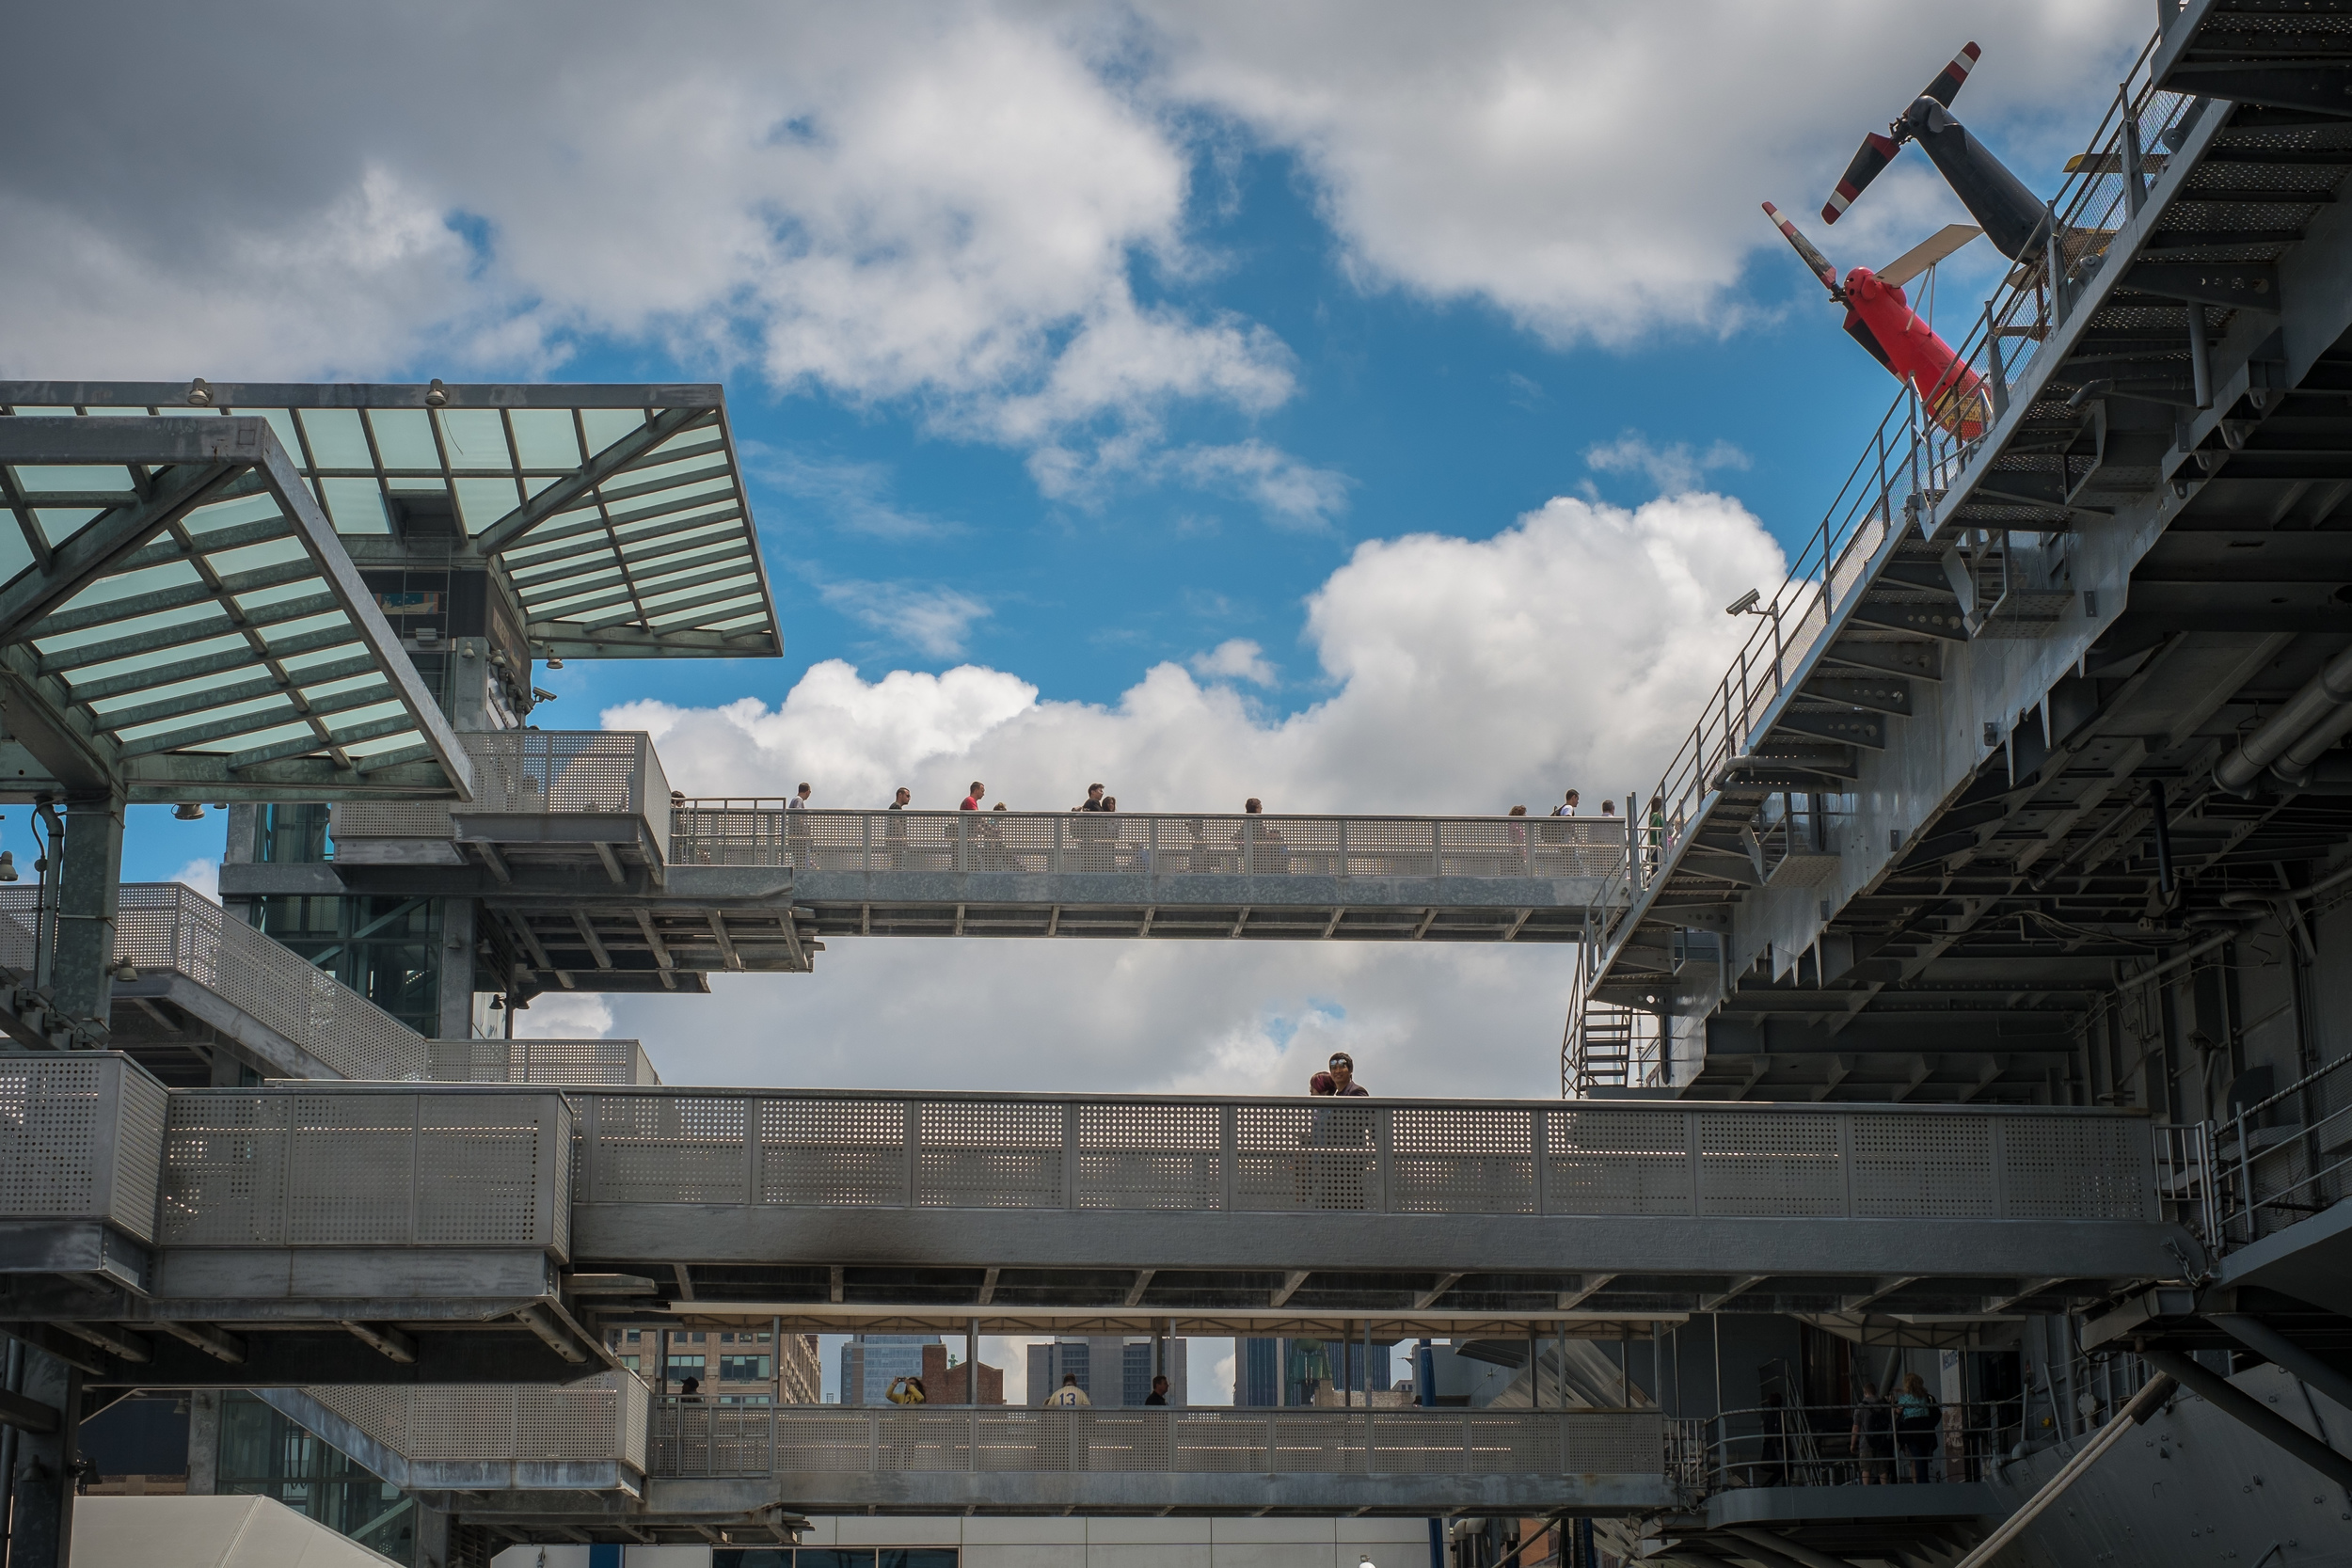
The first stop on the tour was the glass-floored walkway located at the very top the terminal. Several small open windows gave me this grand view of the terminal's main concourse, including the famous terminal clock located above the information booth at center. Fujifilm X-Pro2 with a Fujinon 16-55mm lens. 1/60 @ f2.8, ISO 2000.

I recently had the opportunity to take a "hard hat" tour of Grand Central Terminal (not station) while in New York City for the annual Photo Plus Expo. I am constantly amazed at the opportunities I get because of my camera.

And also because of the people I know and have met because of the camera, which is how I found myself on this rare tour of the busiest train station in the country. My good friend is the photographer for the Metropolitan Transportation Authority and he set this up for me, something that I've been looking forward to since he first introduced me to Metro-North Railroad's treasure of a tour guide Dan Brucker several years ago.

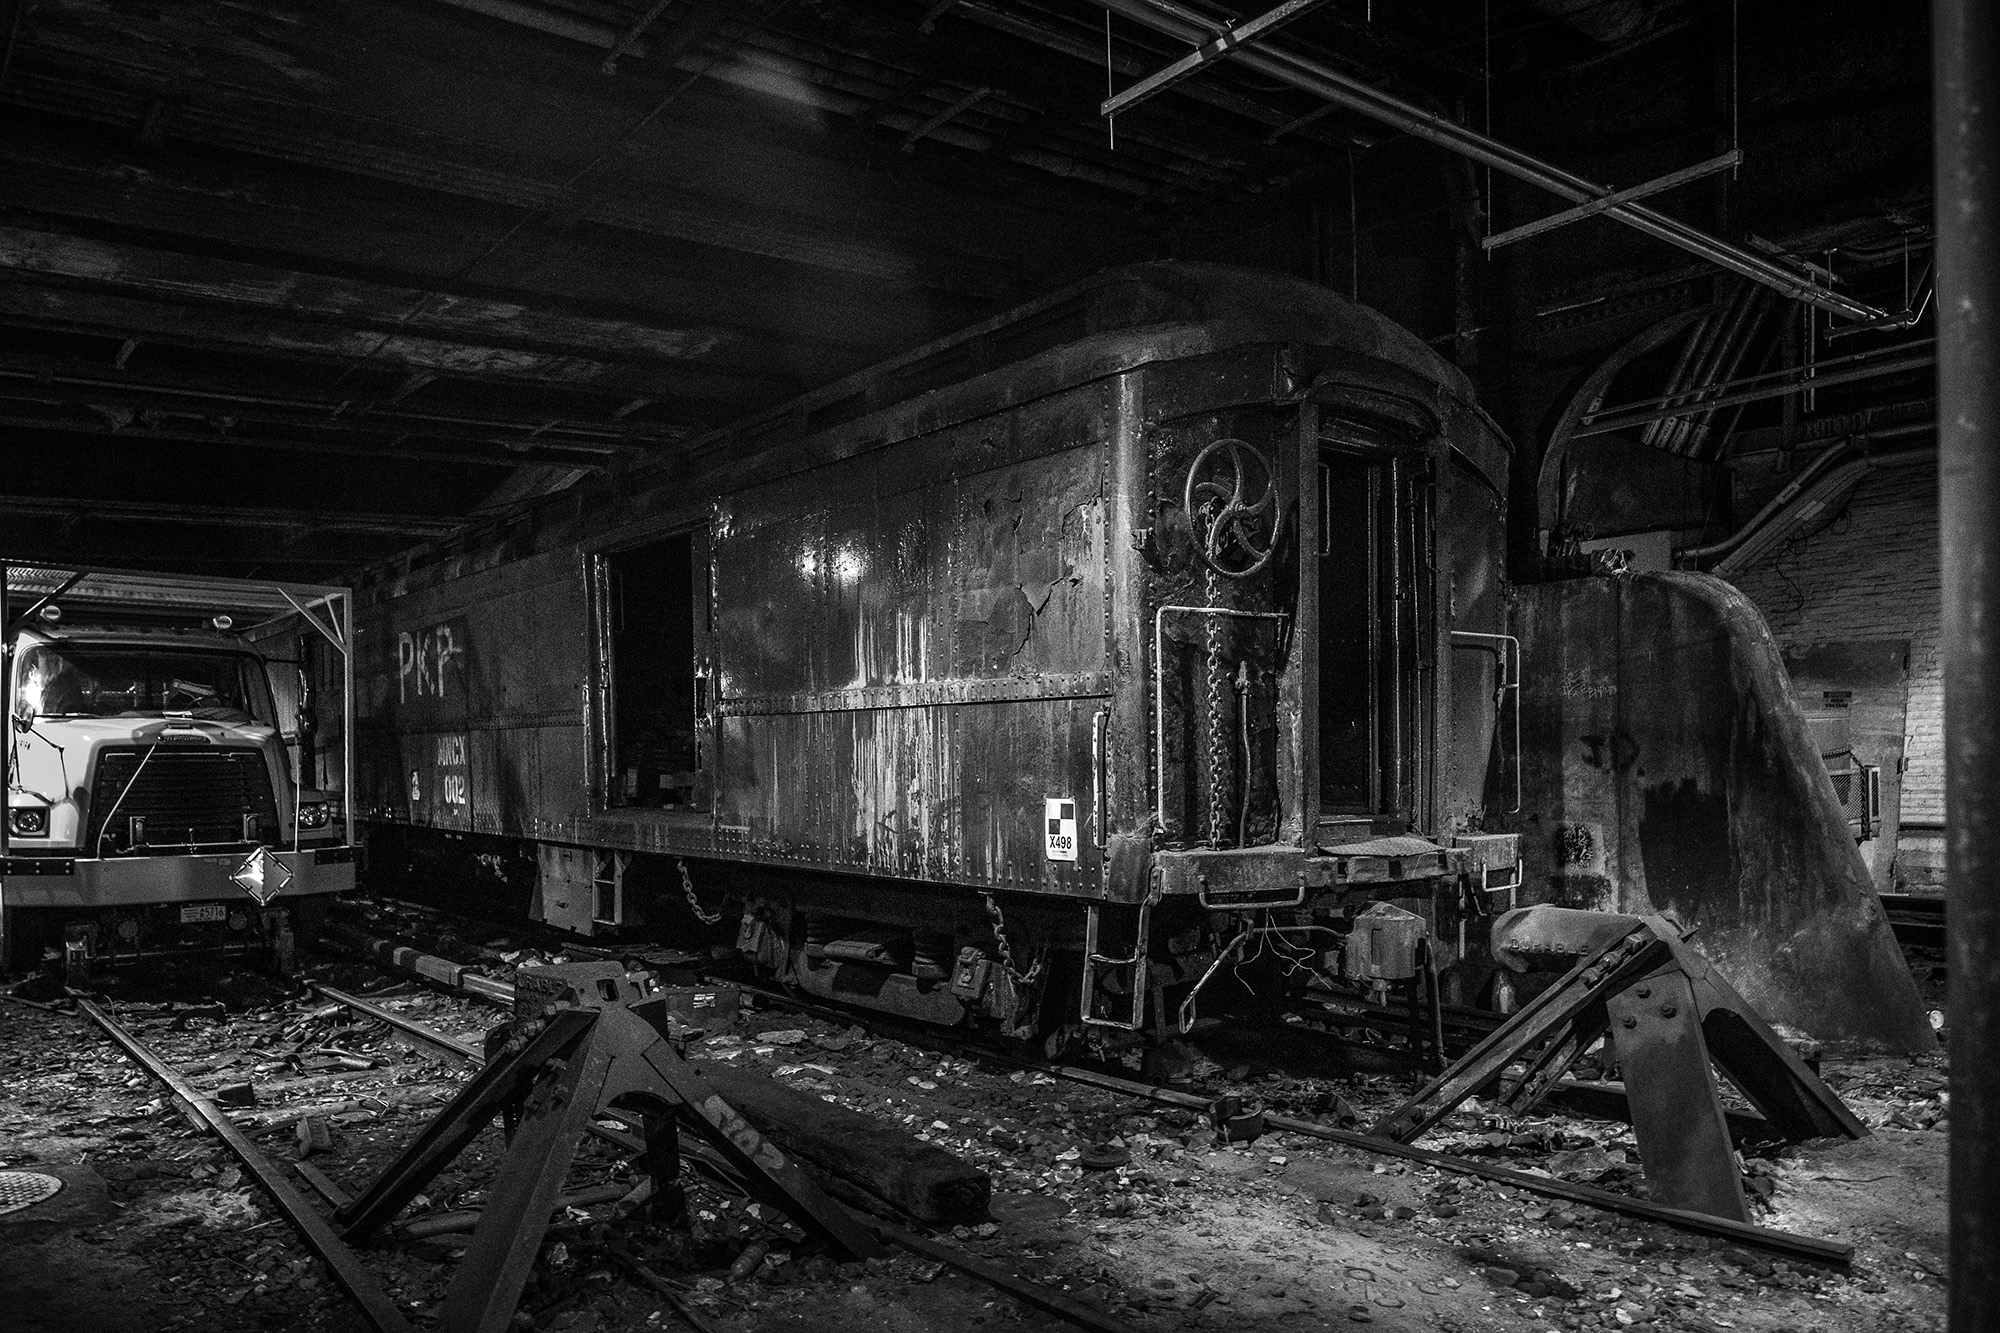
This abandoned railcar located on track 61 was used by FDR during his presidency to transport him, already seated in his Pierce Arrow limousine, to a private station located under the Waldorf Astoria hotel. Fujifilm X-Pro2 with a Fujinon 16-55mm lens. 1/15 @ f2.8, ISO 6400.

To be clear, I wasn't the only person on this tour and these photos are not exclusive, but it is far from common to have this kind of access and I took the opportunity seriously. That started with renting a Fujinon XF 16-55mm f2.8 R LM WR lens from Borrowlenses.com. I knew that the three and half hour tour would be fast paced and I didn't want to change lenses. I also don't own anything longer than the Fujinon XF 35mm f2 R WR, so a zoom made perfect sense, especially one that is f2.8 throughout.

And it is quite the lens. It had a solid feel, was tack sharp and handled the low light great. However, it was also very big and for me, that size becomes an issue when paired with my X-Pro2. This is similar to the Fujinon XF 16mm f1.4 R WR, another solid, tack sharp lens, but big. What I really love about the X-Pro2 is that people hardly take notice that I'm carrying a pro camera. Adding a big lens on the front, no matter how great it is, takes away from that myth.

The secret sub-basement known as M42 is 13 stories below Manhatten, doesn't exist on any plans and still houses massive electrical converters dating from WWII. Like the railcar photo above, monochrome just made sense. Fujifilm X-Pro2 with a Fujinon 16-55mm lens. 1/15 @ f2.8, ISO 1250.

Of course, if stealth on the street isn't an issue, then you will love this lens. And I really do like this lens and considering that I also use my X-Pro2 for all kinds of photography, it may still find it's way into my bag. But before I do that, I'm going to give the Fujinon XF 18-55mm f2.8-4 R LM OIS, a lens I first used paired with the X-T1 during seven days of shooting in the San Francisco area, another try.

You may also notice that all three photos I chose to include in this post were taken with a focal length of 16mm. So did I really need the zoom? Purely coincidental, I assure you that I did take some photos at other focal lengths.

If you find yourself in New York, take a few hours and visit Grand Central Terminal. Even if you can't get a behind-the-scenes tour, there is plenty to explore and photograph.


SEVEN DAYS WITH THE FUJI X-PRO1

The Fuji XF35mm (53mm equivalent), F1.4 lens did a great job. 1/1000, f2.8 at ISO 200.

The Fuji XF35mm (53mm equivalent), F1.4 lens did a great job. 1/1000, f2.8 at ISO 200.

I was headed to New York City on a seven-day assignment to cover Fleet Week for the Navy and thought it would be the perfect time and location to test a Fujifilm X-Pro1 outfitted with an XF 35mm f1.4 lens I rented from  BorrowedLenses.com.

I have been a fan of the Fuji X cameras since I purchased an X-10 in 2012. Then after spending in 2013, I immediately ordered one for myself and I still carry and shoot with it almost daily. Would I love the X-Pro1 as much as these previous cameras?

The X-Pro1 is not a new camera, in fact, it has been around since March 2012 and there is no shortage of reviews and testimonials from photographers who really like this camera. So why am I just writing about it now? Well maybe it's because I was so wrapped up in my X100S that I never really considered another APS-C camera, or maybe it's because I started seeing rumors about an X-Pro2. Whatever the reason, I figured it was time – probably long overdue, that I gave this camera a try.

A little bit of rain didn't bother the X-Pro1, but did offer some nice scenes to photograph. When shooting on the streets in large cities, I find crosswalks and street corners offer plenty of opportunities. 1/125, f5.6 at ISO 640.

A little bit of rain didn't bother the X-Pro1, but did offer some nice scenes to photograph. When shooting on the streets in large cities, I find crosswalks and street corners offer plenty of opportunities. 1/125, f5.6 at ISO 640.

Since there has already been so much written about the X-Pro1, and it really is similar in functionality to the X100S, I decided to skip most of the technical details about this camera and concentrate more on how I set up and used this camera during a week of street photography in New York City. But don't worry, I will still point out the differences to the X100S as they come up.

Of course, there is one major difference between the X-Pro1 and the X100S, interchangeable X mount lenses. In 2012, Fuji originally offered three lenses; a 60mm (91mm) f2.4 macro, 18mm (27mm) f2 and the aforementioned 35mm. As of this posting, there are now at least nine additional lenses, including zooms and offerings from other manufacturers, including Carl Zeiss. It never bothered me that the X100S was a fixed 35mm equivalent, since you work with what you have, but perhaps on a few occasions it would have been nice to have options. That said, I only had the 53mm lens available to me during the trial period, so I made that work and admit I enjoyed the change.

In street photography, you have to always be ready to shoot. In this case I noticed the Fleet Week sign and the man loading kegs as I walked by. I quickly turned and got off about a dozen frames before I moved on. 1/125, f5.6 at ISO 500.

In street photography, you have to always be ready to shoot. In this case I noticed the Fleet Week sign and the man loading kegs as I walked by. I quickly turned and got off about a dozen frames before I moved on. 1/125, f5.6 at ISO 500.

FIRST IMPRESSIONS

The X-Pro1 has a great feel, classic look and you get the sense that it is just made for the streets. Physically, it is slightly larger and a bit heavier than the X100S, but continues to feel comfortable and natural in your hands. The XF35mm lens did protrude from the camera body more than I expected and took me a while to get used to. I've noticed many of the new lens offerings look huge and somewhat awkward on these APS-C cameras.

The Hybrid Viewfinder is similar the X100S, except it will update views based on lens choice. I still prefer the Optical viewfinder (OVF) over the Electronic viewfinder (EVF). I find the EVF darker than I would like and just a bit artificial. The OVF feels open and I like how I can see what is happening just outside the frame which is helpful, especially in street photography.

I was still able to get that wide angle feel I'm used to with the X100S even though the XF 35mm is a 53mm equivalent lens. 1/1200, f5.6 at ISO 200.

I was still able to get that wide angle feel I'm used to with the X100S even though the XF 35mm is a 53mm equivalent lens. 1/1200, f5.6 at ISO 200.

Again, the button layout and functionality is also similar to the X100S. I think the placement of the AE/AF-lock button is in a better location and therefore, I found myself using it more often. You can also choose a focus area quickly by pressing the AF Button and then using the selector to move your focus point within the frame. Pressing the MENU/OK Button will return the focus point to the center. It takes some practice, but getting used to the focus features on the X-Pro1, like the X100S, is key to getting the most out of your camera.

MY SETTINGS FOR SHOOTING ON THE STREETS

Set the AF Illuminator to OFF. The purpose of this light is to assist with autofocus in low light situations, but using the camera in lowlight situations is also the time you probably don't want to draw attention to yourself, or telegraph that you are about to take a photo. I didn't notice any focus issues, even in some fairly low light, with the AF Illuminator off.

Place gaffer's tape over the Indicator Lamp. For the same reason I set the AF Illuminator to OFF, I prefer to cover over the Indicator Lamp on the back of the camera. I'm not so worried I'll be discovered or afraid of the interaction, however, if I can get a few frames off without being noticed, I prefer that.

Set Operational Volume off. Are you seeing a trend here. Plus no shutter noise is a real advantage of mirrorless over DSLR. Even my Nikon's quiet mode can't compete with silence.

Using Auto ISO meant that I could shoot all day in and out of the shadows and then well into the night without thinking about it. 1/125, f1.4 at ISO 2500

Using Auto ISO meant that I could shoot all day in and out of the shadows and then well into the night without thinking about it. 1/125, f1.4 at ISO 2500

Use Auto ISO. I like the thought of moving in and out of various lighting situations and not having to change ISO each time. You can assign ISO to the Fn (function) Button which speeds up the process, but if you don't have to worry about it, why do so. Within auto ISO, there are a few considerations you need to take into account, though. For instance, I set the max ISO to 3200, but the lowest shutter speed to 1/125. Prior to making that choice, the camera would favor ISO and I found my shutter speed kept dropping too low which in some cases resulted in blurred photos.

New York City and Times Square is a busy and crowed place. The small form factor of the X-Pro1 is perfect in these situations and most people hardly notice you taking photos. A real advantage in street photography. 1/125, f2.0 at ISO 320.

New York City and Times Square is a busy and crowed place. The small form factor of the X-Pro1 is perfect in these situations and most people hardly notice you taking photos. A real advantage in street photography. 1/125, f2.0 at ISO 320.

Set Film Type to Monochrome.  Just like with the X100S, I set up the camera to shoot both raw and jpeg allowing me to shoot and preview my photos in black and white, but still have the color originals available during post production. I further set the film simulation mode to monochrome plus yellow filter which offers slightly increased contrast while toning down the brightness of the sky. I've always associated street photography with black and white which why I favor this setup.

I used continuous shooting (burst mode) set to six frames per second (max for this camera) to capture this photo in Coney Island. 1/300, f11 at ISO 200.

I used continuous shooting (burst mode) set to six frames per second (max for this camera) to capture this photo in Coney Island. 1/300, f11 at ISO 200.

Remaining settings. Aperture-priority AE (A) mode, turn off display back (Viewfinder Only), focus mode set to Single Focus. 

SOME FINAL THOUGHTS

The X-Pro1 did seem to focus quicker than the X100S, but there was still a bit of lag when coming out of standby mode. I missed a few shots because of this which was a reminder to always make sure the camera is awake and ready.

UPDATE:

Under Power Management turning the Quick Start Mode to ON is supposed to reduce camera start up time except I failed to test this and only noticed it in the instruction manual recently. And sure enough there is a similar feature available on the X100S, so I may have found a solution. More to come.

In street photography, scenes like this happen quickly and having the camera awake and ready to shoot is key. 1/125, f1.4 at ISO 2500.

In street photography, scenes like this happen quickly and having the camera awake and ready to shoot is key. 1/125, f1.4 at ISO 2500.

What appealed to me about the X100S was its simplicity. And I wondered if adding interchangeable lenses would detract from that? Hard to answer since as I mentioned previously I only had the XF 35mm available to me during the trial period, but even if I had other options available, I tend to pick a lens and stick with it. Although picking a Fujifilm XF 60mm f2.4 macro lens  one day and then a Zeiss 12mm f2.8 Touit series the next would be a fun option to have.

I know there are other new X offerings from Fuji like the XE-2 and the XT-1, but I really love the rangefinder styling of the X100S and X-Pro1. The XT-1 has been getting a lot of favorable reviews and I'm looking forward to testing it in the future.

However for now, I've gone back to shooting with my X100S and really am not looking to change anytime soon. That is unless the X-Pro2 rumors pan out.

WHEN OPPORTUNITY KNOCKS, SHOOT - PHOTOGRAPHING THE SECOND AVENUE SUBWAY

Future 86th Street Station is part of the Second Avenue Subway project.
The future 86th Street Station is part of the Second Avenue Subway project in New York City.
As a photographer for the Office of Naval Research I often have the opportunity to photograph some pretty cool things. Most of the time it comes down to access. If you think about it, as photographers we are often provided access not available to the general public, so when an opportunity arises to photograph something unique, we take advantage of it.

And sometimes opportunities arise because we know the right person. That was the case recently when I had the chance to photograph the Second Avenue Subway Project currently under construction in New York City.

Patrick Cashin, a photographer with the MTA, takes a group photo of neighborhood residents affected by the construction during a tour of the project.
A group photo of neighborhood residents affected by the construction is taken as part of their tour.
My good friend Patrick Cashin, Navy and Air National Guard veteran, is a photographer with the Metropolitan Transportation Authority and is responsible for documenting all aspects of the New York transit system. Part of that documentation includes major construction projects and his recent work photographing the Second Avenue Subway Project is amazing. Pat has never been one to brag, so when he sent me an email earlier this year with a link to a feature that Flickr did on him, I was awed by the work and his story behind it.

Major construction and blasting is completed for phase 1 of the project.
While major construction and blasting is completed for phase 1 of the project, scenes like this still serve to offer a glimpse of what it takes to create new stations and subway lines.
The very first thing that caught my eye when I saw Pat's photographs was the shear scale and size of the project and how some of the photographs he captured looked like they could have been taken 100 years ago when the first subway was built from City Hall to the Bronx.*

So last month as I was planning my trip to New York City for Photo Plus Expo, I made plans to meet up with Pat, even if only for a quick lunch or dinner. He responded that he was also attending the expo, but the real surprise was that he asked if I would be interested in joining him on an assignment the next day photographing underground. Better yet, he had secured permission for me to photograph as well.**

Typically only residents of the neighborhood affected by the project are given the chance to tour the project. One restriction, however, is that they are not allowed to take photographs, which is why the MTA provides a photographer to both document the tour and take a group photo.

View of the future 96th St. Station. Mixed light made some color correction during post processing a must.
View of the future 96th Street Station using the train tunnel to help frame the shot.
There were two tours scheduled and I would be able to stay underground with Pat between those tours, giving me a total of about three hours to take photographs.

For gear I was pretty sure of two things. That it was going to be dark and that I wanted to shoot wide, so I brought with me the Nikon D3S along with two lenses, the 14-24mm and 24-70mm. And of course I also had my Fujifilm X100S . I knew that light would probably be the biggest issue. I didn't bring a tripod so I relied on the high ISO capabilities of the Nikon D3S to capture the scene. The trade off of course is noise. I processed the images using Lightroom 4.0 where besides some color correction, I opened up the shadows and ran some noise reduction. But for the most part a little noise in these types of photographs does not bother me. With few exceptions I set my ISO to 3200 and everything was shot RAW.

Including a MTA employee helps to show the scale of the subway tunnel.
Including a MTA employee in the photograph helps to show the scale of the train tunnel located at the south end of the future 86th Street Station.
Once underground I really was struck by the size of the project, but how do you translate that in your photographs? Using a wide angle lens and including people is a great way to give the view that sense of scale. Even though this was Saturday and there was not any work going on, I was able to include a few workers who where on hand mostly for safety reasons.

An opening to street level allows some natural light into the future 96th Street Station.
An opening to street level allows natural light into the future 96th Street Station which created some challenging mixed light situations.
Another challenge was the mixed lighting. It turned out to be a bit of daylight mixed with fluorescent and who knows what else. In situations like this I always shoot both JPEG and RAW which then gives me the option to color balance after the fact. Why both? Most of the time I never open the RAW images from an assignment. I think of the RAW files as my insurance, because in reality JPEGs just fit into my work flow allowing me to quickly download, caption and transmit. And in this case I wanted the JPEGs so I could look at and edit a few images on my iPad during the train ride back to Washington, D.C.

The 14-24mm lens allowed me to emphasize the shear size of the project.
Shooting wide with the Nikon 14-24mm lens allowed me to emphasize the size and scale of the project.
Do you have friends or family that can get you access to interesting places? I bet if you think about it, you do. Also think about what you do for a living or something you have access to and if it might be interesting to a photographer friend. We tend to not think of what we do as interesting, but in many cases if you stepped back, you would realize that there might be unique opportunities all around.

An MTA employee makes the 150' trip to the surface from the 86th Street Station.
An MTA employee makes the 150' trip to the surface from the future 86th Street Station.
MTA on Flickr:
Metropolitan Transportation Authority of the State of New York

*This project was originally proposed in 1929 as a major expansion, although work never commenced due to the Great Depression. Digging for the project did begin in 1972, however it only lasted a few years before New York became insolvent. Ground breaking for the current project happened in 2007.

Phase I of the current project begins at 96th Street then runs south where is will join the existing 63rd Street Line. Additionally, three new stations will be located at 96th Street, 86th Street and 72nd Street. I entered the project via 125 foot elevator at the 86th Street location and then walked underground via the rail tunnel to the 96th Street station and back.

**In order to photograph the project I had to sign an agreement with Capitol Construction limiting my use of the photographs and while I do retain copyright, I am unable to license them for commercial use. For all inquiries about photo use, please contact Rosanna Alcala at ralcala@mtacc.info.

A PINHOLE OF A PINHOLE

Photograph of

"Topsy-Turvy: A Camera Obscura Installation," was on temporary display in New York's Madison Square Park.

I received a pinhole camera kit for Christmas about ten years ago and remember thinking what a really cool gift it was and that I couldn't wait to build this camera and start taking photographs. However, even before I started building the camera, I couldn't help thinking about what would be the first thing I photographed. And that's where my thoughts stopped.

So the kit was put away in a desk drawer and although I would often come across it during the past decade, I still couldn't imagine taking that first photo.

Then earlier this month I came across a tweet about a camera obscura on display in New York City's Madison Square Park and all of a sudden I realized that I now had the perfect first photograph for my pinhole camera. A pinhole photograph of a pinhole camera. That was it.

Contents of Pinhole photography kit from Flights of Fancy.

Wood pinhole photography kit complete with everything you need to develop your photographs.

Artists Sandra Gibson and Luis Recoder set up this 10x10-foot walk-in camera they dubbed " Topsy-Turvy: A Camera Obscura Installation,” in the Flat Iron district of New York City to educate the public. The exhibit was on display through April 5th.

I retrieved the kit from my desk and started looking through the instructions while at the same time planning my day trip to New York. The kit came with everything I needed to construct the camera, plus everything I needed to develop the paper. I wasn't even deterred when I noticed the developer and fixer had expired in 2008.

The pinhole camera was simple to construct and took about 15 minutes to build. I did make a slight modification to the finished camera by adding a 1/2-inch piece of MDF board to the bottom of the camera so I could insert a1/4"-20 T-Nut so I could attach my camera to a tripod.

Photograph of my pinhole camera with the camera obscura in the background.

Almost complete pinhole camera. Still need to finish the paint job and make additional modifications to the base.

The last thing I did was dig through the attic and find my old darkroom safelight, a Kodak Model B. The kit does provide a red sheet of plastic that could be placed over a light source in case you don't have access to a safelight.

The night before I left for New York I went into the darkroom/bathroom, plugged in the safelight and loaded a 3x3 inch piece of photographic paper into the camera.

I arrived in New York around 10:30 a.m. the next day and walked the nine blocks to Madison Square Park and quickly located the camera obscura at the south end of the park aimed at the historic Flat Iron Building. A couple was just exiting the camera when I arrived so along with the attendant I stepped inside and after a few minutes my eyes adjusted and the surrounding area came into focus. To me, it is fascinating to realize that this is exactly what it would look like if I could step inside the small pinhole camera I had in my bag.

When I exited the camera I walked around the area for a while thinking about the photograph I was about to take. I literally only had one shot and not having used this camera before I wasn't sure what the focal length would be or how long of an exposure to use. The pamphlet that came with the kit did offer suggested exposure times based on the available light.

A photograph that shows the relation between my pinhole camera and the camera obscura.

My pinhole camera all set to take a 45-second exposure of the camera obscura.

I placed the pinhole camera on a light stand I brought along to act as a tripod, took a deep breath, waited for some park goers to get out of the way and then pushed aside the little door covering the pinhole and started the countdown. The pamphlet recommended a 30-second exposure in bright sunlight. I settled on a 45-second exposure because of some open shade in the park.

After I closed the cover I was done. Seemed anticlimactic. I stuck the box back into my bag and went about the rest of the day taking photos of New York City.

I returned home around 11:45 that night and briefly thought that I should wait until the next day to process the photograph, but soon realized that was not going to happen. So once again I set up my makeshift darkroom and went about mixing the developer and fixer. The last time I was in a darkroom was 1997 but when I smelled the fixer it was like I was there yesterday.

A pinhole photograph after being converted from a negative to a positive using Lightroom 4.

Pinhole #1.

I opened the camera and retrieved the paper negative and placed it in the developer and... Nothing! I started to panic and question whether I had put the paper in camera correctly or perhaps not made a long enough exposure. Then I remembered that the chemicals were five years past the date of best use. So after a couple of minutes of not seeing an image appear I added some additional developer and finally Pinhole #1 revealed itself in the miniature tray.

A view of the Flat Iron neighbor as seen on the wall inside the camera obscura.

The Flat Iron Building at left as seen upside down and backward inside the camera obscura.

Just like the image I saw on the wall inside Topsy-Turvy, the image you will get is a negative and reversed. There are two options to correct this. The first is to place the paper with the negative image face down over another sheet of photographic paper, place a piece of glass or plexiglass over both sheets of paper and expose them to white light, then process the paper as before. Remember, everything with the exception of turning on the white light must be done under a safelight in the darkroom.

The second method and the one that I choose is to photograph the pinhole photograph with a digital camera and then using a program such as Adobe Lightroom or Photoshop, flip the tone curve and rotate horizontally to get a corrected image. I explained this process in my blog post about using your digital camera to copy old negatives. I have some exciting things planned for this pinhole camera and with camera obscuras in the future, so keep reading this blog and be sure to follow me on Twitter.