
The Golden Gate Bridge a half hour prior to sunrise. 30 sec. @ f8, ISO 200.
Before I get to my five tips, I will state right up front that much like my blog post, Five Tips for Shooting Antelope Canyon, this was my first time photographing the Golden Gate Bridge. I say that only to admit that I'm not the expert and in fact, welcome comments, additional tips or even to tell me I'm wrong.
However, as a professional photographer, you might find it interesting how I approach a subject that I never photographed and only have a limited time to do so. In this case, I was in San Francisco for three days, but all of that time was not dedicated to taking pictures of possibly the most photographed bridge in the world. Also of note, all of the photos were taken with a Fujifilm X-T1 mirrorless camera that I had for review.

Consider a rental car or Zip car so you can get to locations away from the crowds, like this photograph of the bridge taken from Point Bonita Lighthouse just before sunset. 1/18 @ f22, ISO 200.
Also, while it is possible to get to the Golden Gate Bridge via public transportation, tour bus or even by bike, renting a car seems to be the easiest and most convenient way to get to many of the shooting locations, especially if you have limited time or want the ultimate flexibility to chase light.
1. Location, location, location.
There are numerous locations or vantage points to photograph the bridge and I'll cover just a few even though I'm sure locals have all kinds of hidden spots picked out.
I shot from three basic locations on the North side and two on the South or San Francisco side of the bridge. On the North, it was Vista Point, Battery Spencer, Marin Headlands (Hawk Hill) and on the South, Lands End, and the South Side parking lot.
Vista Point is the first exit after crossing the bridge heading north and while it offers an alright view of the bridge, my suggestion would be to skip the crowded parking lot and head down the hill towards the Coast Guard Station where you can view the bridge from a low angle. Then walk up to the Vista Point visitors center for an additional view.

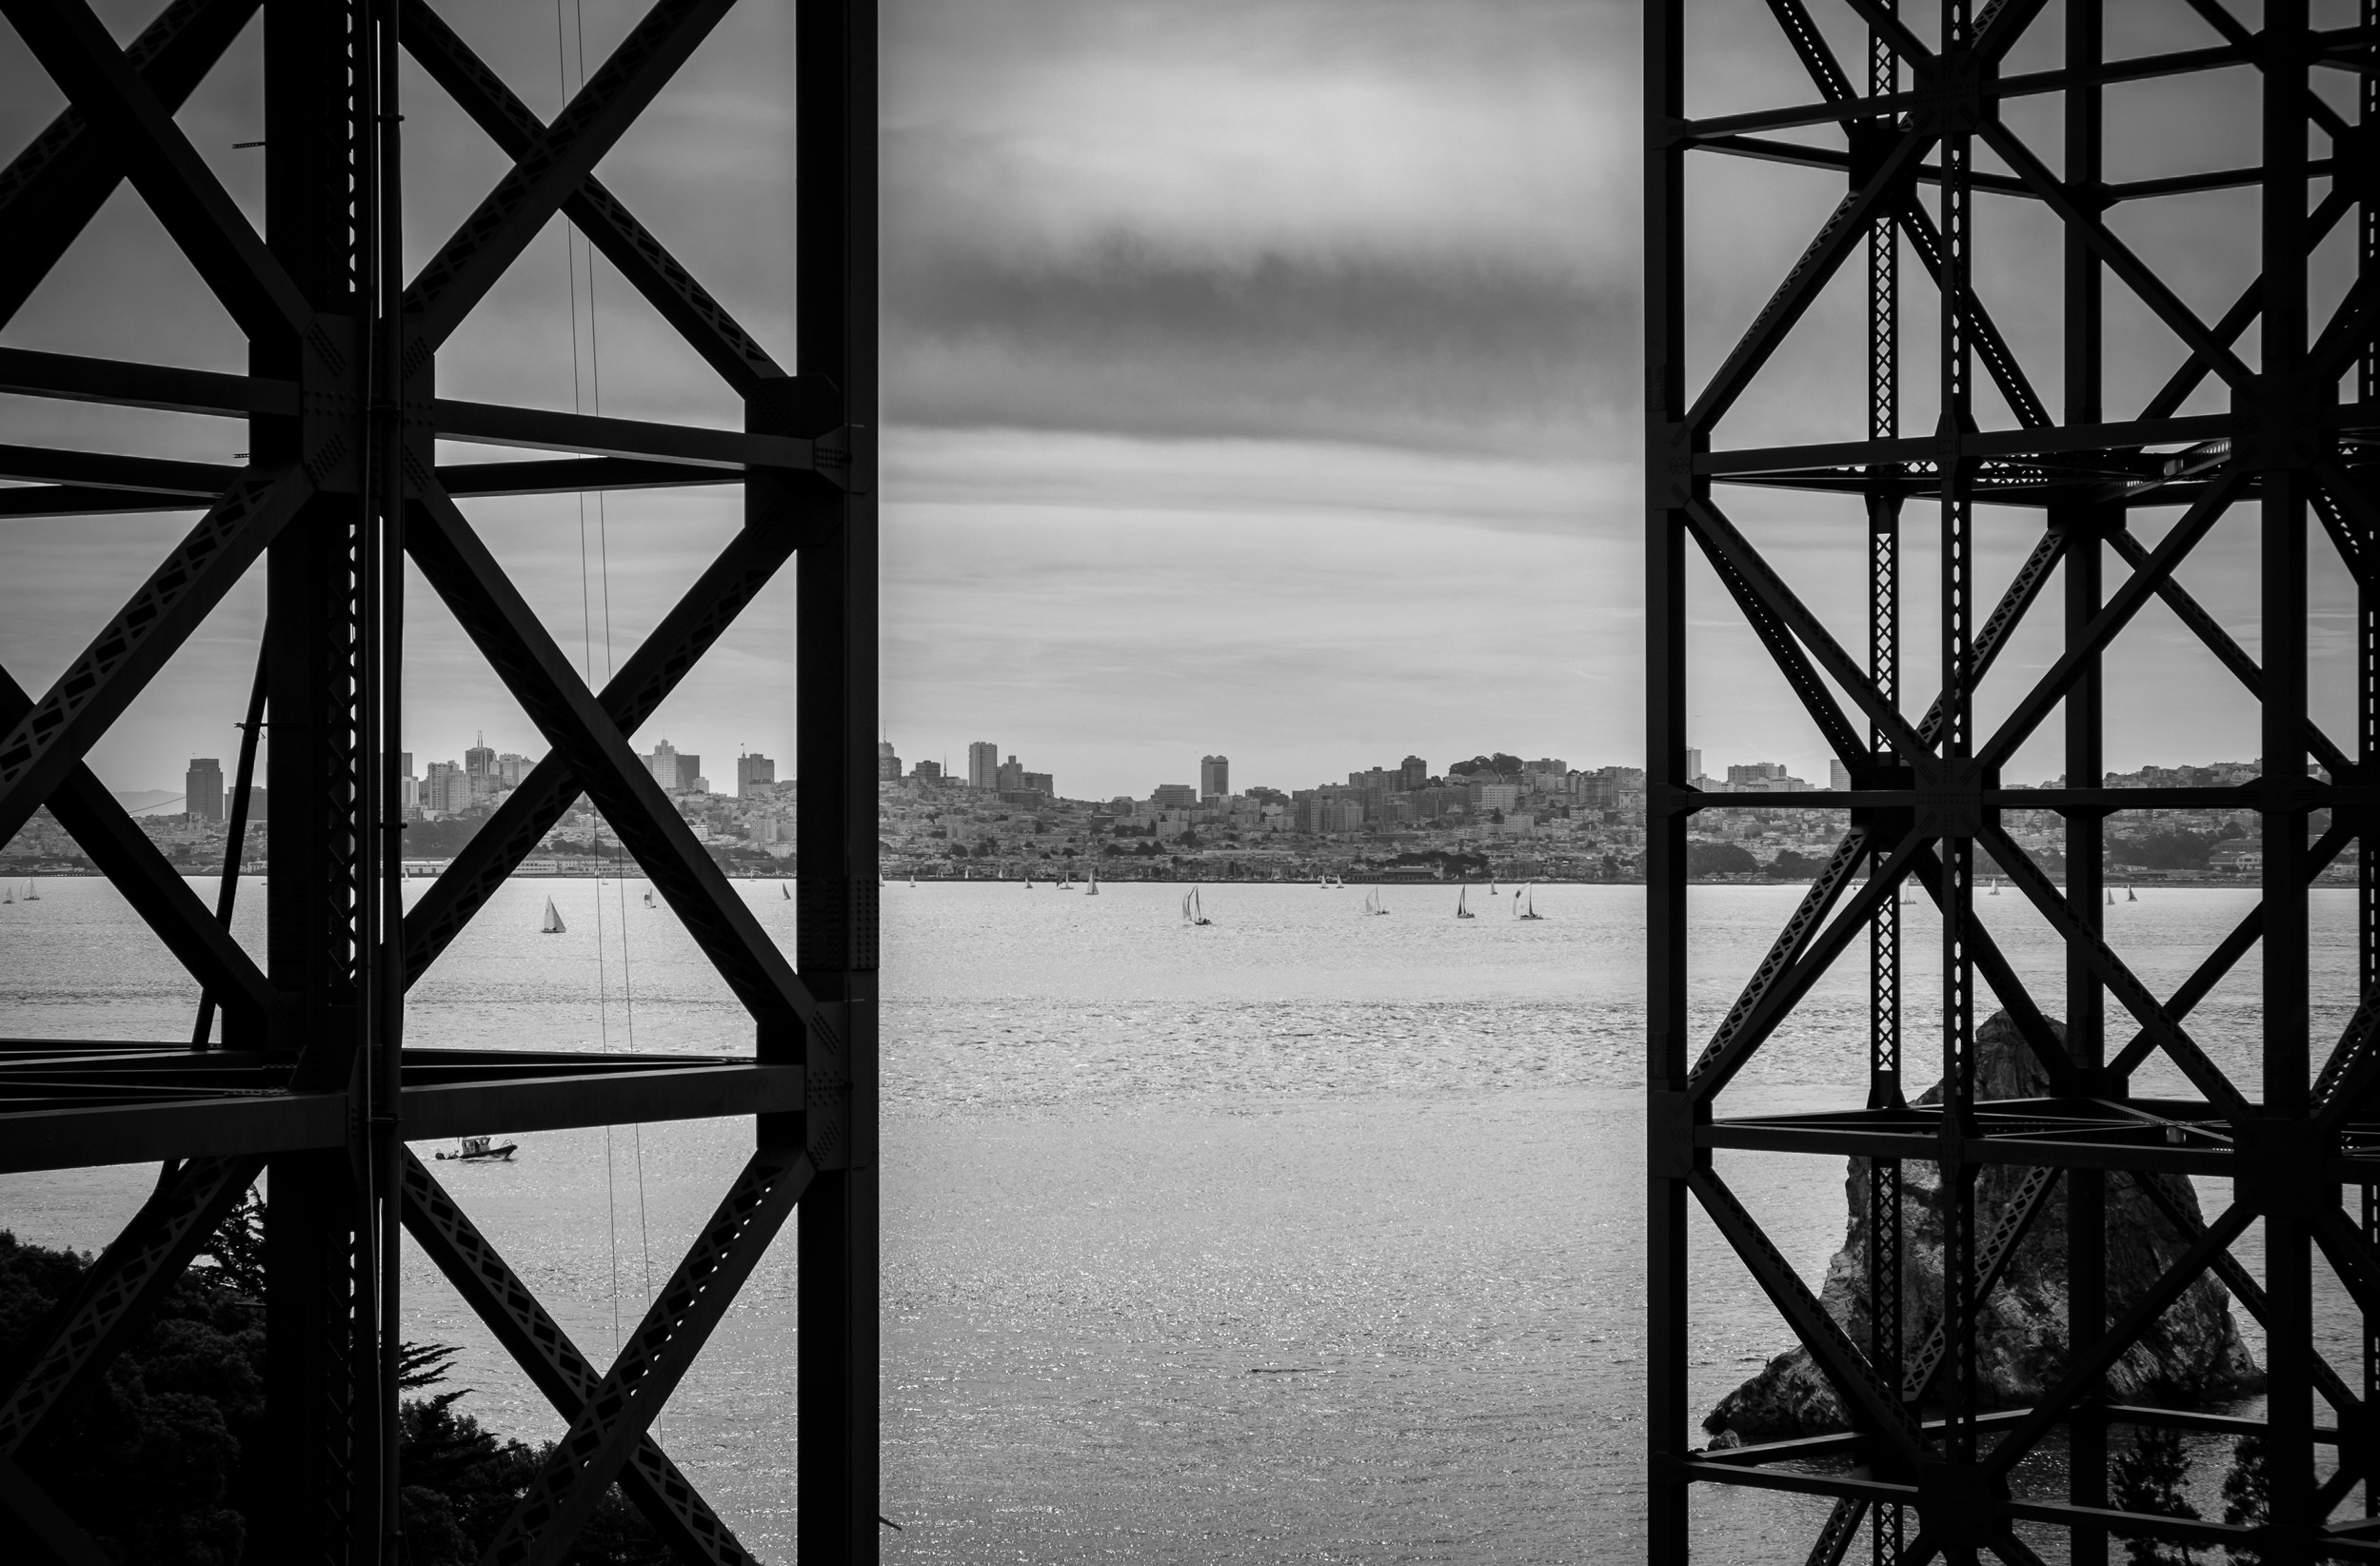
A different look at the bridge from Battery Spencer. 1/1700 @ f3.2, ISO 400.
After leaving Vista Point cross under the bridge and start the climb up Conzelman Rd. making Battery Spencer your first stop. This is a great location and it was the first place that I stopped to photograph the bridge. I was surprised how close the bridge was and you feel like you are at eye level with the bridge towers. Nice vantage point to shoot verticals too.
After leaving Battery Spencer, you continue to climb until you reach the highest point, Hawk Hill. From this vantage point, you get a great overview of the bridge with the city behind it. Don't forget to explore the old World War II batteries while you are there and if you continue on foot through former gun emplacement tunnels to the other side, you will have a bonus view of the Point Bonita Lighthouse.
There are several stopping points along the way so take your time and pull over every chance you get either on the way up or on the return trip, because the view is different and unique each time.

Screen shot from my iPad of the SunSeeker App showing my location and sun direction on the morning of March 17, 2015, as I was attempting to photograph the sunrise. One of the nice things about this App is that you can pick a day and time in the future so that there are no surprises, except for maybe rain and fog.
2. Timing is everything.
Make sure to leave yourself enough time and shooting days to capture the bridge during different times of the day. If you are planning to shoot sunrise or pre-sunrise from Hawk Hill, Conzelman Rd. is closed about a half mile from the top until after sunrise. There is a parking lot, so join the bicyclists and joggers as you make your way to the top. Not too bad, but don't be surprised as I was.
Once again, I used the Sunseeker App to determine sun direction which helps determine where I'm going to start and end my day. Knowing where the sun will be during certain times of the day can help you pre-visualize photographs as you drive around scouting locations.

The Vista Point visitor center gets crowded with both cars and people. I found most people moved on quickly so if you want a particular shot, just wait a few minutes. 1/100 @ f11, ISO 200.
3. Avoid the crowds.
It is clear that you are not the first person who has thought about photographing the Golden Gate Bridge, so be prepared for crowds, especially at the visitors centers. Sometimes you may also have to pass by a pull-over because it is full, but remember there will be another. It was my experience that if you have a little patience while people grab their selfies, they will move on allowing you to get your shot.
And as in most situations, you lessen your chance of running into crowds by getting there early and staying late. After all, isn't that the best time to shoot anyway? So take a break in the middle of the day and head over to Sausalito for some tacos and Mexican beer at the Salsalita Taco Shop while everyone else is fighting for a spot to photograph the bridge in the noon time sun.
Think about details and capturing pieces of the bridge, even from underneath. This was taken while walking from the Coast Guard station up the hill to the Vista Point parking area. 1/350 @ f9, ISO 200.
4. Look for something different.
The temptation is to go wide and take in the entire bridge. That makes a nice shot and sets the stage, but don't forget about details. With a telephoto lens, you can pick out details from many of the shooting locations I mentioned previously, but there are also places to access the bridge from underneath. And while I didn't get the chance on this trip, you can also walk or bike across the bridge, which would certainly get you up close and personal.
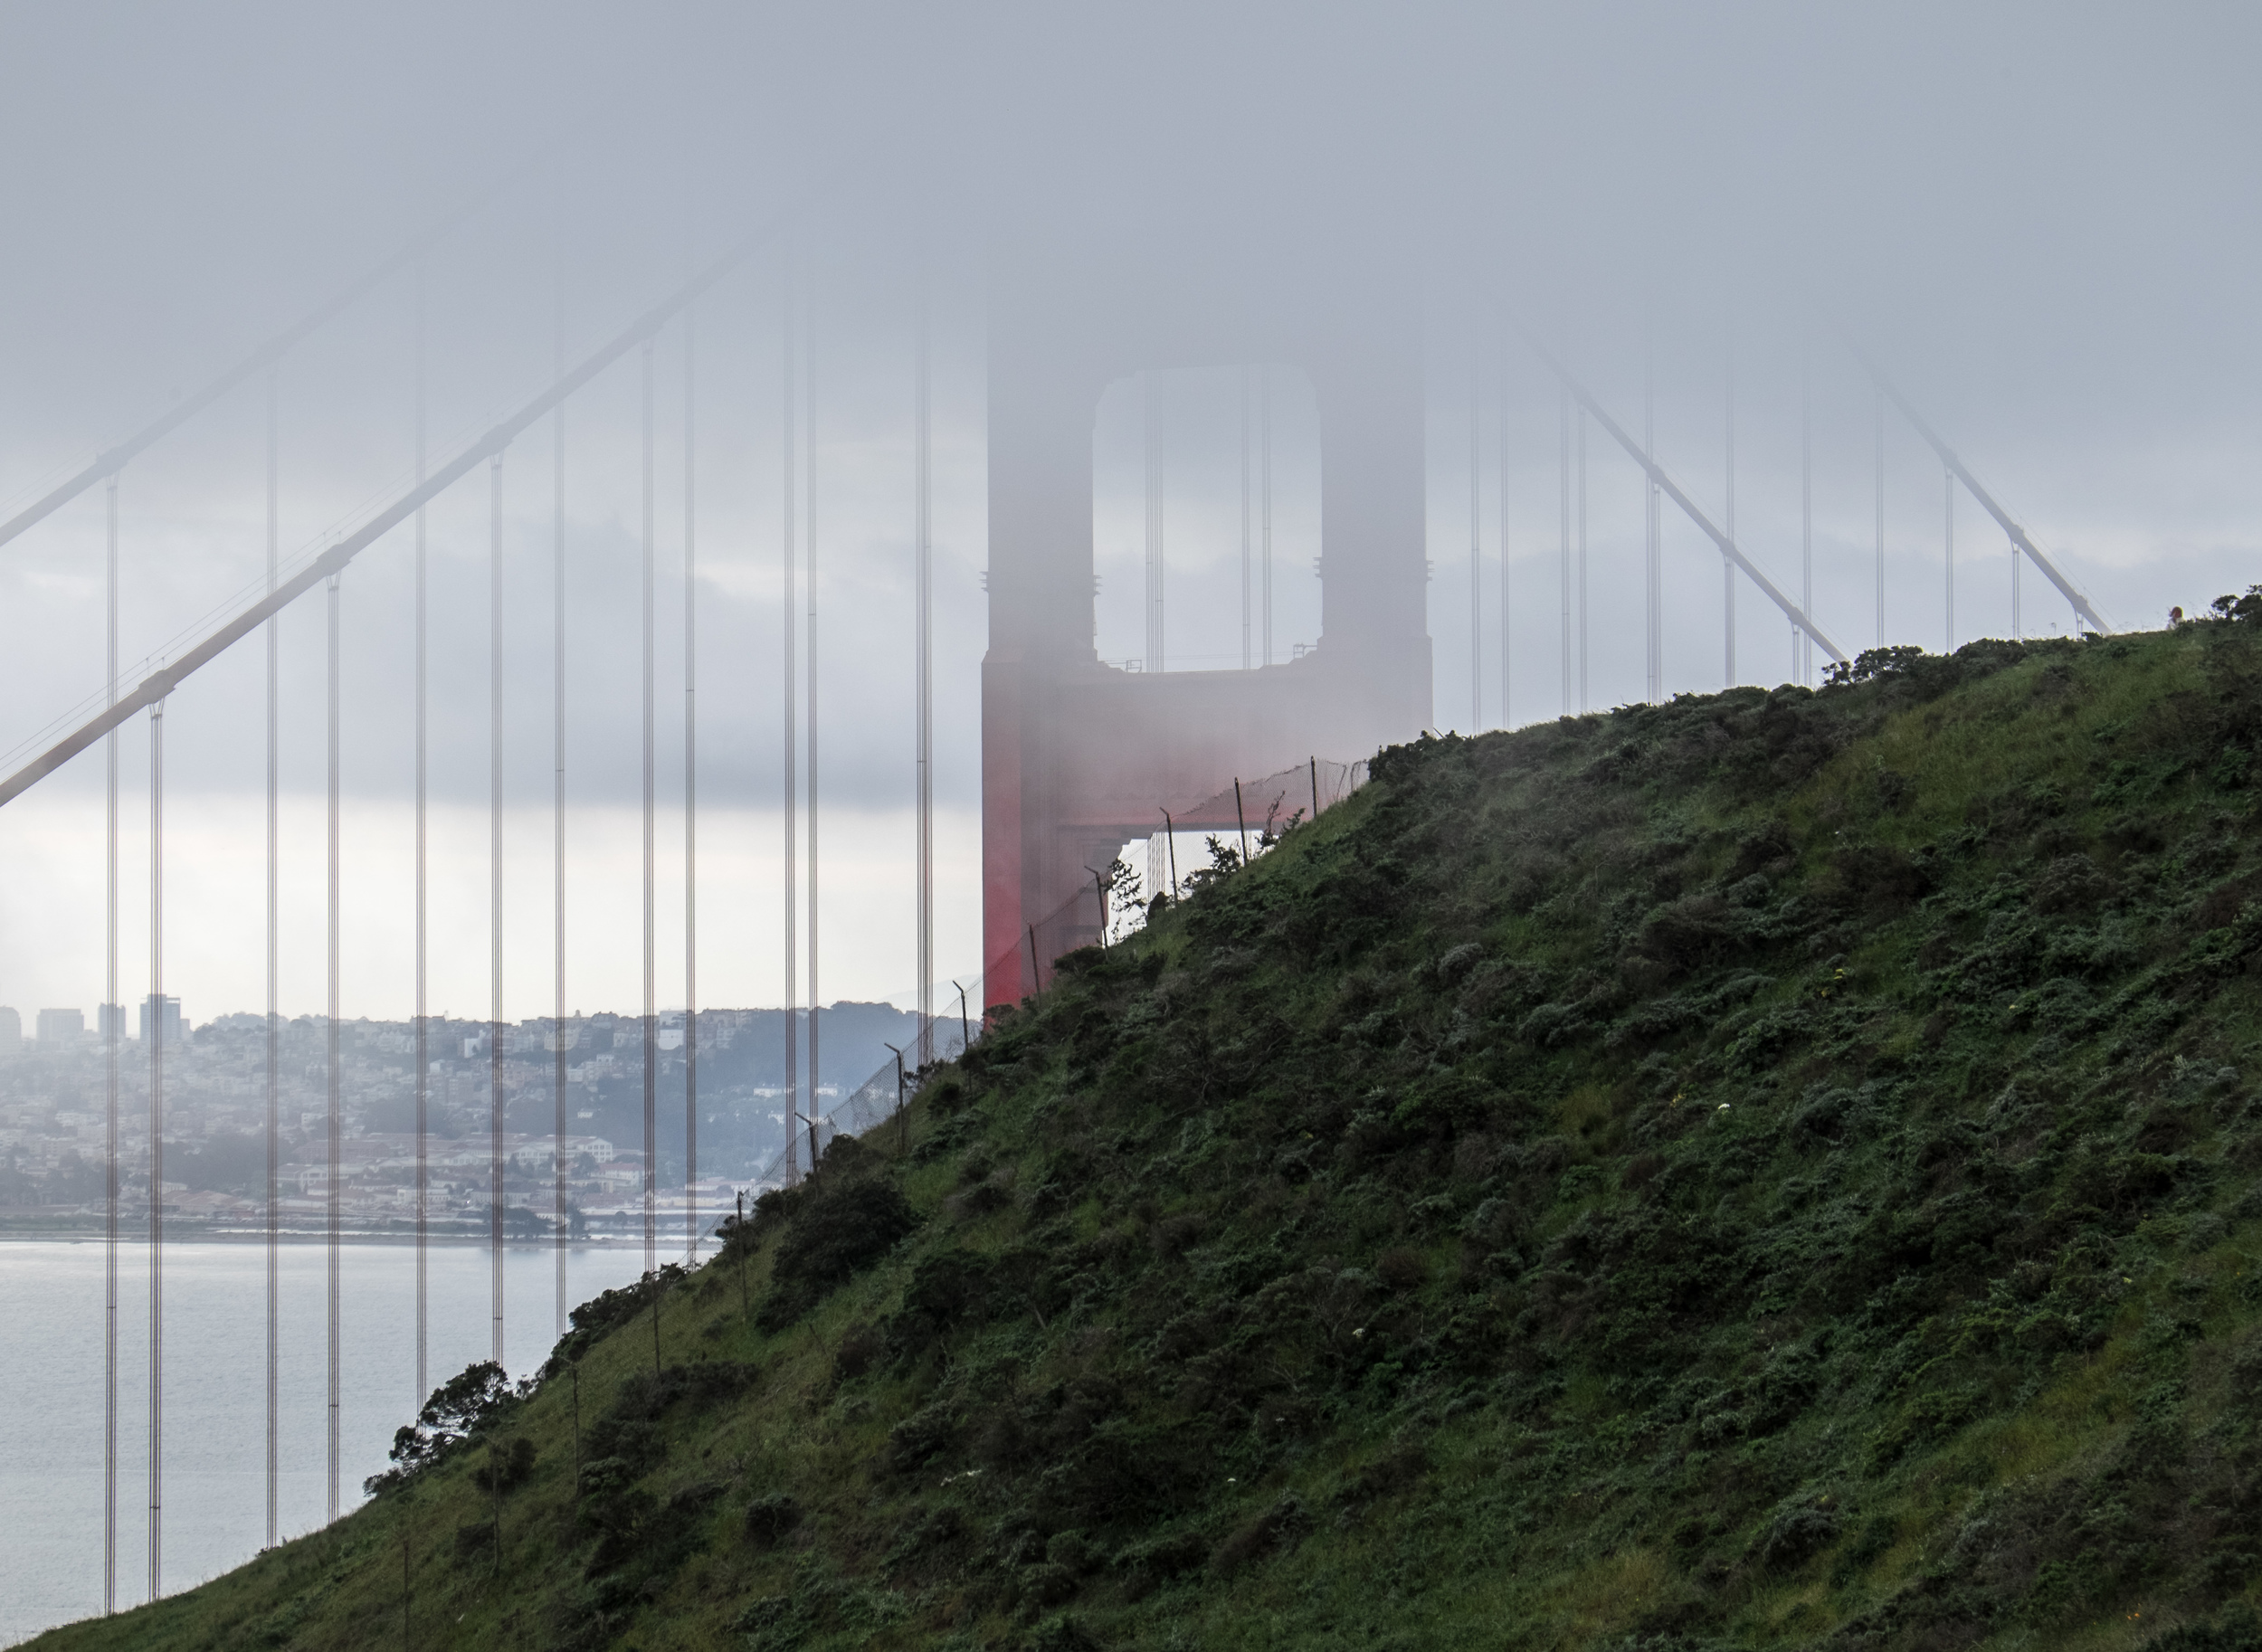
Among the first photographs I took of the bridge, was as I made the short climb at Battery Spencer which puts you at eye level with the bridge towers and in this case almost in the clouds. 1/60 @ f10, ISO 400.
5. Weather can be your friend.
I could state the obvious and just say that the weather, especially clouds and fog, are unpredictable in San Francisco, or I could tell you to embrace it and use it to your advantage. On my first day photographing the bridge, I could only make it half way up Conzelman Rd. before the visibility dropped to near zero. But those same clouds added something to my photos taken from Battery Spencer when they covered just the top of the bridge.
The point is, don't make a judgment from your hotel room downtown. Get out to the locations you scouted and see for yourself because you never know when the weather will change and maybe even change in such a way that takes your photograph from alright to awesome.
Photographed from the trail at Lands End. I rarely use presets, but something about this photograph reminded me of a classic postcard, so I added Yesteryear, and Rounded Corners White presets in Lightroom 5. 1/2000 @ f4, ISO 200.
As I said at the beginning of this blog post, there are many more locations to explore and photograph the bridge such as Crissy Field, Fort Point, Point Cavallo, Baker Beach and many, many more. In fact, maybe three days is not enough time.
So make the trip, have fun, and when not photographing the bridge, there are all kinds of other wonderful locations around the city to photograph.

