travel

FINDING PHOTOGRAPHS IN JOSHUA TREE NATIONAL PARK

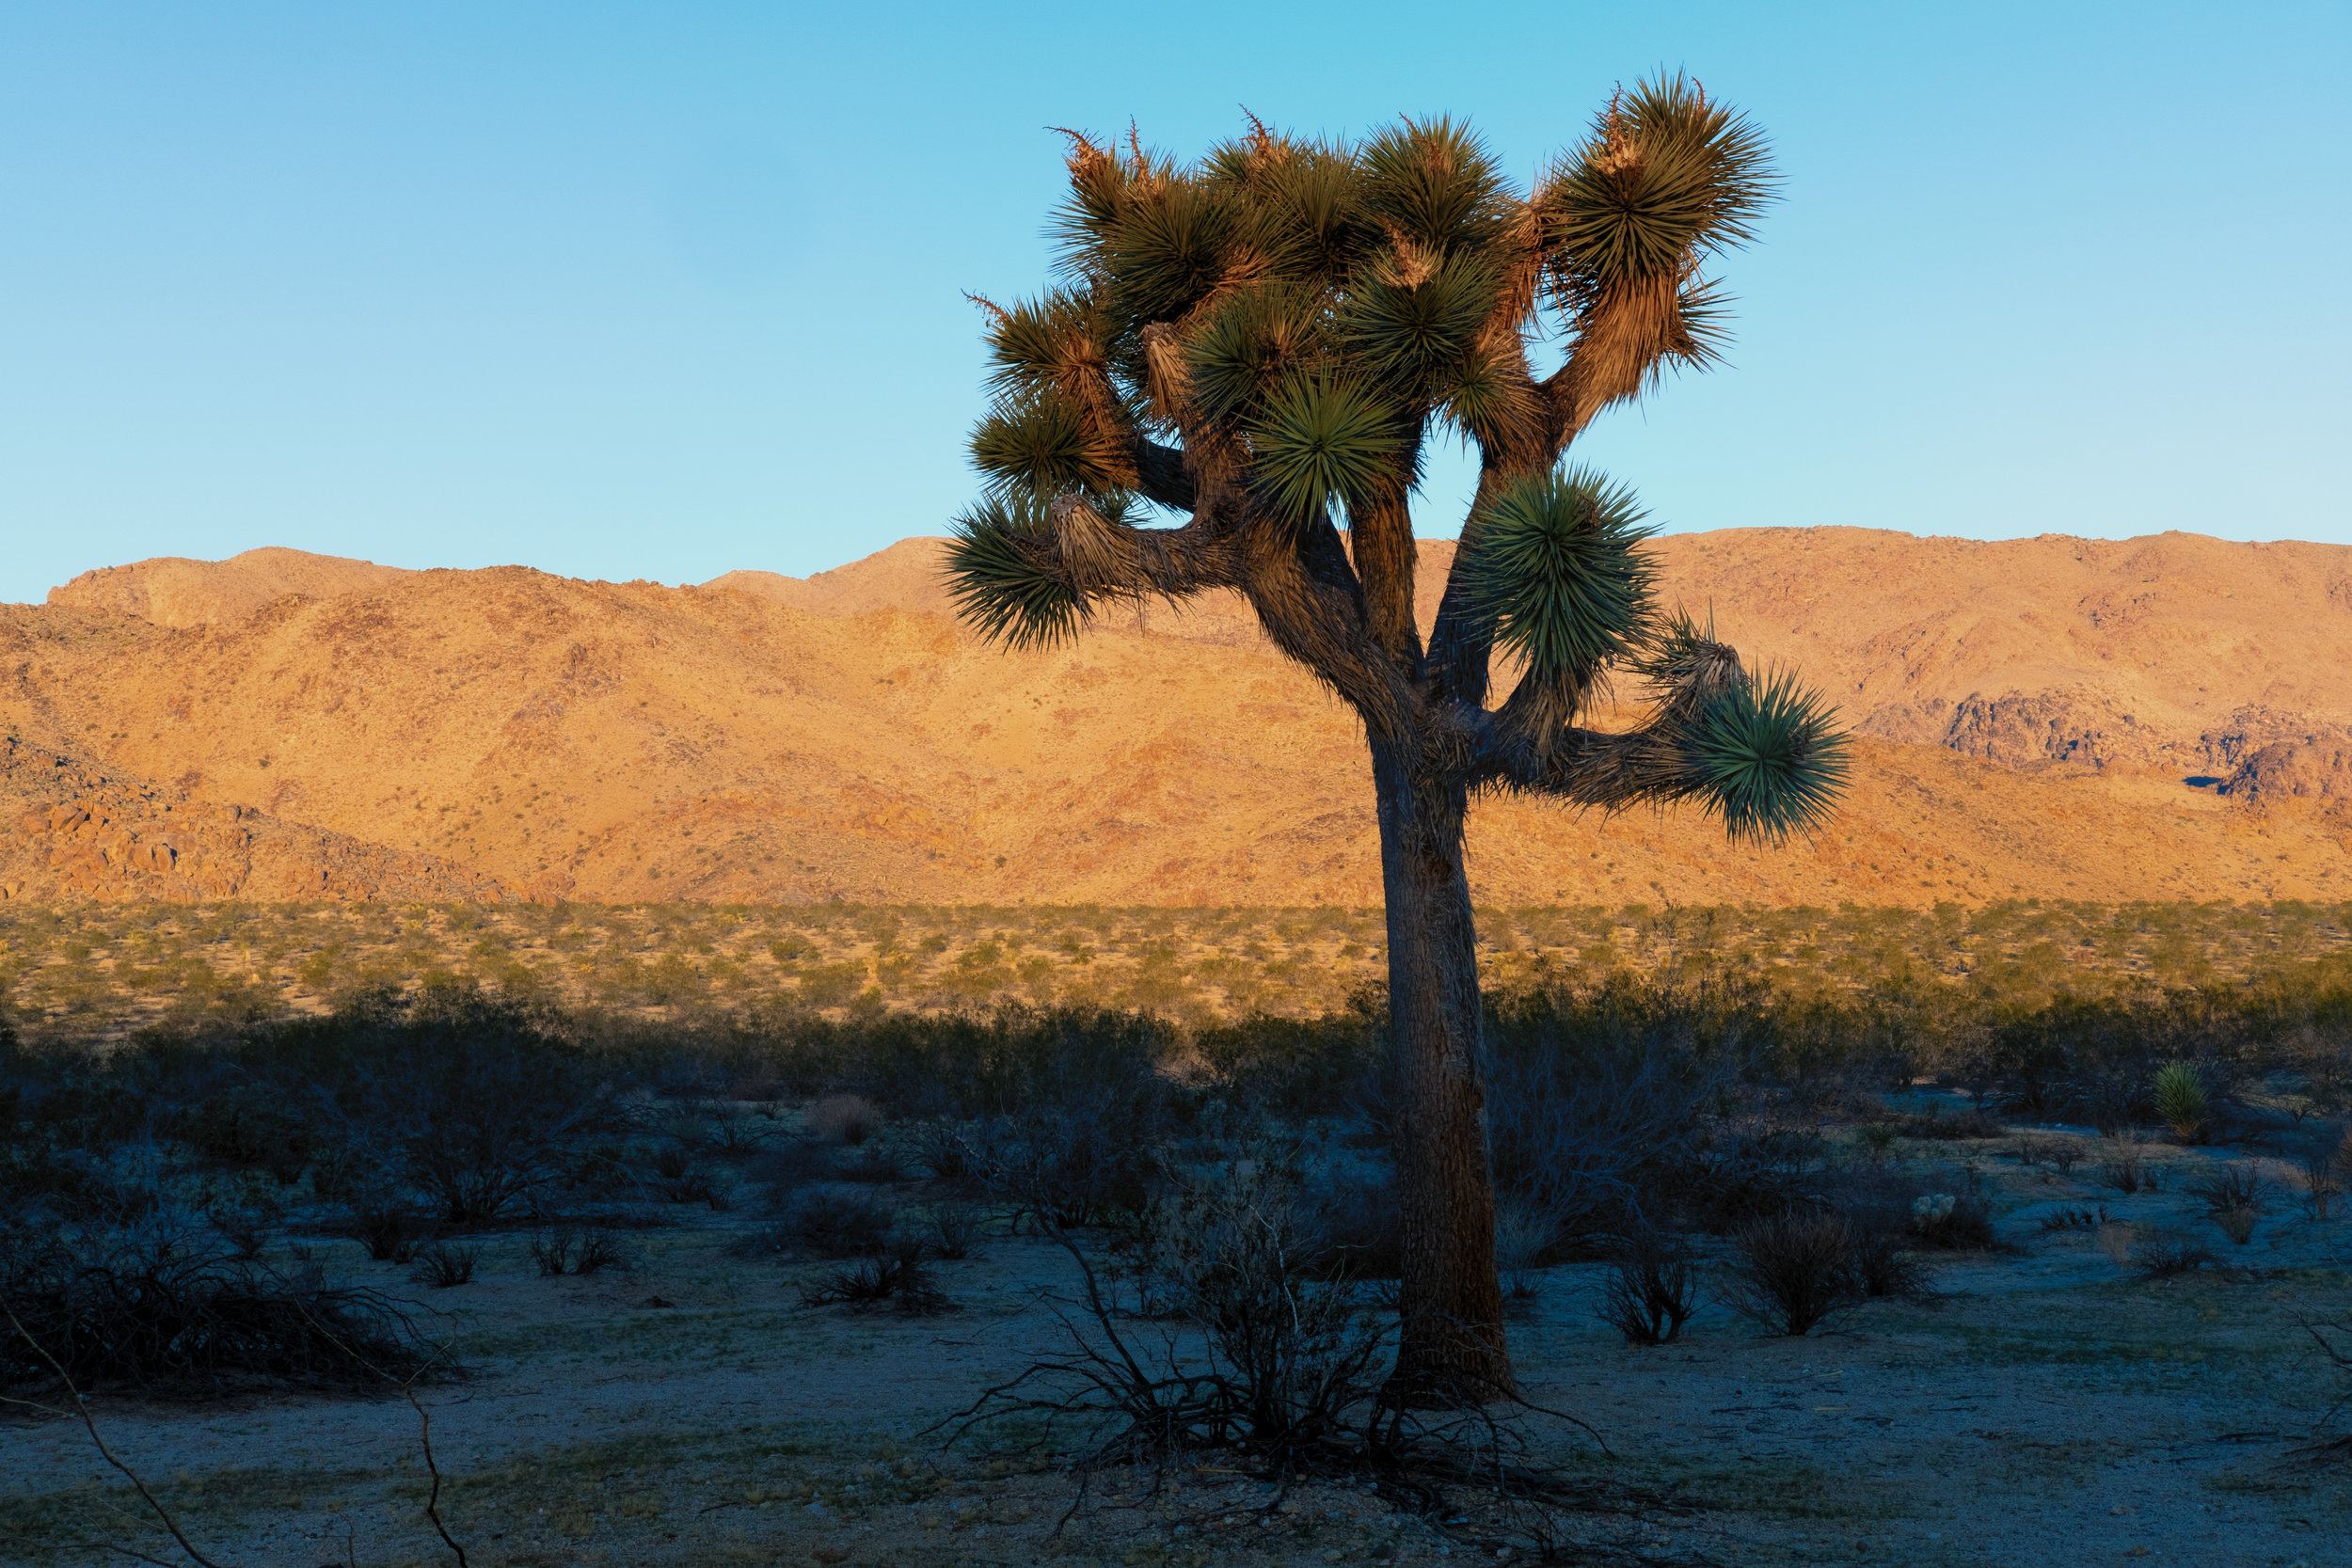
The light that appears just after sunrise is special. In this case, I liked how it made the sand colored mountains glow. I wanted something in the foreground and picked this lone josohua tree which I originally thought about shooting in silhouette, however, as the sun began to rise above the mountains behind me I knew I would have a few minutes where the sun lit the top of the tree, but before it lit me and cast my shadow into the scene. Sometimes missing the actual sunrise is fine.  Fujifilm X-Pro2 with a Fujinon XF 35mm f2 R WR, 1/60 @ f14, ISO 200.

It was still dark outside when I left Oceanside, Calif., on my way to Joshua Tree National Park, hoping to arrive in time to photograph the sunrise. As I made my way west on the I-10, still some 40 miles from my destination, a place I've never been, and the sky began to slowly lighten, it became evident that I was probably going to miss another sunrise.

It was only then when I recognized a familiar anxiety, which shouldn't exist, yet an anxiety that creeps in almost every time I decide to make one of these personal photo trips. Why do I put any kind of pressure on myself and why does it matter if I miss the sunrise? Am I really missing the sunrise if I'm watching it with my eyes? Do I have to actually capture the sunrise in a photograph in order to alleviate the anxiety? These are the questions I struggle with.

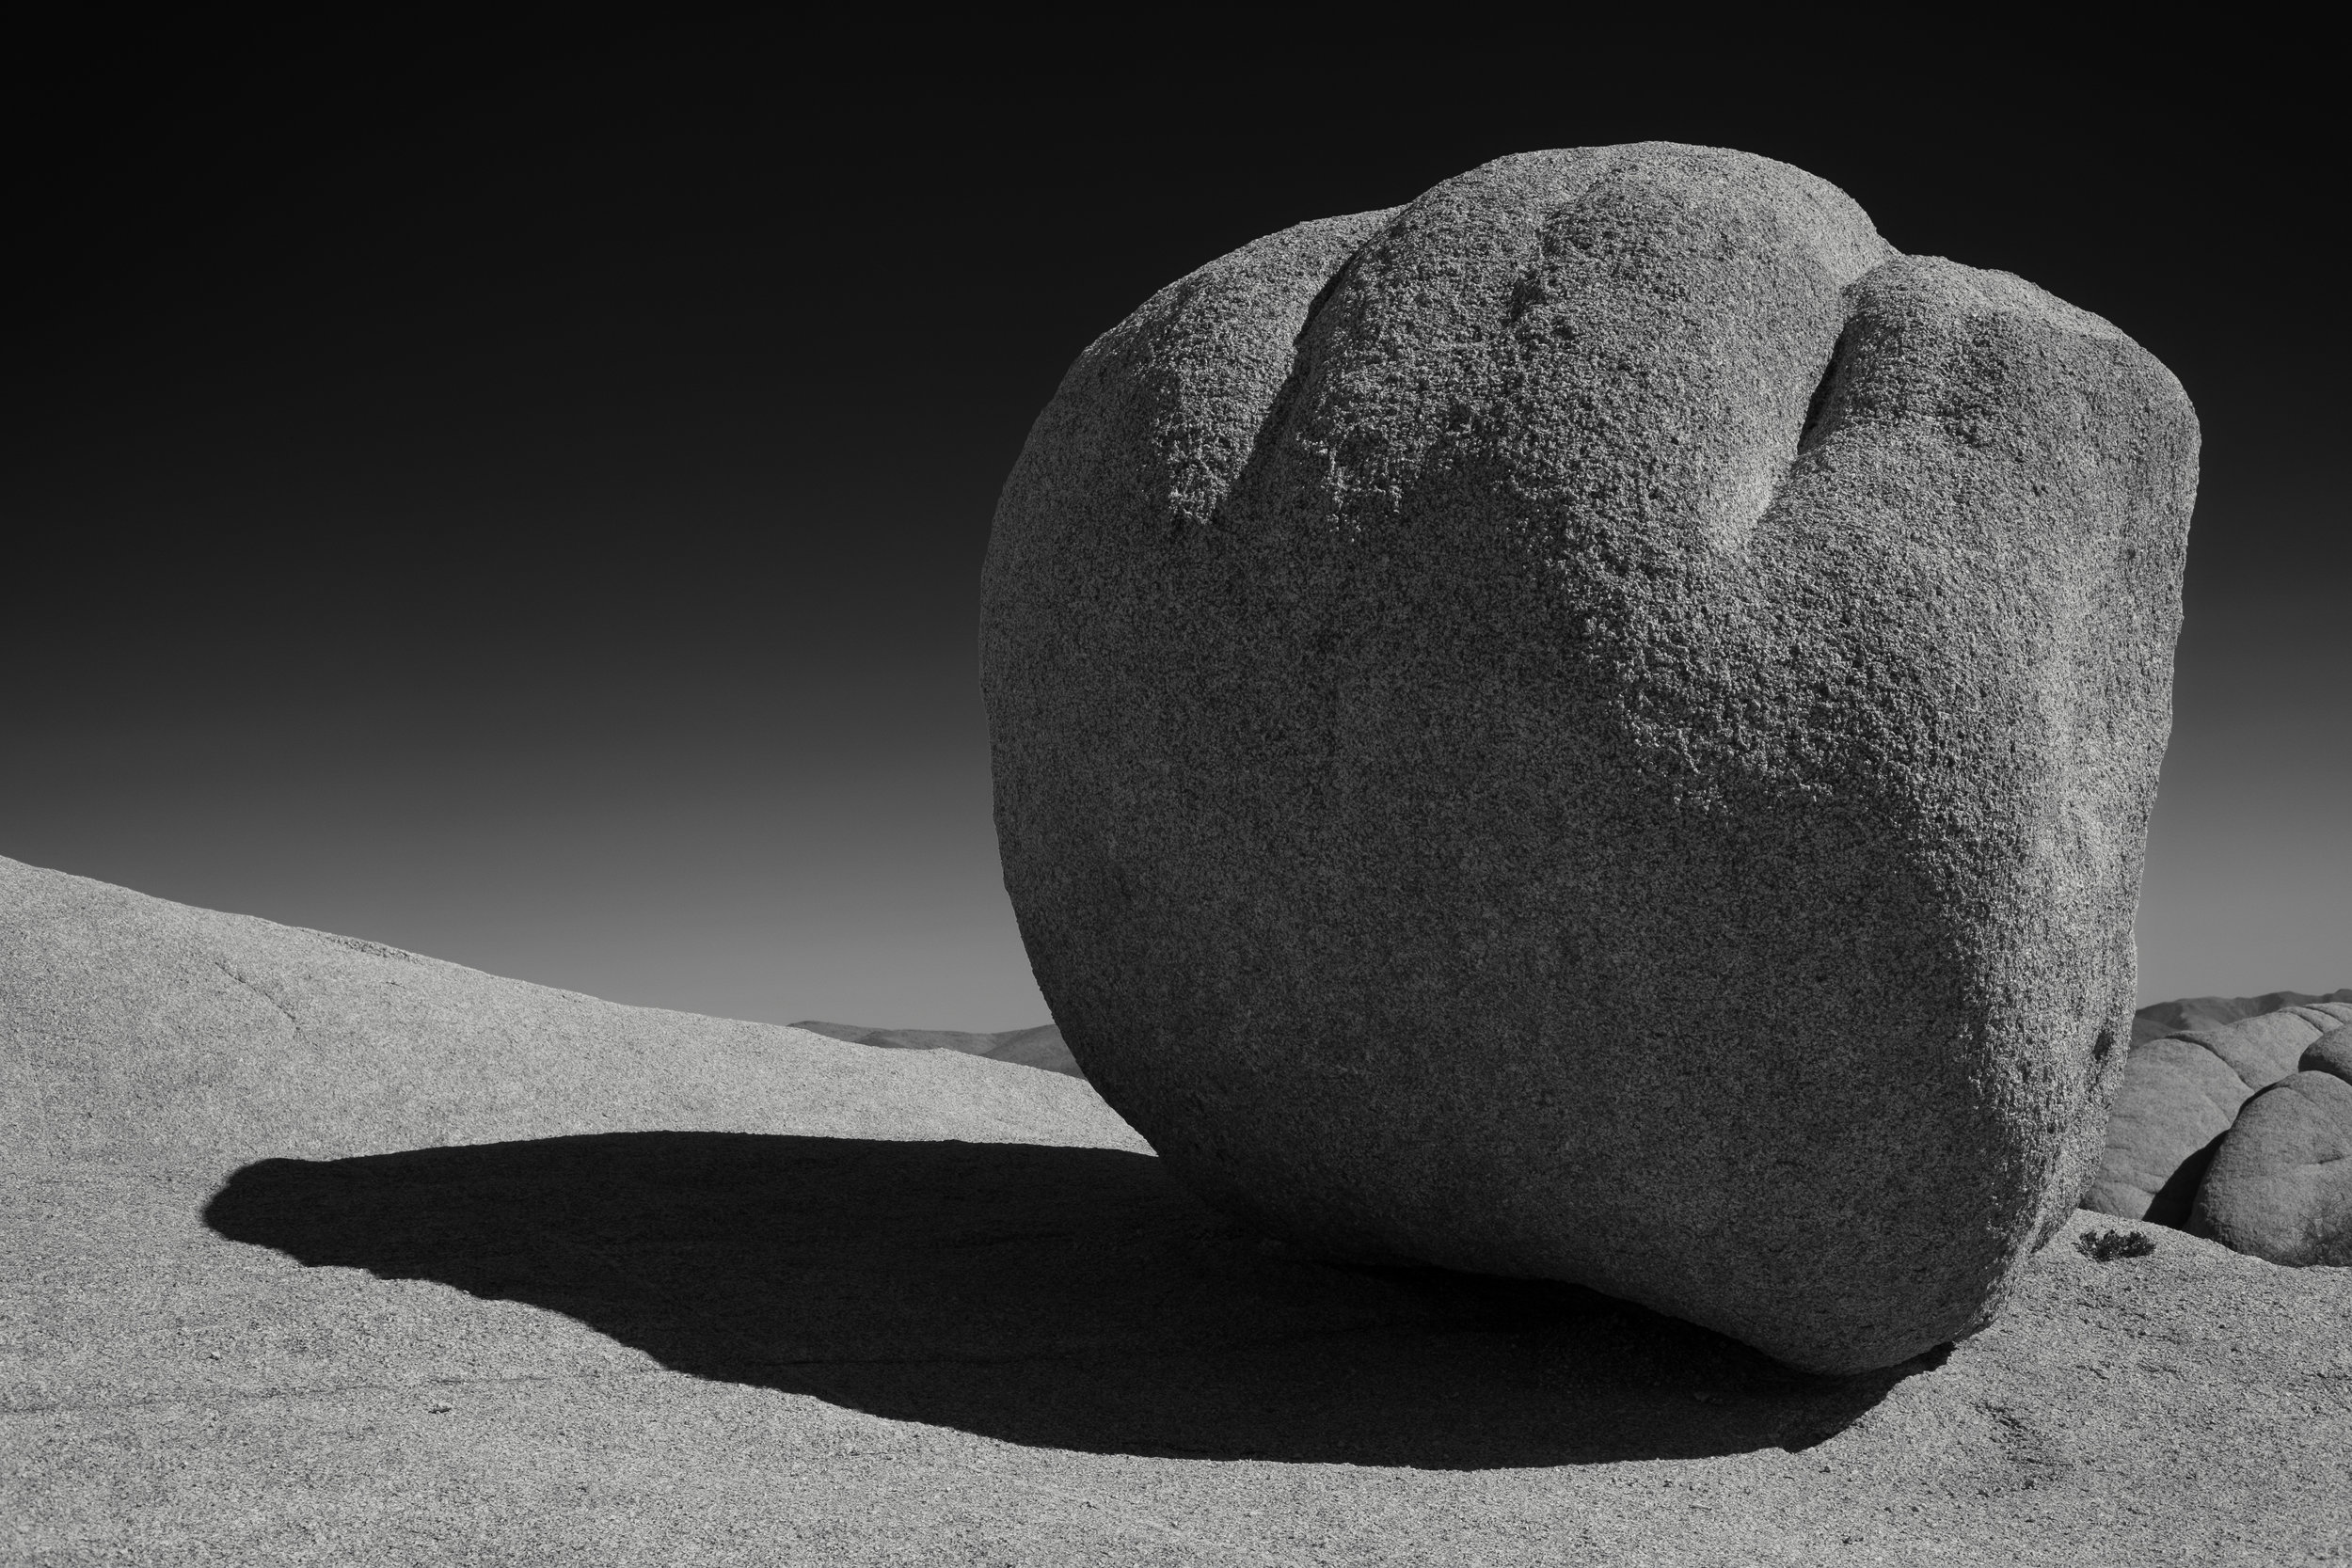
During the middle of the day I had a great time exploring a section of the national park called Jumbo Rocks. Lots of fun climbing around the granite rock formations in search of interesting shapes. I thought the light wrapping around this particular boulder which was balancing on an even bigger boulder made a nice composition. Choosing to convert to monochrome during post  processing helps to focus on that composition as does using a red filter, which turns the blue sky almost black. Fujifilm X-Pro2 with a Fujinon XF 35mm f2 R WR, 1/900 @ f8.0, ISO 200.

The strange thing is that I rarely feel this kind of anxiety when I'm on a paid assignment, like the one I just finished the day before. I feel pressure for sure, but somehow it's not the same. I've reflected on this before, this feeling that I have to get a remarkable image or somehow the trip was a waste.

Of course, the reality is that I normally come back from all of these trips with at least some photographs that I'm proud of. What I am certain of though is that I do return from these trips with memories of a great experience. Maybe that is more of the point.

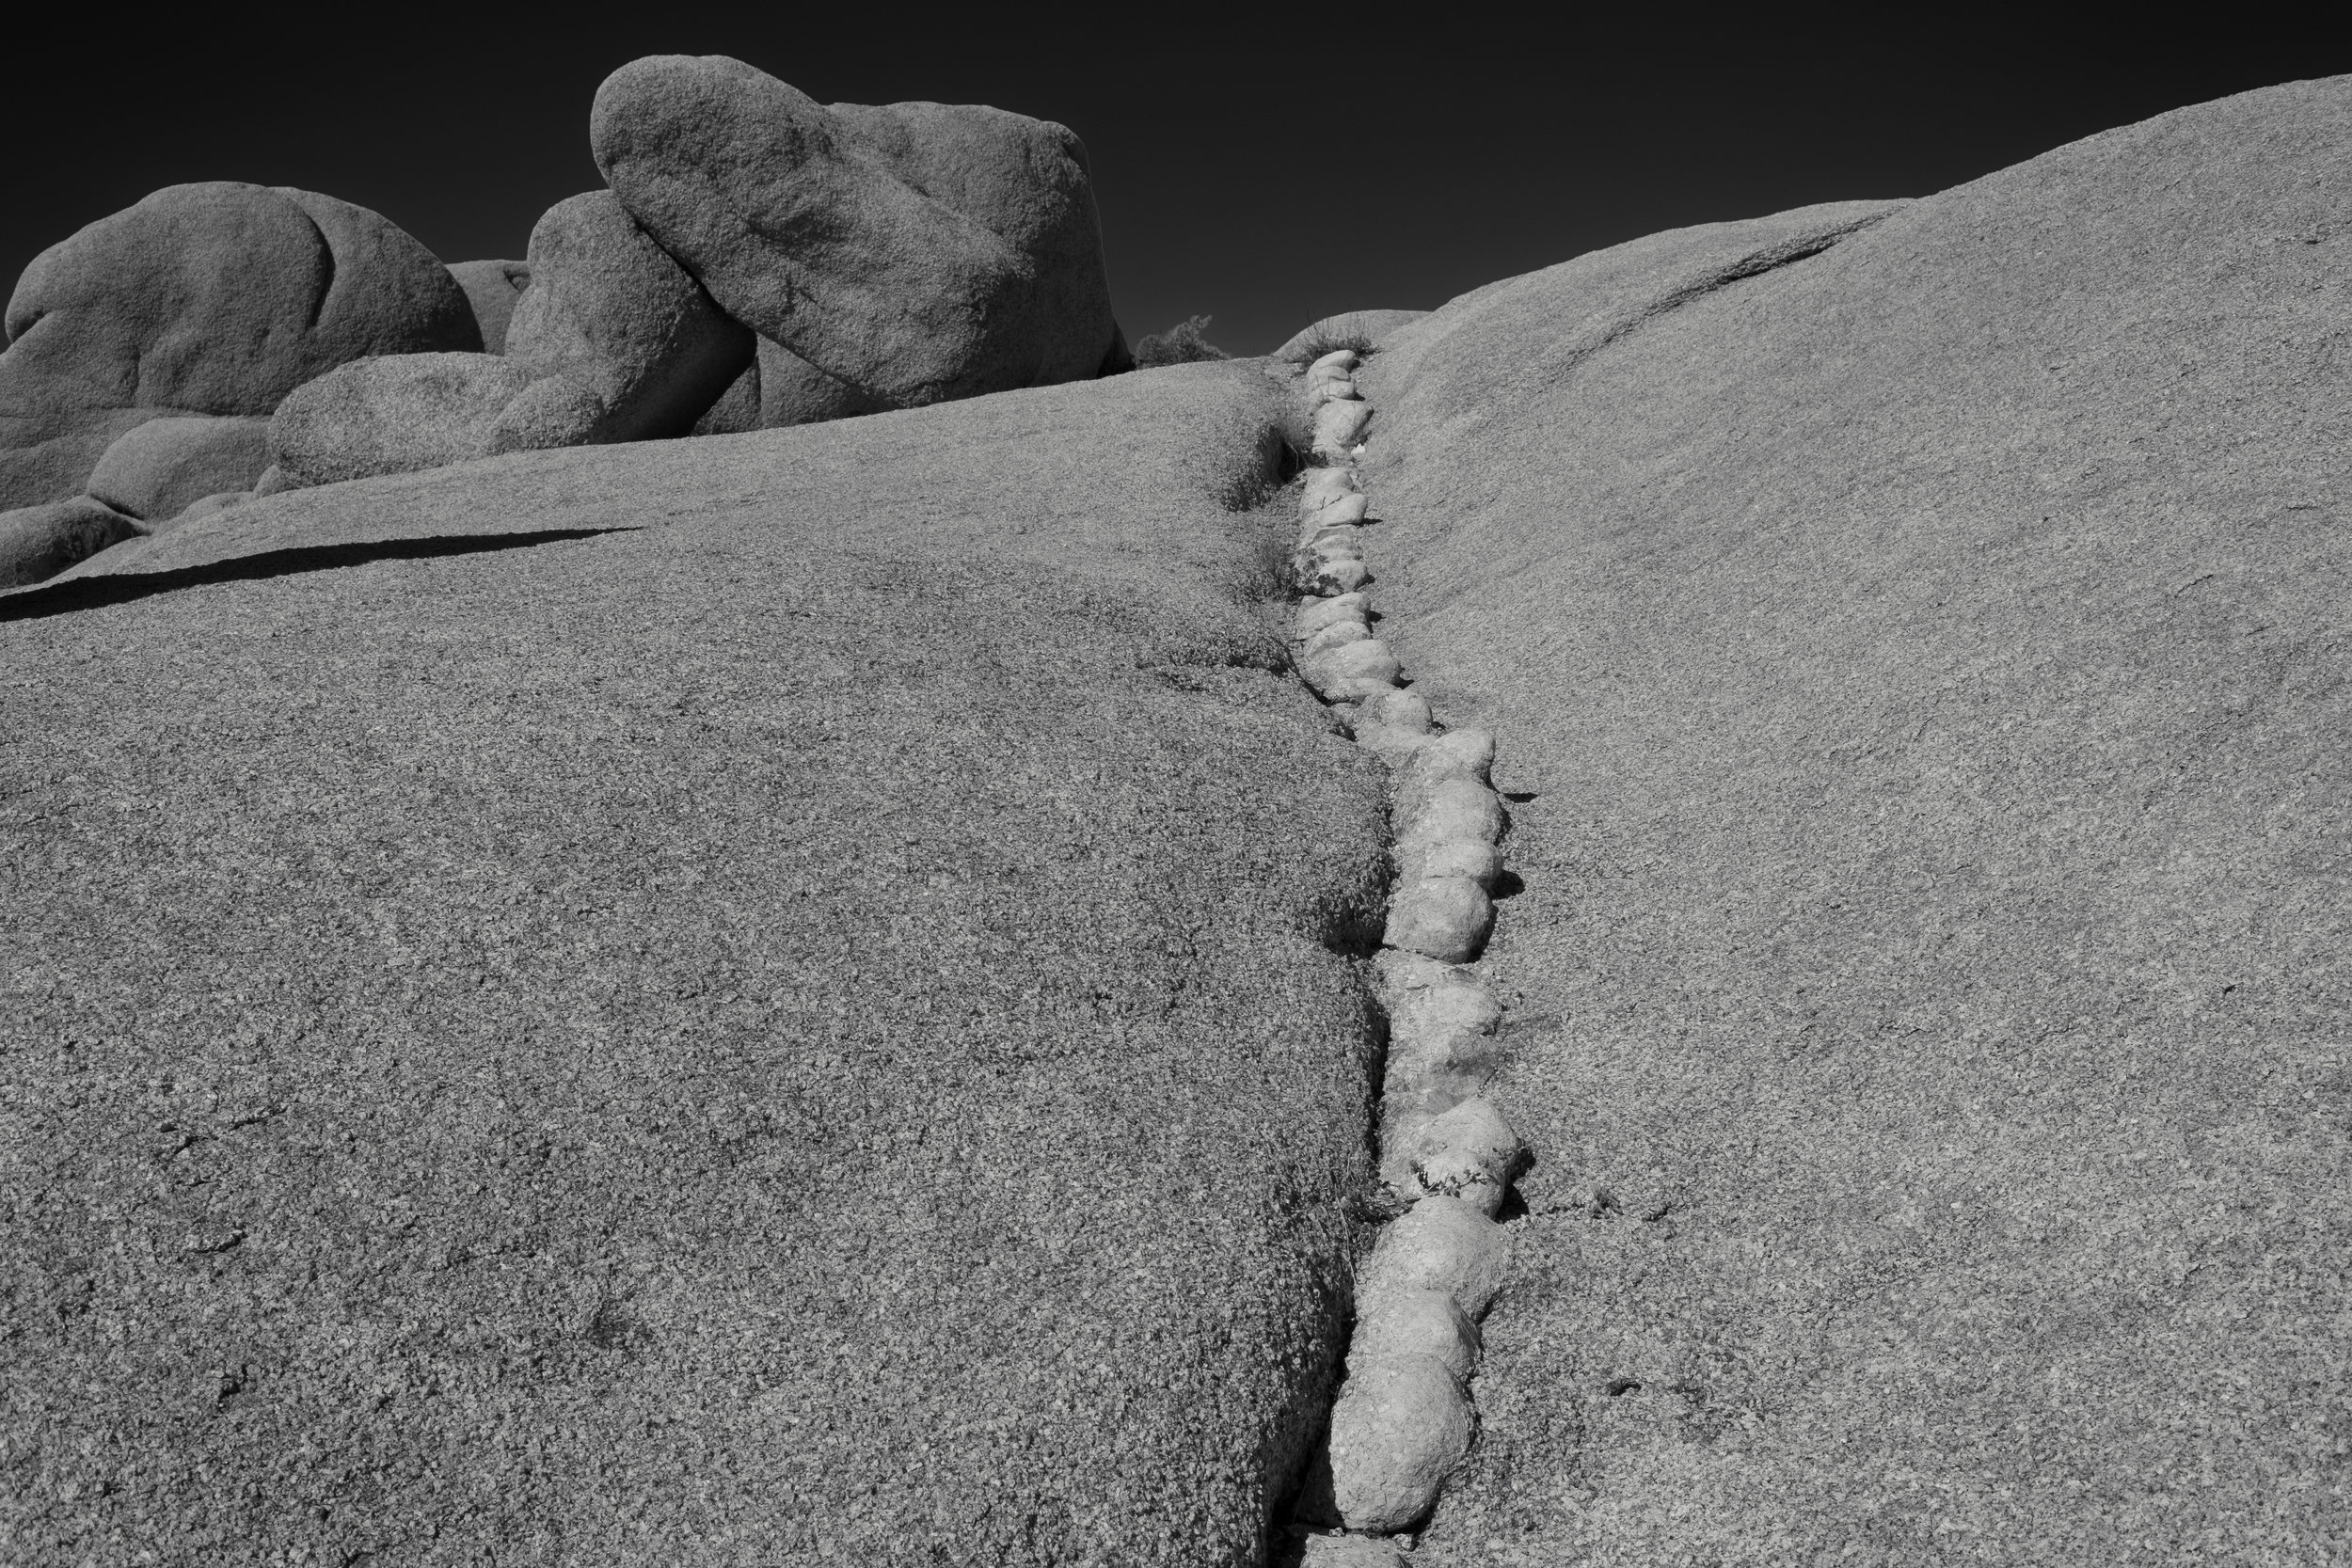
I kept noticing how these lines of a different type of rock  made their way through the giant granite formations. In this case, I used the line to lead the viewer into the photo. Fujifilm X-Pro2 with a Fujinon XF 35mm f2 R WR, 1/680 @ f11, ISO 200.

I'm fortunate that I get paid to take photographs. And I'm also fortunate that I get to travel in pursuit of those photographs. And when I can extend that trip in order to experience a new location with my camera, I try to take full advantage of it.

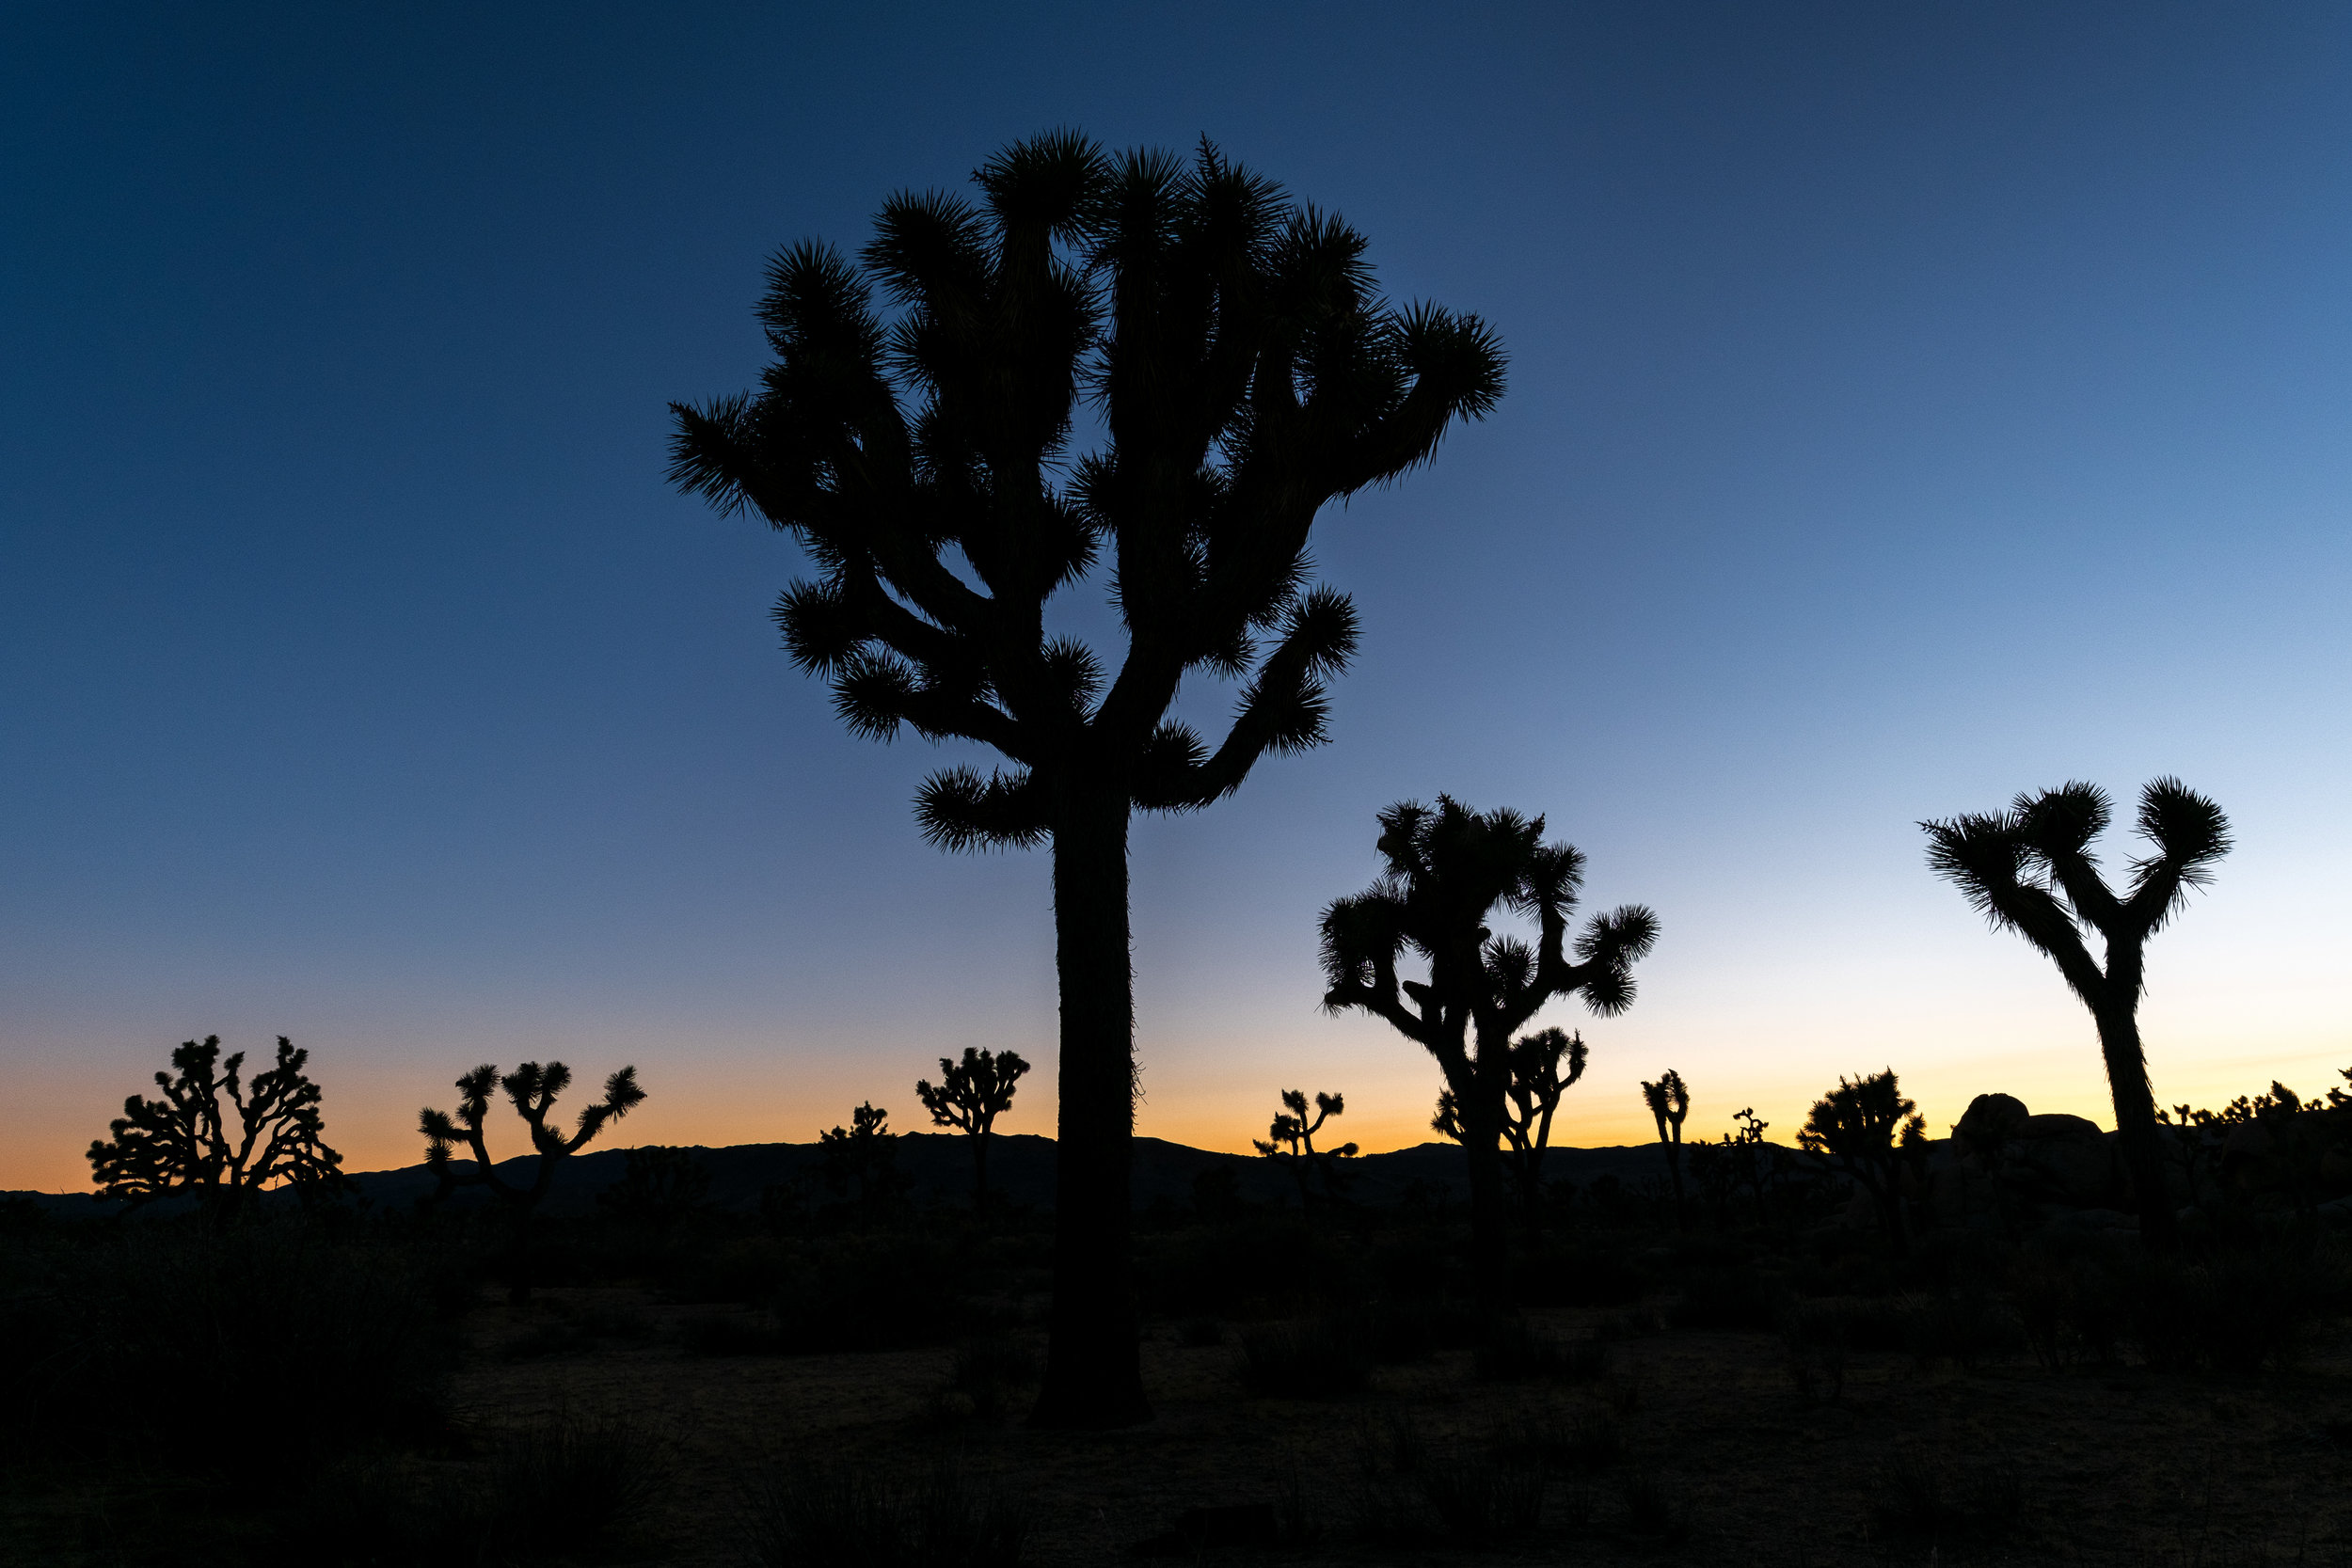
One of the best things about photographing during the winter months is that the sun sets early enough that there is still plenty of time for dinner. What is difficult, however, is with close to 800,000 acres of land, how do you find the perfect spot to photograph that sunset in Joshua Tree National Park. During my travels through the park earlier in the day, I found a section with a lot of trees, so I returned to that spot and after about 20 minutes of walking around as the sun dropped behind a distant mountain, I found a nice composition and made my final photo of the trip. Fujifilm X-Pro2 with a Fujinon XF 16mm f1.4 R WR, 1/60 @ f9.0, ISO 200.

Sometimes on these personal trips, I just need to remind myself to slow down, realize that there is not a deadline and that there is not an editor waiting for the results. These trips are about me and my camera and capturing memories. And sometimes when I miss that photo of a sunrise, I need to remind myself that I still had the experience and know that I'm fine with that.

AS SCENE FROM A TRAIN - FIVE TIPS FOR BETTER PHOTOGRAPHS

Photographing an urban scene like this one as the train left Central Station in Montreal offers a different viewpoint of the city. Fujifilm X100S, 1/200 @ f5.6, ISO 200.

Photographing an urban scene like this one as the train left Central Station in Montreal offers a different viewpoint of the city. Fujifilm X100S, 1/200 @ f5.6, ISO 200.

Traveling by train can be a wonderful experience, sitting comfortably and watching as the world passes by just outside your window. I suppose if you commute daily by train you might not see it as some wonderful experience, however, whether the train you are on is traveling through a beautiful countryside or the forgotten parts of a city, there is no reason why you shouldn't be able to take out your camera and make some amazing photographs.

We have all seen photographs out of airplane windows. Instagram anyone? Perhaps they are a bit cliche, although I actually don't mind them. Less often though do you see photos taken from a train and that's a shame. Maybe it is because more people fly, I don't know, but the opportunities to capture unique views from a train are endless. And many times it is not even possible to tell from the photograph that it was taken through a window while traveling upwards of 60 miles per hour.

Taking advantage of the stopped train while waiting to cross the border from Canada into the United States allowed me some extra time to compose this shot which would have been difficult with the train moving due to the strong back light. Fujifilm X…

Taking advantage of the stopped train while waiting to cross the border from Canada into the United States allowed me some extra time to compose this shot which would have been difficult with the train moving due to the strong back light. Fujifilm X100S,  1/950 @ f5.6, ISO 400.

So what do you photograph? Think about the difference between trains and cars, besides the fact that trains are on rails and cars are on the road, but what does that offer you visually. If you think about it, roads generally pass by the front of buildings and houses, whereas trains travel behind, which makes it possible to capture a unique perspective. If you are out west or up north, it can be about beautiful landscapes, but most trains travel through urban and industrial areas as well so you see the back side of the city or urban landscape. Take advantage of both and you will be surprised at what you capture.

Notice how the foreground is a blurred. I still think it adds some interest. Fujifilm X100S, 1/500 @ f5.6, ISO 200.

Notice how the foreground is a blurred. I still think it adds some interest. Fujifilm X100S, 1/500 @ f5.6, ISO 200.

Before you break out your camera on the next trip from Washington, D.C., to Philadelphia or beyond, let me offer some tips to help you start making beautiful images from the comfort of you train seat. And you barely have to put down your drink to do it.

Five Tips to make better photographs during your next train journey:

1. Pick a good seat. It might seem obvious, but you really should choose a window seat, otherwise, you better get to know the person you are sitting with very well. Somewhat joking, but there a few ways to ensure you will get a window seat and a good one at that. Use the red cap or a similar service even when you don't need assistance with your luggage because they will get you on the train before everyone else and that is well worth a few dollars. Boarding early also gives you the option to pick a seat with the cleanest, least scratched window. Finally, not all window seats are created equal, so make sure you get one that is more or less centered on a window.

I selected the left side of the Amtrak Adirondack train from New York to Montreal because I knew the Hudson River would be out my window during most of the trip. The ice was a bonus. Fujifilm X100S, 1/1250 @ f2.8, ISO 400.

I selected the left side of the Amtrak Adirondack train from New York to Montreal because I knew the Hudson River would be out my window during most of the trip. The ice was a bonus. Fujifilm X100S, 1/1250 @ f2.8, ISO 400.

2.Select the side of the train that will afford you the best views. If it is not a route you are familiar with, then a little research will go a long way. Google maps do show train tracks. Another consideration when selecting which side to sit will be the direction of light. Shooting into the sun can create some interesting photos, but remember that you are shooting through a window so the sun glare and reflection may not allow for photographs. Compare it to sun glare on a dirty windshield, it is the same thing.

Downtown Albany, New York, as the sun goes down. I like the empty parking lot and elevated shooting position. A view that would be difficult if not for riding on the train. Fujifilm X100S, 1/1250 @ f2.8, ISO 400.

Downtown Albany, New York, as the sun goes down. I like the empty parking lot and elevated shooting position. A view that would be difficult if not for riding on the train. Fujifilm X100S, 1/1250 @ f2.8, ISO 400.

3. Pay attention to your aperture. Selecting a wide aperture, f 2.0 - f 5.6, will limit the effects of shooting through the window, similar to shooting through a fence. If you have the time and can do it safely, clean the window from the outside prior to boarding. Of course, you should check with train personnel before you do this just to be on the safe side. But at a minimum, wipe the inside of the window. You don't have to shoot wide open though because you do want some depth of field, but too much and you will be spending a lot of time cloning out spots caused by dirt on the window.

4. Shutter speed matters. Objects close to the train will blur even at relatively fast shutter speeds. If you are shooting objects in the distance without a foreground then you can get away with a slower shutter speed even on a fast-moving train. If a fast shutter speed is not possible or you are just looking to get more creative, then slow the shutter speed way down and blur the scene as you pass by. Instead of you panning with the camera, let the train do it for you. Think about this technique to photograph trees during the Fall.

Photographing the backside of the city. The slightly burred train structure at the right adds just enough context to let the viewer know that this photo is taken from a train. I like the industrial look and hints of color in this image. It can be ha…

Photographing the backside of the city. The slightly burred train structure at the right adds just enough context to let the viewer know that this photo is taken from a train. I like the industrial look and hints of color in this image. It can be hard to frame a shot while the train is traveling at 60 m.p.h. so take plenty of shots.  Fujifilm X100S, 1/160 @ f5.6, ISO 200.

5. Always be prepared to shoot and when possible try to anticipate what's coming up. Even when you are very familiar with the route, the view outside will pass by quickly so you need to keep your camera ready and as close to the window, without touching it, as possible. This might be a good time to mention that a wide angle lens works best, especially in a changing landscape. Fast moving trains make framing and shooting with long glass difficult. If the train is moving slowly or you are traveling the great plains, then this may not be a problem.

Take the time to shoot lots of pictures on your next rail journey and let the results surprise you and your friends. Besides, there is much more to see from a train window than from a plane window.

Check out Amtrak train routes and start planning your adventure today.

PHOTOGRAPHY IS A PAIN

Think Tank roller with pouches for use once on location.
Photography is a pain – pain in the shoulder and back that is. When I started in this profession I carried my gear in an over-the-shoulder Domke bag. And at the time I also carried all the gear I owned to every job. So it was simple, when I obtained more gear, I purchased a larger bag, the Domke Little Bit Bigger Bag to be specific.

So in my case, like many photographers, all the years of carrying gear over my right shoulder has led to shoulder pain. Nothing severe, just enough to be noticeable. So over time I've come up with a few techniques and tips to avoid this pain and hopefully if you're just starting out, allow you to avoid it in the future.

And it all starts by getting that gear off of your shoulder. Below I offer five tips.

1. Use a roller bag like the Think Tank Airport series or roller case such as the Pelican Case to get your gear to and from the assignment. It allows you carry maximum gear without putting any strain on your body.

2. Tip one gets the gear to the location, but then what? I'm a fan of the Think Tank Modular system which allows you to then use accessory packs to carry and organize your gear once there. You can load up that large roller bag or Pelican Case, then easily customize later. The belt and pouch system distributes the weight evenly on your hips and if you add a harness, you won't even notice that you are carrying camera equipment.

3. Change your traditional camera straps to something like the BlackRapid line of products. These across the chest camera slings do not put as much pressure on a given shoulder. Plus they have the added benefit of not allowing the camera to slip off your shoulder. Once you get use to it you almost forget about the camera hanging at your side.


4. Match gear to the assignment given. In previous blog posts I've talked about traveling light, with minimum gear. It is a hard habit to break and you will spend lots of time second guessing yourself, but if you really take a look at what gets used and what never leaves your pack, you can start to hone your packing.

5. I suppose I would be remiss if I didn't mention diet and exercise to strengthen your shoulder or back. We all know what is right, but let's face it, even if I was practicing good healthy practices 30 years ago, I'm pretty sure I'd still have some of the same issues as I close in on 50. Just be practical and remember that the body does start to wear out, so why speed the process by lugging too much when you're young.

So slow down, pack right, really think through what gear you bring and be sure to take care of your body. And get out there and shoot.

AS A STAFF PHOTOGRAPHER IS TRAVEL NECESSARY?

Friday, August 24, 2012, edition of the Wall Street Journal.

I'm sometimes challenged on why I need to travel in order to cover an assignment when a local photographer might be available. Wouldn't it be less expensive? The answer is not always. How would my coverage be different? Read on.

Don't get me wrong, sometimes it doesn't make sense for me to travel to an assignment, and in those cases I'm the first to admit that it may be best to see if a local asset is available. Or it might even make sense to hand a point-and-shoot camera to the writer or exhibit coordinator who is already attending the event.

I also don't take it personally. However, if you have a professional photographer on staff and you don't use them, are you really saving money? Will the images be used beyond Facebook or internal publications? Is there national media interest or will there even be something to photograph? These questions need to be asked.

As an example, I was looking through the Friday, August 24th edition of the Wall Street Journal and immediately recognized one of my images. It was a photo of the Combat Tactical Vehicle technology demonstrator that I took during an assignment at the Nevada Automotive Test Center in Carson City, Nev., in 2008. It was being used to illustrate an article about companies competing to build a successor to the Humvee.

The combat tactical vehicle as it appeared in the Wall Street Journal.

How does this relate to the theme of this blog? When I travel on assignment for my employer, everything I do, from the way I approach the assignment, caption the photographs or edit the video, is designed to tell their story. This isn't the first time that photos taken during one assignment and for one purpose were used time and time again, often for completely different reasons. The key to this happening is that the photos were professionally taken along with a detailed caption containing enough key words that the photo can be found while doing a search, especially on a broad range of topics. That is best accomplished by a staff photographer.

As a staff photographer, from the time I receive the assignment and begin my research, I know the story, why it is important to my client and who the key players are. That all translates into how I market the image which makes a huge difference down the road.

In the end, a staff photographer is always going to have your best interests in mind and not be distracted  by other things going on around them. So when asked if I need to travel, I respond that you can't afford not to send me.

Another key that I will write about in the future is to have an approved travel budget and the ability to demonstrate what your employer is getting out of that budget.