NEW YEAR'S DAY PHOTO FAIL

2014 Mummers Parade
"Oh, Dem Golden Slippers" is both a signature song and signature footwear worn by Mummers during the annual parade held on New Year's Day in Philadelphia.
There are days when you just don't have it. Even with the best intentions you head out with your camera and... nothing. All photographers face this and most of the time you just chalk it up to experience and move on.

Then there are those days when you are shooting and think to yourself that you are nailing it only to discover later that not only didn't you nail the shot, but you didn't really nail ANY shots. That is true disappointment and the place I found myself on New Year's Day.

It was with great excitement that on January 1st, 2014, I headed to Center City Philadelphia to photograph the 114th Mummers Parade. I've had a lot of fun in the second half of 2013 shooting with my Fujifilm X100S and photographing the Mummers was going to be a continuation of this and a great start to 2014, or so I thought.
Goodtime Lobster Club
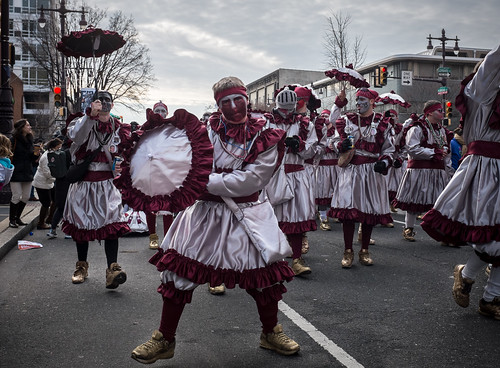
In this photo of the Goodtime Lobster Club I came close to capturing the Mummer Strut that is a staple of the Comics divisions.
Just some quick background on the Mummers for those of you who haven't had the pleasure. Some compare the Mummers Parade to Mardi Gras in New Orleans, but that really doesn't do it justice or tell the whole story, in fact the parade itself predates Mardi Gras becoming official in 1900, but traces its roots back to the mid-17th century and is believed to be the oldest "folk" festival in the country. It is a party to be sure, but participants spend all year preparing props and costumes in order to welcome in the new year.
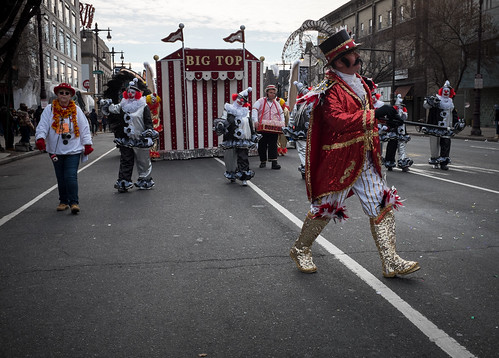
Fralinger String Band and the Circus Comes to Clown.
I photographed the Fralinger String Band as I worked my way along the parade route. Away from the performance areas you are not limited to shooting from the sidewalk and can venture into the street.
The parade consists of local clubs competing in one of four categories; comics (including wench brigades), fancies and probably the most well known, string bands and fancy brigades whose elaborate props and costumes can cost upwards of $10,000.

And even though I lived in and around Philadelphia my entire life, this was the first Mummers Parade I attended. I've watched on TV and thought about going in the past, but this year I was going to make it happen and I was determined to get some great photos.
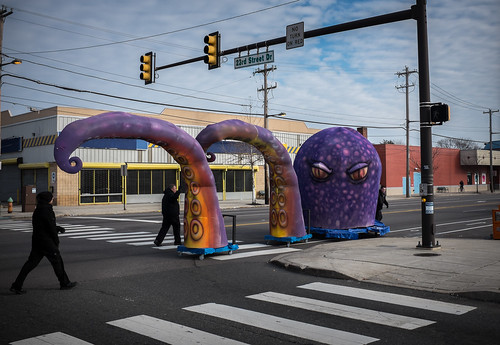
Members of the South Philly String Band move props up Oregon Ave.
Members of the South Philly String Band move props up Oregon Ave. These were the first photos I took during the day and thought I was off to a good start. I was close to getting the right shot, but just seemed to be a bit off.
I thought I was off to a great start as I was driving downtown and upon exiting at Passyunk Avenue I saw Mummers wheeling props down Oregon Ave, still hours away from when they would march up Broad Street. So I quickly drove ahead and found parking. I shot from two different locations as the South Philly String Band wheeled their props, including parts of a pirate ship and a giant octopus, down the street to the start of the parade. This was going to be a fun day I thought to myself.
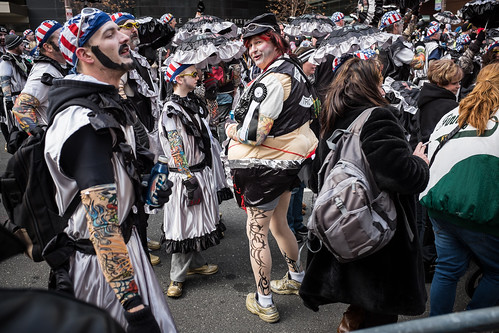
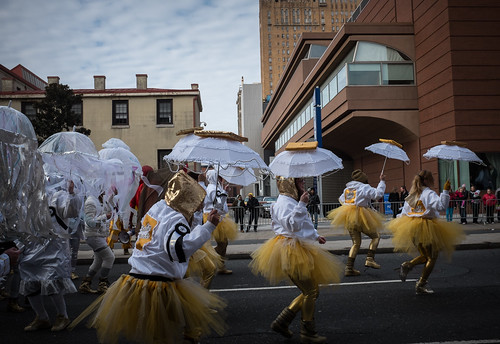
This photo of Finnegan's NYB captures an individual, but fails to capture the excitement of the entire group.
I found parking as close to Broad Street as I could and headed off. The parade essentially takes place on a one and half mile route between Washington Avenue and City Hall, on a section of Broad Street known as the Avenue of the Arts. In that span there are several locations that are designated as performance areas and while they can get a little crowded, most of the stretch offers plenty of chances to get up close and personnel. My goal was to capture moments that didn't necessarily involve the performances so I roamed up and down Broad Street shooting from both sides of the street and in some cases from in the street.

I searched and scanned for interesting characters, faces, antics, anything that would convey the feeling of Mummery.

Froggy Carr Wench Brigade perform "Frogs Under the Sea."
In this photo of the Froggy Carr Wench Brigade performing "Frogs Under the Sea" I captured the color but failed to really capture any movement or celebration.
So all this pageantry of color, movement, celebration, costumes and unique characters, was all taking place in front of my camera and I was clicking away sure that I was capturing some really cool images. Yet for some reason what I was seeing with my eyes and what I was capturing just didn't add up. Sometimes I seemed a second off, sometimes I needed to be wider or tighter and sometimes I just missed the key moment all together.

That would have been fine if I had realized it at the time and made the adjustments. Not a huge deal because I was shooting for myself and not on assignment. For a professional photographer on assignment, even if you don't have it, you better find it quick, because if you return too often without it, then you will find yourself looking for another job. On this day even if I didn't get the one shot I was looking for, I did get some photos that may not be as bad as I first thought, and probably most important, I had a wonderful time.
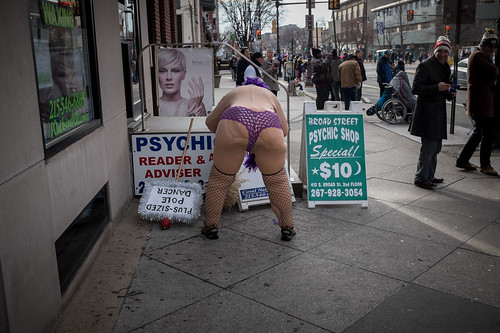
Mummers Parade
I was prepared to capture more of this type of behind the parade scenes but ended up focusing more on the parade itself and in the end maybe didn't focus on anything.
I've already been out shooting again and I have several assignments this week to redeem myself and get 2014 off to the proper photographic start, but my thoughts are already on Jan. 1, 2015, and the 115th Mummers Parade.

Not that I'm in a hurry.

AS SCENE FROM A TRAIN - FIVE TIPS FOR BETTER PHOTOGRAPHS

Photographing an urban scene like this one as the train left Central Station in Montreal offers a different viewpoint of the city. Fujifilm X100S, 1/200 @ f5.6, ISO 200.

Photographing an urban scene like this one as the train left Central Station in Montreal offers a different viewpoint of the city. Fujifilm X100S, 1/200 @ f5.6, ISO 200.

Traveling by train can be a wonderful experience, sitting comfortably and watching as the world passes by just outside your window. I suppose if you commute daily by train you might not see it as some wonderful experience, however, whether the train you are on is traveling through a beautiful countryside or the forgotten parts of a city, there is no reason why you shouldn't be able to take out your camera and make some amazing photographs.

We have all seen photographs out of airplane windows. Instagram anyone? Perhaps they are a bit cliche, although I actually don't mind them. Less often though do you see photos taken from a train and that's a shame. Maybe it is because more people fly, I don't know, but the opportunities to capture unique views from a train are endless. And many times it is not even possible to tell from the photograph that it was taken through a window while traveling upwards of 60 miles per hour.

Taking advantage of the stopped train while waiting to cross the border from Canada into the United States allowed me some extra time to compose this shot which would have been difficult with the train moving due to the strong back light. Fujifilm X…

Taking advantage of the stopped train while waiting to cross the border from Canada into the United States allowed me some extra time to compose this shot which would have been difficult with the train moving due to the strong back light. Fujifilm X100S,  1/950 @ f5.6, ISO 400.

So what do you photograph? Think about the difference between trains and cars, besides the fact that trains are on rails and cars are on the road, but what does that offer you visually. If you think about it, roads generally pass by the front of buildings and houses, whereas trains travel behind, which makes it possible to capture a unique perspective. If you are out west or up north, it can be about beautiful landscapes, but most trains travel through urban and industrial areas as well so you see the back side of the city or urban landscape. Take advantage of both and you will be surprised at what you capture.

Notice how the foreground is a blurred. I still think it adds some interest. Fujifilm X100S, 1/500 @ f5.6, ISO 200.

Notice how the foreground is a blurred. I still think it adds some interest. Fujifilm X100S, 1/500 @ f5.6, ISO 200.

Before you break out your camera on the next trip from Washington, D.C., to Philadelphia or beyond, let me offer some tips to help you start making beautiful images from the comfort of you train seat. And you barely have to put down your drink to do it.

Five Tips to make better photographs during your next train journey:

1. Pick a good seat. It might seem obvious, but you really should choose a window seat, otherwise, you better get to know the person you are sitting with very well. Somewhat joking, but there a few ways to ensure you will get a window seat and a good one at that. Use the red cap or a similar service even when you don't need assistance with your luggage because they will get you on the train before everyone else and that is well worth a few dollars. Boarding early also gives you the option to pick a seat with the cleanest, least scratched window. Finally, not all window seats are created equal, so make sure you get one that is more or less centered on a window.

I selected the left side of the Amtrak Adirondack train from New York to Montreal because I knew the Hudson River would be out my window during most of the trip. The ice was a bonus. Fujifilm X100S, 1/1250 @ f2.8, ISO 400.

I selected the left side of the Amtrak Adirondack train from New York to Montreal because I knew the Hudson River would be out my window during most of the trip. The ice was a bonus. Fujifilm X100S, 1/1250 @ f2.8, ISO 400.

2.Select the side of the train that will afford you the best views. If it is not a route you are familiar with, then a little research will go a long way. Google maps do show train tracks. Another consideration when selecting which side to sit will be the direction of light. Shooting into the sun can create some interesting photos, but remember that you are shooting through a window so the sun glare and reflection may not allow for photographs. Compare it to sun glare on a dirty windshield, it is the same thing.

Downtown Albany, New York, as the sun goes down. I like the empty parking lot and elevated shooting position. A view that would be difficult if not for riding on the train. Fujifilm X100S, 1/1250 @ f2.8, ISO 400.

Downtown Albany, New York, as the sun goes down. I like the empty parking lot and elevated shooting position. A view that would be difficult if not for riding on the train. Fujifilm X100S, 1/1250 @ f2.8, ISO 400.

3. Pay attention to your aperture. Selecting a wide aperture, f 2.0 - f 5.6, will limit the effects of shooting through the window, similar to shooting through a fence. If you have the time and can do it safely, clean the window from the outside prior to boarding. Of course, you should check with train personnel before you do this just to be on the safe side. But at a minimum, wipe the inside of the window. You don't have to shoot wide open though because you do want some depth of field, but too much and you will be spending a lot of time cloning out spots caused by dirt on the window.

4. Shutter speed matters. Objects close to the train will blur even at relatively fast shutter speeds. If you are shooting objects in the distance without a foreground then you can get away with a slower shutter speed even on a fast-moving train. If a fast shutter speed is not possible or you are just looking to get more creative, then slow the shutter speed way down and blur the scene as you pass by. Instead of you panning with the camera, let the train do it for you. Think about this technique to photograph trees during the Fall.

Photographing the backside of the city. The slightly burred train structure at the right adds just enough context to let the viewer know that this photo is taken from a train. I like the industrial look and hints of color in this image. It can be ha…

Photographing the backside of the city. The slightly burred train structure at the right adds just enough context to let the viewer know that this photo is taken from a train. I like the industrial look and hints of color in this image. It can be hard to frame a shot while the train is traveling at 60 m.p.h. so take plenty of shots.  Fujifilm X100S, 1/160 @ f5.6, ISO 200.

5. Always be prepared to shoot and when possible try to anticipate what's coming up. Even when you are very familiar with the route, the view outside will pass by quickly so you need to keep your camera ready and as close to the window, without touching it, as possible. This might be a good time to mention that a wide angle lens works best, especially in a changing landscape. Fast moving trains make framing and shooting with long glass difficult. If the train is moving slowly or you are traveling the great plains, then this may not be a problem.

Take the time to shoot lots of pictures on your next rail journey and let the results surprise you and your friends. Besides, there is much more to see from a train window than from a plane window.

Check out Amtrak train routes and start planning your adventure today.

PHOTOGRAPHY GEAR - THE STOCKING STUFFER VERSION

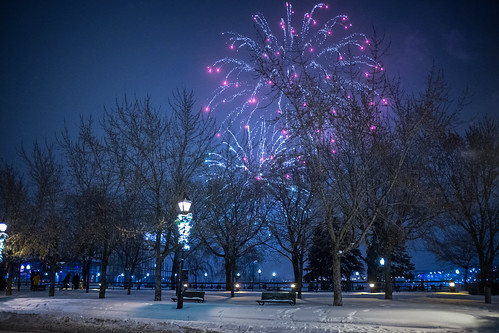
Fireworks in Montreal, Canada, just before Christmas.
Montreal, Canada, December 22, 2013.
A few low-cost stocking stuffers just in time for Christmas. And I mean just in time.

If there is a photographer on your gift list or maybe you just feel like treating yourself, then I offer a few suggestions below. Most of these items are under $50.00 and even if you or the lucky person you are buying them for already owns a few of them, adding another will not be seen as a mistake. Like all my other gear recommendations on this blog, I own and use all these items.
Frio universal locking cold shoes

Having a few $13.99 Frio universal locking cold shoes around will allow you to couple your strobes to light stands. Forget one of these and you better have some $16.99 gaffers tape handy.

Manfrotto swivel lite-tite umbrella adaptor

Attaching your strobes to a light stand is one thing, but without a $34.19 Manfrotto swivel lite-tite umbrella adapter you won't be able to aim them correctly. And this also allows you to use an umbrella. Again without this you'll be back to using gaffers tape.

Think Tank double-sided non-slip camera strap

There are all kinds of camera straps out there from something you picked up while on vacation to Disney World, to some fancy overpriced leather model. For me personally, when it comes to a camera strap I prefer something simple like a $26.95 Think Tank double-sided non-slip strap.
Two versions of the clamps are shown, with and without the flash shoe.
I've talked about the $61.18 Manfrotto spring clamp with flash shoe, better known as the Justin Clamp,before. When you need to position a second strobe and a light stand is just not going to work, this clamp will get you out of a jam all day long.

Lastolite mini trigrip

I own quite a few reflectors and am well aware that a cheap piece of foam core will do the trick, but if you are a one-person operation, the $49.88 Lastolite 18-Inch mini TriGrip  allows you to easily position the reflector with one hand while holding a camera with the other. Also, if you happen to have an assistant, they will easily be able to hold this in one hand while positioning a strobe they are holding in the other hand behind it giving you some very nice diffused light.
Think Tank cable management 10 bag.


In my opinion you can't have enough bags and while backpacks and other camera bags are quite expensive, satisfy your need to get more organized with something like a $17.75 Think Tank cable management 10 clear plastic pouch. I use this pouch to hold the charger, cables and spare cards for my Fuji X100S. Maybe getting better organized is on your New Years resolution short list?

Think Tank red whips


And finally, if you think the above items are too expensive, you can't go wrong with a pack of ten Think Tank red whips at $7.99. You will be the envy of all the other photographers with tangled cables.

If you've read this far then I thank you for indulging me while I recommend some products via the Amazon associate program. I don't write this blog for profit, but the few dollars I mange to earn a month does provide me some satisfaction.

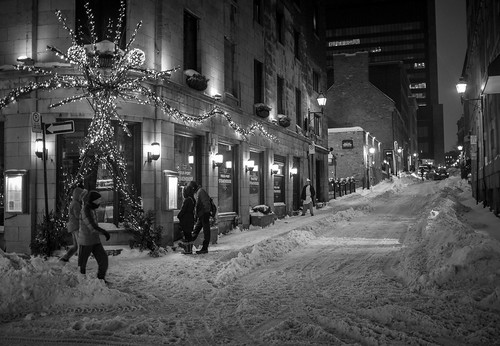
Street scene in Montreal Canada.
You don't want to be out in this weather shopping, do you?
I hope you all had a great year in photography and I wish you the best in the New Year.

Thank you again for visiting blog.jfwphoto.com in 2013 and remember to get out there and shoot!

MEMORIAL DAY - A PERFECT DAY FOR A PHOTO WALK IN DC

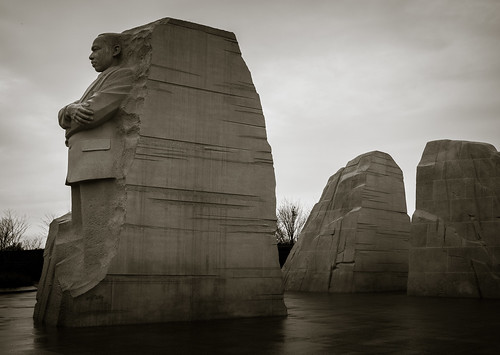
The Martin Luther King, Jr. Memorial is the newest addition to the National Mall in Washington, D.C.
I know it is not the final Monday in May. This is memorial day with a small "m."

It started as a government snow day and it doesn't take much in the Washington, D.C., area for the government to shutdown due to weather, or even the threat of weather.

On these days the temptation is to stay inside, pour a second cup of coffee and just spend the day relaxing. Of course the other option is to grab a camera and take advantage of the weather and day off to get some unique shots. On this day, and after a text from a friend reminding me I should be out shooting, I decided to head downtown.

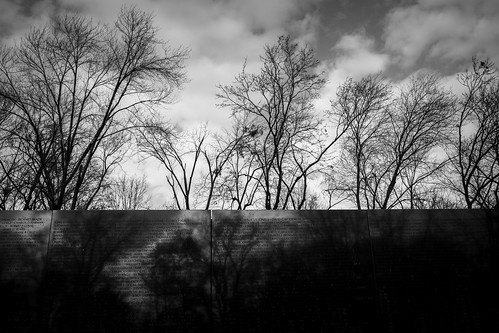
The Vietnam Veterans Memorial was the final stop and by this time the sun started to come out and made for some interesting reflections in the still wet stone.
In the absence of a specific assignment, I like to pick a theme prior to heading out on a shoot. It doesn't mean I have to stick with the theme, but I find that it is helps to focus, otherwise I just walk around aimlessly with my camera and end up disappointed at the end of the day. So the natural theme I self assigned myself was to capture Washington, D.C., under a blanket of snow.

Now remember when I said earlier in this post that it doesn't take much for the government to shut down. Well this was the case and as I exited the metro at Foggy Bottom it was apparent that my theme was already melting away. There was NO snow.

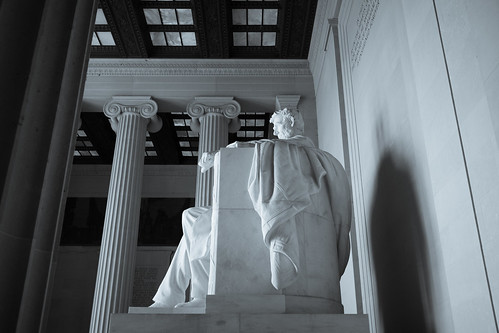
The Lincoln Memorial was a good starting point.
With that idea out I decided to just start walking in the direction of the Lincoln Memorial and see what I could see and before I realized it, I found myself walking from memorial to memorial and it hit me, or more specifically a new theme came to light; memorial day. Not the most original theme of course, but if you are in Washington, D.C., you really are in the perfect place for this kind of photo walk.

Map shows the route I took to capture memorial photos in Washington, D.C.
The route I took from the Lincoln Memorial to the Vietnam Veterans Memorial.
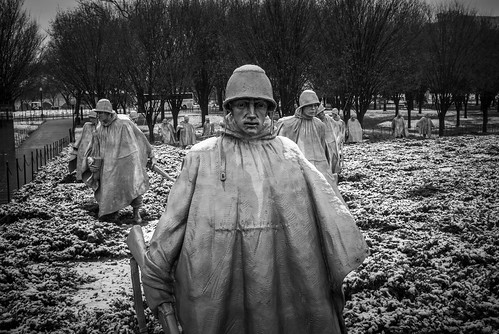
I started at the Lincoln Memorial (A) and made a counter clockwise loop ending at the Vietnam Veterans Memorial (E). Along the way I stopped at the Korean War Memorial (B), Martin Luther King, Jr Memorial (C) and the World War II Memorial (D).

Snow was the most apparent at the Korean War Memorial and somehow the most appropriate.
There were very few people around and while I usually try and include people in my photographs, this day I concentrated more on the memorials themselves. I carried only my Fuji X100S and shot in black and white mode all day.

Even though there was no snow, or very little snow on the ground, everything was wet which made for some great reflections. Also as the day wore on, the sky cleared up and provided some nice light and cloud formations.

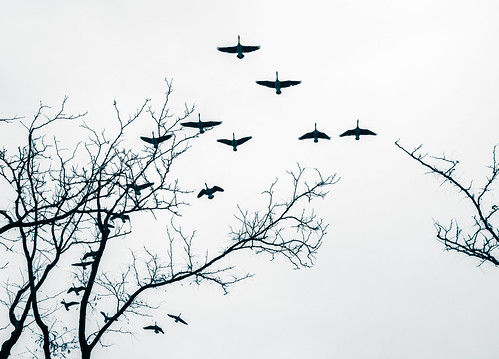
Just because the theme for the walk was memorial day, it doesn't mean other things won't catch your eye along the way.
Give yourself an assignment or pick a theme to get started and get out there and shoot. Don't wait for a rainy day. But if it is raining, or snowing, all the better.

WHEN OPPORTUNITY KNOCKS, SHOOT - PHOTOGRAPHING THE SECOND AVENUE SUBWAY

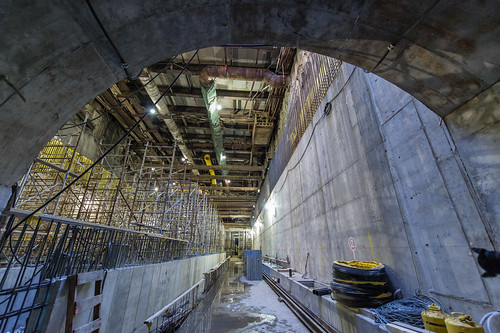
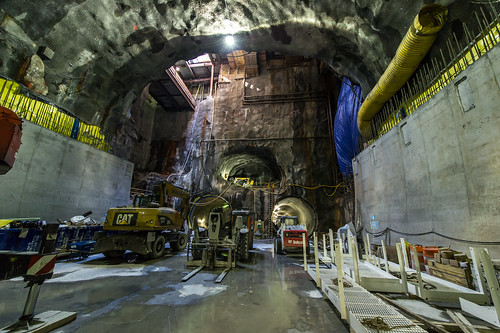
Future 86th Street Station is part of the Second Avenue Subway project.
The future 86th Street Station is part of the Second Avenue Subway project in New York City.
As a photographer for the Office of Naval Research I often have the opportunity to photograph some pretty cool things. Most of the time it comes down to access. If you think about it, as photographers we are often provided access not available to the general public, so when an opportunity arises to photograph something unique, we take advantage of it.

And sometimes opportunities arise because we know the right person. That was the case recently when I had the chance to photograph the Second Avenue Subway Project currently under construction in New York City.

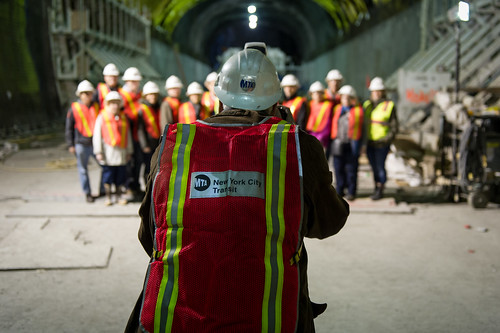
Patrick Cashin, a photographer with the MTA, takes a group photo of neighborhood residents affected by the construction during a tour of the project.
A group photo of neighborhood residents affected by the construction is taken as part of their tour.
My good friend Patrick Cashin, Navy and Air National Guard veteran, is a photographer with the Metropolitan Transportation Authority and is responsible for documenting all aspects of the New York transit system. Part of that documentation includes major construction projects and his recent work photographing the Second Avenue Subway Project is amazing. Pat has never been one to brag, so when he sent me an email earlier this year with a link to a feature that Flickr did on him, I was awed by the work and his story behind it.

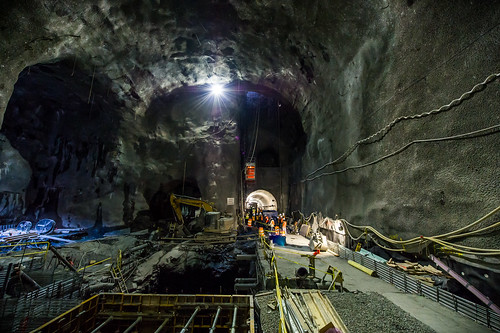
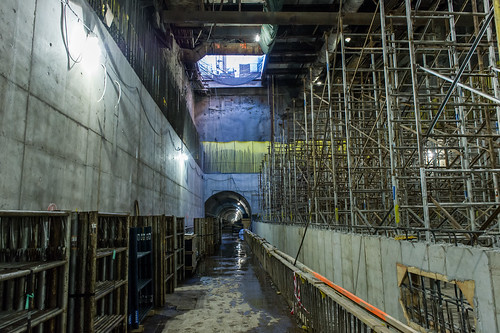
Major construction and blasting is completed for phase 1 of the project.
While major construction and blasting is completed for phase 1 of the project, scenes like this still serve to offer a glimpse of what it takes to create new stations and subway lines.
The very first thing that caught my eye when I saw Pat's photographs was the shear scale and size of the project and how some of the photographs he captured looked like they could have been taken 100 years ago when the first subway was built from City Hall to the Bronx.*

So last month as I was planning my trip to New York City for Photo Plus Expo, I made plans to meet up with Pat, even if only for a quick lunch or dinner. He responded that he was also attending the expo, but the real surprise was that he asked if I would be interested in joining him on an assignment the next day photographing underground. Better yet, he had secured permission for me to photograph as well.**

Typically only residents of the neighborhood affected by the project are given the chance to tour the project. One restriction, however, is that they are not allowed to take photographs, which is why the MTA provides a photographer to both document the tour and take a group photo.

View of the future 96th St. Station. Mixed light made some color correction during post processing a must.
View of the future 96th Street Station using the train tunnel to help frame the shot.
There were two tours scheduled and I would be able to stay underground with Pat between those tours, giving me a total of about three hours to take photographs.

For gear I was pretty sure of two things. That it was going to be dark and that I wanted to shoot wide, so I brought with me the Nikon D3S along with two lenses, the 14-24mm and 24-70mm. And of course I also had my Fujifilm X100S . I knew that light would probably be the biggest issue. I didn't bring a tripod so I relied on the high ISO capabilities of the Nikon D3S to capture the scene. The trade off of course is noise. I processed the images using Lightroom 4.0 where besides some color correction, I opened up the shadows and ran some noise reduction. But for the most part a little noise in these types of photographs does not bother me. With few exceptions I set my ISO to 3200 and everything was shot RAW.

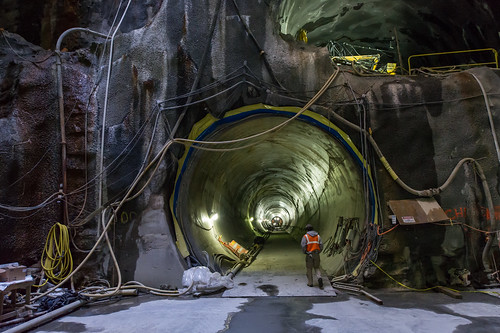
Including a MTA employee helps to show the scale of the subway tunnel.
Including a MTA employee in the photograph helps to show the scale of the train tunnel located at the south end of the future 86th Street Station.
Once underground I really was struck by the size of the project, but how do you translate that in your photographs? Using a wide angle lens and including people is a great way to give the view that sense of scale. Even though this was Saturday and there was not any work going on, I was able to include a few workers who where on hand mostly for safety reasons.

An opening to street level allows some natural light into the future 96th Street Station.
An opening to street level allows natural light into the future 96th Street Station which created some challenging mixed light situations.
Another challenge was the mixed lighting. It turned out to be a bit of daylight mixed with fluorescent and who knows what else. In situations like this I always shoot both JPEG and RAW which then gives me the option to color balance after the fact. Why both? Most of the time I never open the RAW images from an assignment. I think of the RAW files as my insurance, because in reality JPEGs just fit into my work flow allowing me to quickly download, caption and transmit. And in this case I wanted the JPEGs so I could look at and edit a few images on my iPad during the train ride back to Washington, D.C.

The 14-24mm lens allowed me to emphasize the shear size of the project.
Shooting wide with the Nikon 14-24mm lens allowed me to emphasize the size and scale of the project.
Do you have friends or family that can get you access to interesting places? I bet if you think about it, you do. Also think about what you do for a living or something you have access to and if it might be interesting to a photographer friend. We tend to not think of what we do as interesting, but in many cases if you stepped back, you would realize that there might be unique opportunities all around.

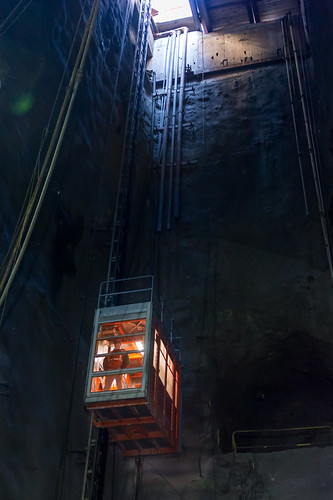
An MTA employee makes the 150' trip to the surface from the 86th Street Station.
An MTA employee makes the 150' trip to the surface from the future 86th Street Station.
MTA on Flickr:
Metropolitan Transportation Authority of the State of New York

*This project was originally proposed in 1929 as a major expansion, although work never commenced due to the Great Depression. Digging for the project did begin in 1972, however it only lasted a few years before New York became insolvent. Ground breaking for the current project happened in 2007.

Phase I of the current project begins at 96th Street then runs south where is will join the existing 63rd Street Line. Additionally, three new stations will be located at 96th Street, 86th Street and 72nd Street. I entered the project via 125 foot elevator at the 86th Street location and then walked underground via the rail tunnel to the 96th Street station and back.

**In order to photograph the project I had to sign an agreement with Capitol Construction limiting my use of the photographs and while I do retain copyright, I am unable to license them for commercial use. For all inquiries about photo use, please contact Rosanna Alcala at ralcala@mtacc.info.