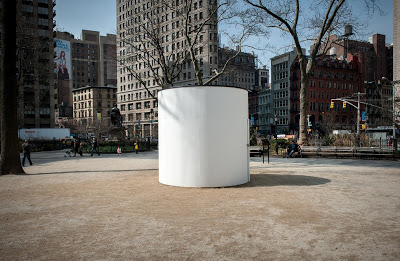
"Topsy-Turvy: A Camera Obscura Installation," was on temporary display in New York's Madison Square Park.
I received a pinhole camera kit for Christmas about ten years ago and remember thinking what a really cool gift it was and that I couldn't wait to build this camera and start taking photographs. However, even before I started building the camera, I couldn't help thinking about what would be the first thing I photographed. And that's where my thoughts stopped.
So the kit was put away in a desk drawer and although I would often come across it during the past decade, I still couldn't imagine taking that first photo.
Then earlier this month I came across a tweet about a camera obscura on display in New York City's Madison Square Park and all of a sudden I realized that I now had the perfect first photograph for my pinhole camera. A pinhole photograph of a pinhole camera. That was it.
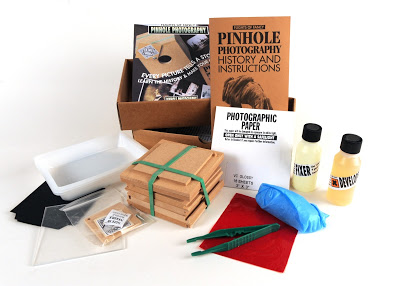
Wood pinhole photography kit complete with everything you need to develop your photographs.
Artists Sandra Gibson and Luis Recoder set up this 10x10-foot walk-in camera they dubbed " Topsy-Turvy: A Camera Obscura Installation,” in the Flat Iron district of New York City to educate the public. The exhibit was on display through April 5th.
I retrieved the kit from my desk and started looking through the instructions while at the same time planning my day trip to New York. The kit came with everything I needed to construct the camera, plus everything I needed to develop the paper. I wasn't even deterred when I noticed the developer and fixer had expired in 2008.
The pinhole camera was simple to construct and took about 15 minutes to build. I did make a slight modification to the finished camera by adding a 1/2-inch piece of MDF board to the bottom of the camera so I could insert a1/4"-20 T-Nut so I could attach my camera to a tripod.
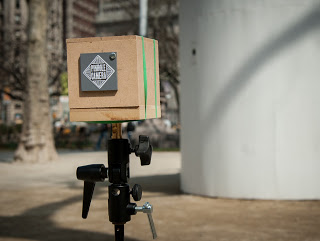
Almost complete pinhole camera. Still need to finish the paint job and make additional modifications to the base.
The last thing I did was dig through the attic and find my old darkroom safelight, a Kodak Model B. The kit does provide a red sheet of plastic that could be placed over a light source in case you don't have access to a safelight.
The night before I left for New York I went into the darkroom/bathroom, plugged in the safelight and loaded a 3x3 inch piece of photographic paper into the camera.
I arrived in New York around 10:30 a.m. the next day and walked the nine blocks to Madison Square Park and quickly located the camera obscura at the south end of the park aimed at the historic Flat Iron Building. A couple was just exiting the camera when I arrived so along with the attendant I stepped inside and after a few minutes my eyes adjusted and the surrounding area came into focus. To me, it is fascinating to realize that this is exactly what it would look like if I could step inside the small pinhole camera I had in my bag.
When I exited the camera I walked around the area for a while thinking about the photograph I was about to take. I literally only had one shot and not having used this camera before I wasn't sure what the focal length would be or how long of an exposure to use. The pamphlet that came with the kit did offer suggested exposure times based on the available light.
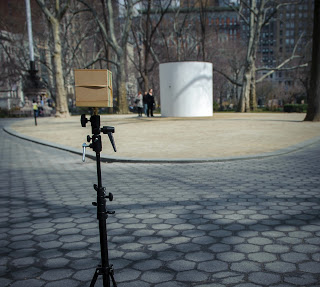
My pinhole camera all set to take a 45-second exposure of the camera obscura.
I placed the pinhole camera on a light stand I brought along to act as a tripod, took a deep breath, waited for some park goers to get out of the way and then pushed aside the little door covering the pinhole and started the countdown. The pamphlet recommended a 30-second exposure in bright sunlight. I settled on a 45-second exposure because of some open shade in the park.
After I closed the cover I was done. Seemed anticlimactic. I stuck the box back into my bag and went about the rest of the day taking photos of New York City.
I returned home around 11:45 that night and briefly thought that I should wait until the next day to process the photograph, but soon realized that was not going to happen. So once again I set up my makeshift darkroom and went about mixing the developer and fixer. The last time I was in a darkroom was 1997 but when I smelled the fixer it was like I was there yesterday.
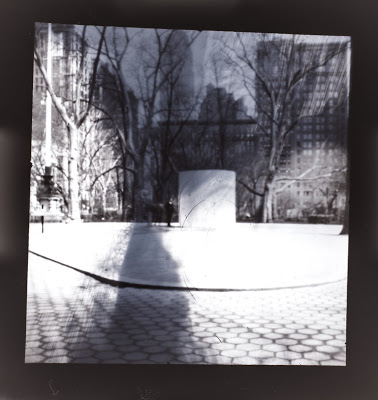
Pinhole #1.
I opened the camera and retrieved the paper negative and placed it in the developer and... Nothing! I started to panic and question whether I had put the paper in camera correctly or perhaps not made a long enough exposure. Then I remembered that the chemicals were five years past the date of best use. So after a couple of minutes of not seeing an image appear I added some additional developer and finally Pinhole #1 revealed itself in the miniature tray.
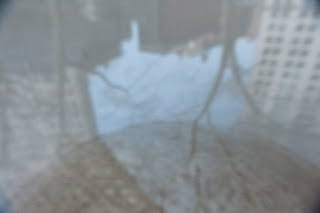
The Flat Iron Building at left as seen upside down and backward inside the camera obscura.
Just like the image I saw on the wall inside Topsy-Turvy, the image you will get is a negative and reversed. There are two options to correct this. The first is to place the paper with the negative image face down over another sheet of photographic paper, place a piece of glass or plexiglass over both sheets of paper and expose them to white light, then process the paper as before. Remember, everything with the exception of turning on the white light must be done under a safelight in the darkroom.
The second method and the one that I choose is to photograph the pinhole photograph with a digital camera and then using a program such as Adobe Lightroom or Photoshop, flip the tone curve and rotate horizontally to get a corrected image. I explained this process in my blog post about using your digital camera to copy old negatives. I have some exciting things planned for this pinhole camera and with camera obscuras in the future, so keep reading this blog and be sure to follow me on Twitter.
