Tear sheet showing a stand-alone photo taken with the Kodak DCS 460 as it appeared in the May 11, 1996, edition of the Philadelphia Daily News. Was this a first?
Last year I read an article on Popphoto.com titled "The 30 Most Important Digital Cameras of all Time," and the first thing that struck me was how many of these cameras I had the opportunity to use or at least get my hands on and the second thing was how far we've come in both quality and price.
It also got me thinking about the first image I had published that was taken with a digital camera. Actually it was published twice.
The Kodak Professional DCS 460 Digital Camera was introduced in 1995.
The camera was a Kodak Professional DCS 460 which had a list price of $35,600, a 1.3x crop factor and at 6.2 megapixels was the highest resolution digital camera available at the time.
In May of 1996 I was a photo editor and producer for Philadelphia Online (now Philly.com) and was working on an interactive seating map of the Blockbuster Sony Music Entertainment Center in Camden, N.J., and since I had access to the DCS 460, I decided to use it as I photographed the stage from various sections of the arena. A great time saver over shooting on film and scanning the negatives.
On the way to the venue, I came across an accident on Spring Garden Street where a car had smashed into the front window of Panichelle's barber shop. As I drove by I thought I caught a glimpse of the barber inside continuing to cut hair, so I parked, grabbed the camera and walked back to the barber shop and started shooting photos.
Stand-alone photo as it appeared on the May 10, 1996, homepage of Philadelphia Online. View full homepage from that day.
After I returned from the original assignment in Camden I downloaded the images from the camera and was showing a few editors the shot when one of them suggested we post it to the Philadelphia Online home page as a stand-alone photo, something we hadn't done previously. This was a first.
The other suggestion was to show it to the photo editors at the Philadelphia Daily News, where it was published as a stand-alone photo the next day.
So was this the first digital camera photo, not from a wire service, published in the Philadelphia Daily News? Hardly a case for the History Detectives, but I know if I had shot this with film, I probably wouldn't have processed it until the next day and by that time it would not have been news.
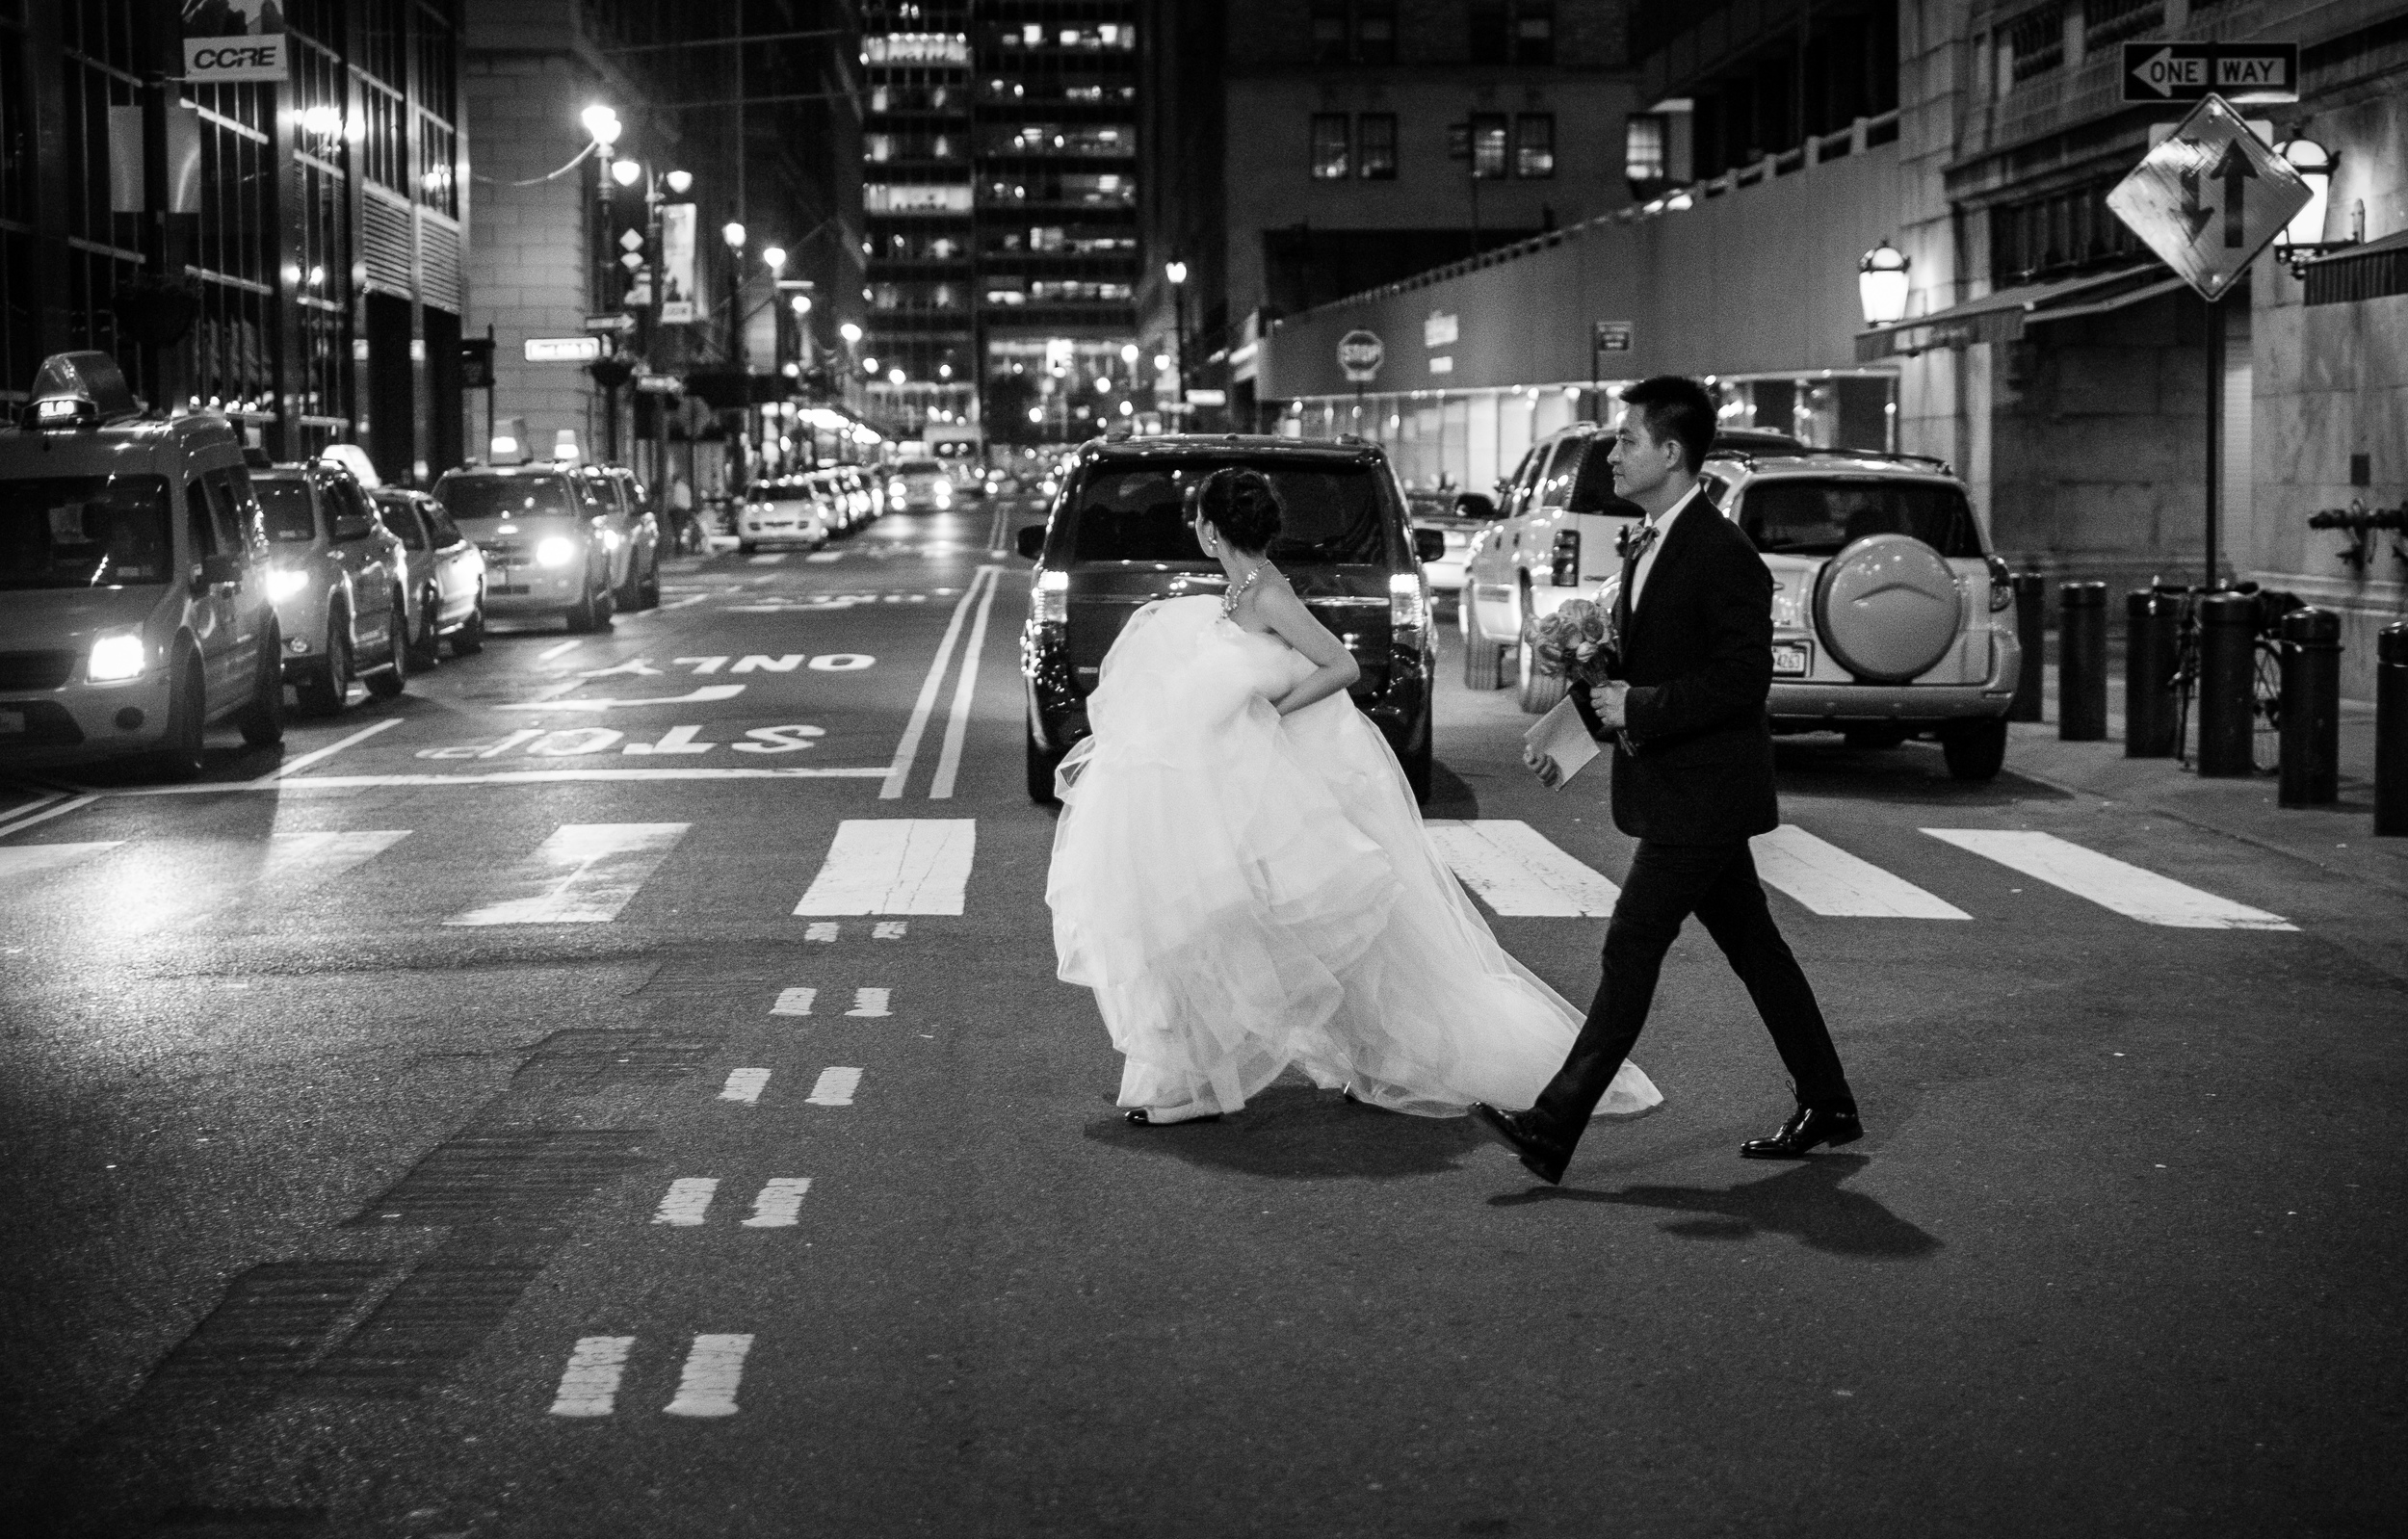
The Fuji XF35mm (53mm equivalent), F1.4 lens did a great job. 1/1000, f2.8 at ISO 200.
I was headed to New York City on a seven-day assignment to cover Fleet Week for the Navy and thought it would be the perfect time and location to test a Fujifilm X-Pro1 outfitted with an XF 35mm f1.4 lens I rented from BorrowedLenses.com.
I have been a fan of the Fuji X cameras since I purchased an X-10 in 2012. Then after spending in 2013, I immediately ordered one for myself and I still carry and shoot with it almost daily. Would I love the X-Pro1 as much as these previous cameras?
The X-Pro1 is not a new camera, in fact, it has been around since March 2012 and there is no shortage of reviews and testimonials from photographers who really like this camera. So why am I just writing about it now? Well maybe it's because I was so wrapped up in my X100S that I never really considered another APS-C camera, or maybe it's because I started seeing rumors about an X-Pro2. Whatever the reason, I figured it was time – probably long overdue, that I gave this camera a try.
A little bit of rain didn't bother the X-Pro1, but did offer some nice scenes to photograph. When shooting on the streets in large cities, I find crosswalks and street corners offer plenty of opportunities. 1/125, f5.6 at ISO 640.
Since there has already been so much written about the X-Pro1, and it really is similar in functionality to the X100S, I decided to skip most of the technical details about this camera and concentrate more on how I set up and used this camera during a week of street photography in New York City. But don't worry, I will still point out the differences to the X100S as they come up.
Of course, there is one major difference between the X-Pro1 and the X100S, interchangeable X mount lenses. In 2012, Fuji originally offered three lenses; a 60mm (91mm) f2.4 macro, 18mm (27mm) f2 and the aforementioned 35mm. As of this posting, there are now at least nine additional lenses, including zooms and offerings from other manufacturers, including Carl Zeiss. It never bothered me that the X100S was a fixed 35mm equivalent, since you work with what you have, but perhaps on a few occasions it would have been nice to have options. That said, I only had the 53mm lens available to me during the trial period, so I made that work and admit I enjoyed the change.
In street photography, you have to always be ready to shoot. In this case I noticed the Fleet Week sign and the man loading kegs as I walked by. I quickly turned and got off about a dozen frames before I moved on. 1/125, f5.6 at ISO 500.
FIRST IMPRESSIONS
The X-Pro1 has a great feel, classic look and you get the sense that it is just made for the streets. Physically, it is slightly larger and a bit heavier than the X100S, but continues to feel comfortable and natural in your hands. The XF35mm lens did protrude from the camera body more than I expected and took me a while to get used to. I've noticed many of the new lens offerings look huge and somewhat awkward on these APS-C cameras.
The Hybrid Viewfinder is similar the X100S, except it will update views based on lens choice. I still prefer the Optical viewfinder (OVF) over the Electronic viewfinder (EVF). I find the EVF darker than I would like and just a bit artificial. The OVF feels open and I like how I can see what is happening just outside the frame which is helpful, especially in street photography.
I was still able to get that wide angle feel I'm used to with the X100S even though the XF 35mm is a 53mm equivalent lens. 1/1200, f5.6 at ISO 200.
Again, the button layout and functionality is also similar to the X100S. I think the placement of the AE/AF-lock button is in a better location and therefore, I found myself using it more often. You can also choose a focus area quickly by pressing the AF Button and then using the selector to move your focus point within the frame. Pressing the MENU/OK Button will return the focus point to the center. It takes some practice, but getting used to the focus features on the X-Pro1, like the X100S, is key to getting the most out of your camera.
MY SETTINGS FOR SHOOTING ON THE STREETS
Set the AF Illuminator to OFF. The purpose of this light is to assist with autofocus in low light situations, but using the camera in lowlight situations is also the time you probably don't want to draw attention to yourself, or telegraph that you are about to take a photo. I didn't notice any focus issues, even in some fairly low light, with the AF Illuminator off.
Place gaffer's tape over the Indicator Lamp. For the same reason I set the AF Illuminator to OFF, I prefer to cover over the Indicator Lamp on the back of the camera. I'm not so worried I'll be discovered or afraid of the interaction, however, if I can get a few frames off without being noticed, I prefer that.
Set Operational Volume off. Are you seeing a trend here. Plus no shutter noise is a real advantage of mirrorless over DSLR. Even my Nikon's quiet mode can't compete with silence.
Using Auto ISO meant that I could shoot all day in and out of the shadows and then well into the night without thinking about it. 1/125, f1.4 at ISO 2500
Use Auto ISO. I like the thought of moving in and out of various lighting situations and not having to change ISO each time. You can assign ISO to the Fn (function) Button which speeds up the process, but if you don't have to worry about it, why do so. Within auto ISO, there are a few considerations you need to take into account, though. For instance, I set the max ISO to 3200, but the lowest shutter speed to 1/125. Prior to making that choice, the camera would favor ISO and I found my shutter speed kept dropping too low which in some cases resulted in blurred photos.
New York City and Times Square is a busy and crowed place. The small form factor of the X-Pro1 is perfect in these situations and most people hardly notice you taking photos. A real advantage in street photography. 1/125, f2.0 at ISO 320.
Set Film Type to Monochrome. Just like with the X100S, I set up the camera to shoot both raw and jpeg allowing me to shoot and preview my photos in black and white, but still have the color originals available during post production. I further set the film simulation mode to monochrome plus yellow filter which offers slightly increased contrast while toning down the brightness of the sky. I've always associated street photography with black and white which why I favor this setup.
I used continuous shooting (burst mode) set to six frames per second (max for this camera) to capture this photo in Coney Island. 1/300, f11 at ISO 200.
Remaining settings. Aperture-priority AE (A) mode, turn off display back (Viewfinder Only), focus mode set to Single Focus.
SOME FINAL THOUGHTS
The X-Pro1 did seem to focus quicker than the X100S, but there was still a bit of lag when coming out of standby mode. I missed a few shots because of this which was a reminder to always make sure the camera is awake and ready.
UPDATE:
Under Power Management turning the Quick Start Mode to ON is supposed to reduce camera start up time except I failed to test this and only noticed it in the instruction manual recently. And sure enough there is a similar feature available on the X100S, so I may have found a solution. More to come.
In street photography, scenes like this happen quickly and having the camera awake and ready to shoot is key. 1/125, f1.4 at ISO 2500.
What appealed to me about the X100S was its simplicity. And I wondered if adding interchangeable lenses would detract from that? Hard to answer since as I mentioned previously I only had the XF 35mm available to me during the trial period, but even if I had other options available, I tend to pick a lens and stick with it. Although picking a Fujifilm XF 60mm f2.4 macro lens one day and then a Zeiss 12mm f2.8 Touit series the next would be a fun option to have.
I know there are other new X offerings from Fuji like the XE-2 and the XT-1, but I really love the rangefinder styling of the X100S and X-Pro1. The XT-1 has been getting a lot of favorable reviews and I'm looking forward to testing it in the future.
However for now, I've gone back to shooting with my X100S and really am not looking to change anytime soon. That is unless the X-Pro2 rumors pan out.
It was only a few months ago in a post titled Decisions, Decisions... Well, You Get the Point, I wrote about the decisions we have to make as photographers. As a quick reminder, these are not decisions about camera settings, etc., but the decision of where we choose to photograph from.
And now I have the answer to the question of can you be in two places at once. How to be there - and also there.
The answer came in the GoPro HERO3+ Black Edition, and not only can I be in two places, but if needed, be in three, or even more places at the same time. To be fair, photographers have been using remote or remotely triggered cameras long before GoPro came on the scene. But with the low cost, high quality and ease of use of GoPro cameras, it has never been easier to work with remotes.
Just prior to lift-off I triggered the GoPro and it is already taking a still image every five seconds allowing me to concentrate on photographing everything else.
In that previous blog post, I gave the example of making the tough choice of whether to ride aboard the Navy's only manned airship or stay on the ground during an assignment. In that case, I concluded that I made the right decision by staying on the ground, but it still didn't lessen the fact that I wanted to ride in the blimp.
When assigned to once again photograph the blimp, I was sure that I would get the opportunity to ride aboard. After all, it only made sense, right? So imagine my disappointment when I received word the day before the assignment that due to newly installed scientific equipment, space was limited. Guess who was getting bumped?
So did I cancel the shoot? Of course not, because after all I would still get to photograph the blimp. However, I did start to think about how I could get the photographs I wanted from inside the cockpit without actually being inside the cockpit. I briefly considered handing a camera to someone who would be on board, but somehow that never really works out.
A test shot (selfie) after positioning and mounting the GoPro in the blimp.
Even though I've been an owner of a GoPro for several years and have had some success with it, I just don't think I've ever really used it to its fullest. That is until I obtained the newest version. Using the App and Wi-Fi to control the camera has really made me want to use this camera more than ever before. Also, for some reason the ability to see what the camera sees, again via the App, really resonated with me.
Once I made the decision to use a remote camera and take the viewer inside the airship, I called the squadron and let them know that I wanted to place a camera aboard the airship. I received the permission I needed, arrived early on the day of the assignment and using a suction cup mount, I mounted the GoPro as far forward as I could. I successfully pulled off the picture I had in my mind. Actually, I think this picture is better than if I was aboard, but don't tell the Navy that.
How the photo appeared on the home page of Navy.mil.
Tips for using your GoPro as a remote:
1. While it's always a good idea to get to an assignment early, if you plan on using remote cameras, then it is critical that you arrive early. You don't want to rush the process or not leave yourself some time to test everything out.
2. Be sure to let everyone involved know what you are planning on doing and seek permission if necessary. There may also be the instance when you need someone to turn the camera on for you.
3. As events begin to unfold, open the App and make sure that you are connected to the camera via Wi-Fi.
4. Obviously the GoPro is capable of shooting both videos and still photographs, but if it is stills you want, then consider setting the GoPro to shoot interval photographs, such as every five seconds or so. The video below is GoPro footage taking during the R/V Neil Armstrong commissioning. Once I started the camera, I was able to give my full attention to shooting stills from a position about 25 yards away.
5. Once you start the GoPro, I find it is best to forget about it and concentrate on the photographs you are taking. Worrying about the remote camera or taking the time to over monitor means you might miss a shot with the primary camera.
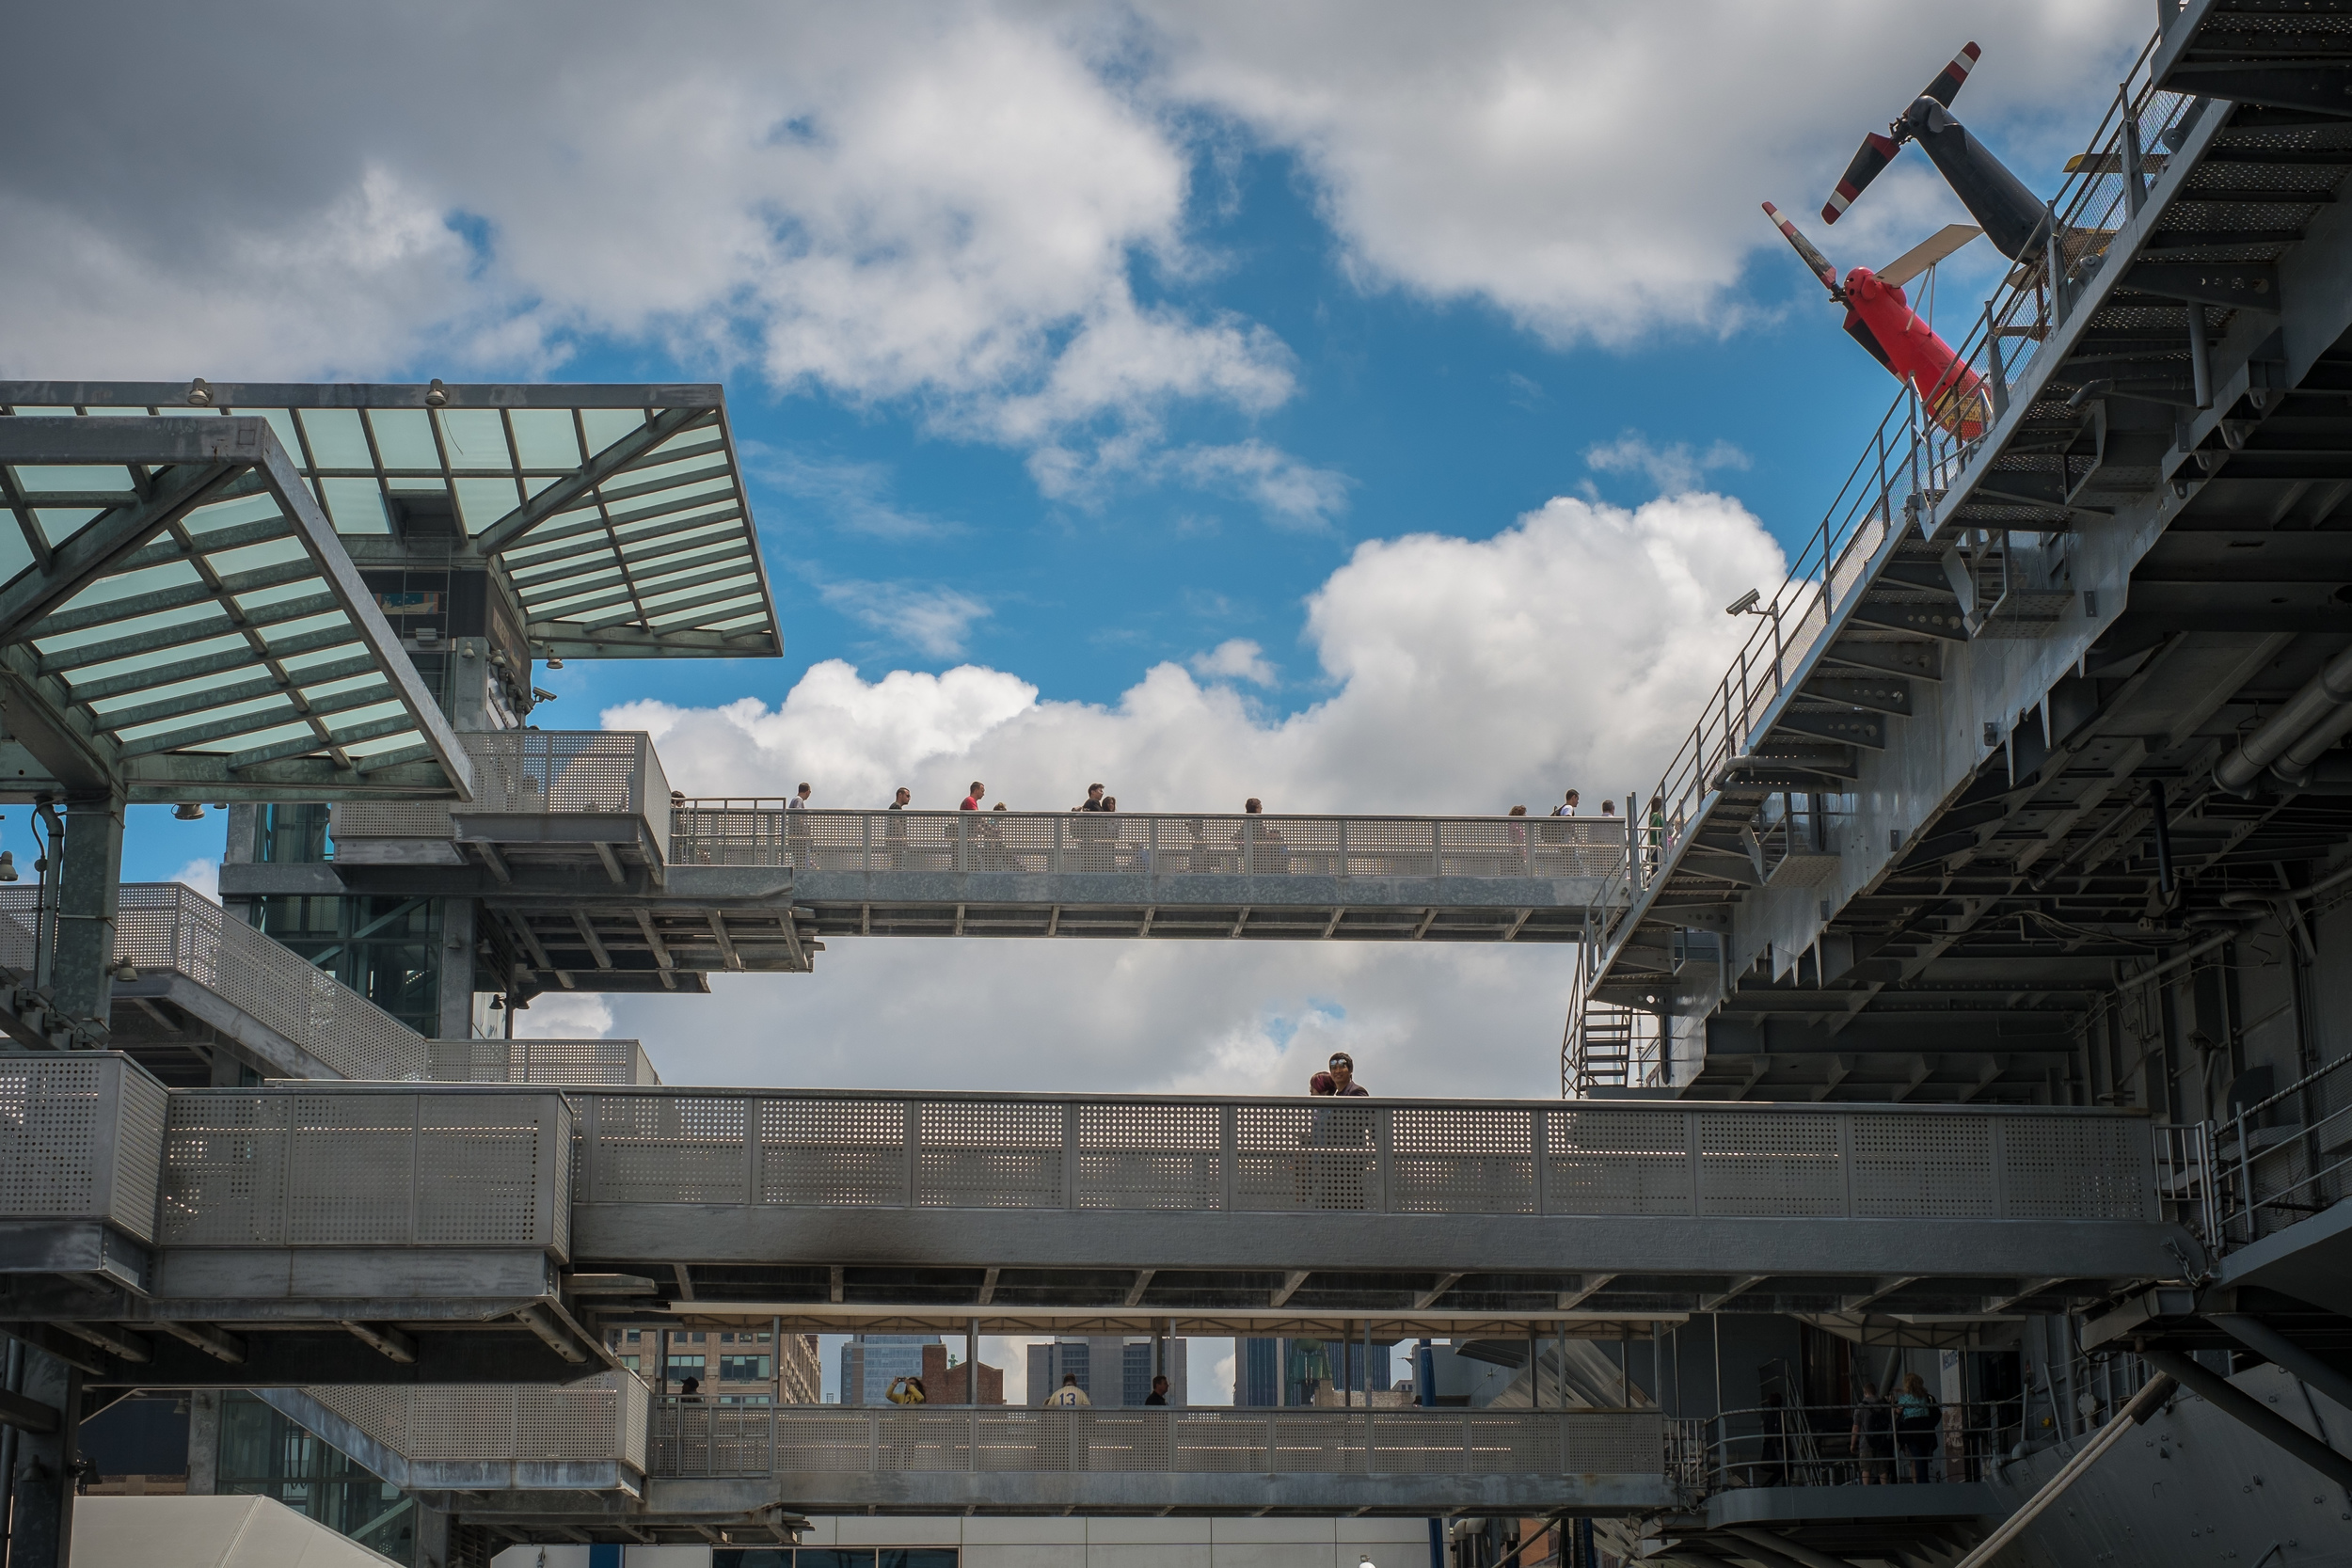
I photograph a fair amount of trade shows, exhibitions, and symposiums as part of my job with the Office of Naval Research. These events tend to be in the same venues year after year so over time it becomes a real challenge to get a different perspective or make new unique photographs.
This year during the Sea Air Space Exposition held at the Gaylord in National Harbor, Md., I decided to get high for inspiration and go a little old school.
I should say that "I" didn't get high, but my camera did. But before I reveal how I made these photographs, let's explore some options available to get that "aerial" perspective.
Even 15 feet of elevation offers a different perspective of a fairly static scene.
The first thing would be to look over the venue and see if there is a balcony, overlook or some other position that would allow you to shoot down on the event floor. The downside, of course, is that your booth or exhibit would need to be in the right location to take advantage of this shooting position.
Absent of a balcony, you could use ladder or bucket lift, both of which are available at most locations. However, once the show floor opens the event coordinators are unlikely to allow a bucket lift back on the floor. A ladder is great but does limit your ability to reposition quickly. It's still a good option and if you are unable to secure a ladder locally, consider bringing the best non-photo accessory available with you.
I get a little flying time with a friend's DJI Phantom 2. These are great for use outdoors, but a little risky to use on a trade show floor.
Finally, before I reveal the technique I used, you could use an unmanned aerial vehicle (UAV) such as the DJI Phantom 2. Now these UAVs are really cool and would surely work, but the reality is that they may get you kicked out.
So while all of the above techniques will work, I opted to go a little old school and attach my camera with a 14-24mm lens to a Gitzo carbon fiber monopod and extend it all the way out. I then used a Pocket Wizard to trigger the camera, but you could use a cable release or even the self-timer. This technique puts the camera about 15 feet up and I think offered me the photos I was looking for including a unique shot of the Navy's X-47B.
Of all the photographs of the Navy's X-47B from the exposition, mine was the only one I saw taken from above.
Another advantage of the monopod is that you can follow the action. I would bring the camera to my eye, focus, then raise the camera and start shooting.
If you find yourself in a rut and looking for something different when tasked with photographing the same thing, literally try a different perspective and get high.
Please tell me that you don't use the bottom of your t-shirt or worse, your actual shirt as your primary method of keeping your lens clean?
Whether you own your photographic equipment or it is provided to you through your employer, it pays to keep it clean and cared for. And probably the number one cleaning task that you perform every time you pull out your camera is to clean the front element of your lens.
I always have a microfiber cloth handy and until now it has been the sole way I've kept my lenses clean. And I suppose I've been aware of the LensPen pro camera cleaning kit for some time and really don't have a good explanation on why I never tried it.
While you can purchase them individually, I opted for the DSLR pro kit which features all three LensPens; the original LensPen for lenses, FilterKlear for lens filters and the MicroPro for viewfinders. Also included is a microfiber cloth which doubles as a carrying pouch.
How does it work? The LensPen consists of the cleaning tip on one end and a retractable brush on the other. Use the brush to remove particles and dust from the lens surface before using the cleaning tip to wipe away fingerprints, smudges and the like. The instructions recommend wiping the lens surface using a smooth circular motion.
And while the LensPen was easy to use and did a good job of cleaning all my lenses, I found the real surprise was the MicroPro, or the smallest of the set. If you have ever tried to clean the viewfinder of a camera you will soon find the MicroPro will become your favorite of the set. I've tried cotton swabs, microfiber clothes and nothing works as well for this task as the the MicroPro does.
Maybe now it's time to order a sensor cleaning kit, something else I've been putting off for far too long.